How to Use Leawo Video Converter Pro for Mac
As an all-in-one and comprehensive software package consisting of all-embracing Video Converter for Mac, Mac DVD Converter, photo slideshow maker, screen recorder and camera video recorder, Leawo Video Converter Pro for Mac is able to fast convert videos from one format to the other, rip DVD to video in various video formats, create photo slideshows from photo collections, and record screen activities and camera videos. Moreover, Leawo Video Converter Pro for Mac can turn 2D DVD/video into 3D video and provides some practical editing features to edit DVD/video content meeting personal demand. Free download, install and launch the versatile Mac Video Converter Pro, and then follow the step-by-step guide below to learn how to use Leawo Video Converter Pro for Mac.

Convert
DVD/videos
Slideshow
Maker
Screen
Recorder
Camera
Recorder
Video
Editing
2D to
3D
How to Convert DVD or Video Using Leawo Video Converter Pro for Mac
Leawo Video Converter Pro for Mac is an expert in converting videos between almost all video file formats, and ripping DVD to videos in various video file formats. It only takes several simple steps to rip DVD to video and convert video between various video file formats.
Step 1Import DVD/Video source file
Simply click “Add Video” icon to import video files into the total video converter for Mac for converting (click “Load DVD” icon to import DVD files if you want to convert DVD) or just directly drag-and-drop video or DVD file into the program. After source file is imported, you can select subtitle and audio tracks, play source media files, and snap screenshots while playing.

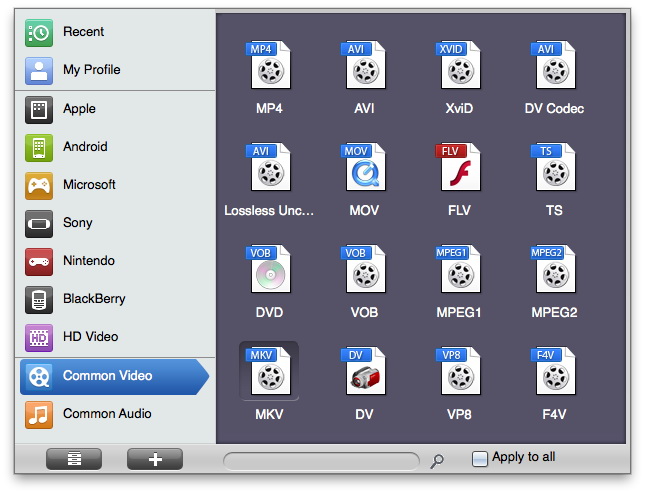
Step 2Set target profile:
On the imported file panel, click the clickable format icon next to audio selecting box to set output profile. You can either set format preferred as output profile or directly choose your output device. For time and energy saving, you can directly input your desired format or your device name into the profile searching bar for quick profile settings.
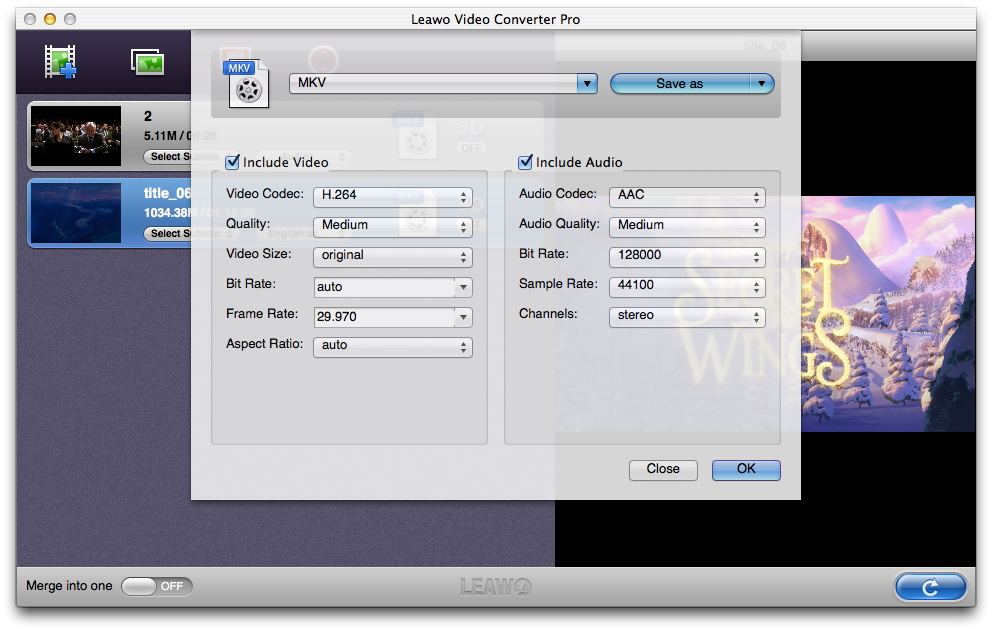
To perfectly match your output devices or to meet your specific need, you can click "+" button at the bottom left of the profile setting panel interface to detail profile parameters, including: video codec, audio codec, quality, video size, bit rate, frame rate, aspect ratio, sample rate and audio channels. After the completion of detailed setting, press "OK" to return to the main interface.
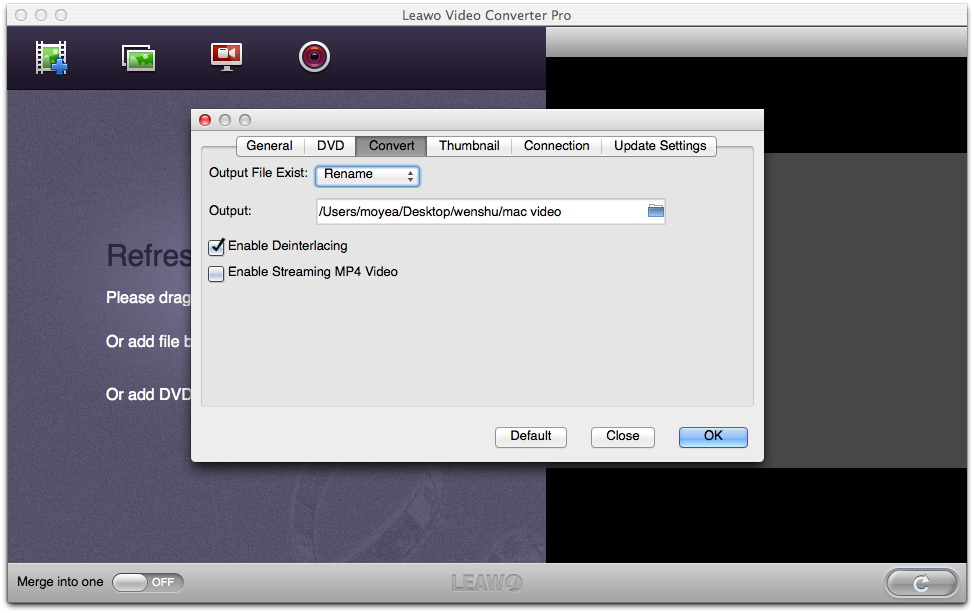
Step 3Set output directory
Click “LeawoVideoConverterPro > Preferences > Convert > Output” on the upper menu bar of the main interface to choose output directory for output files saving, and then press "OK" to confirm the settings.
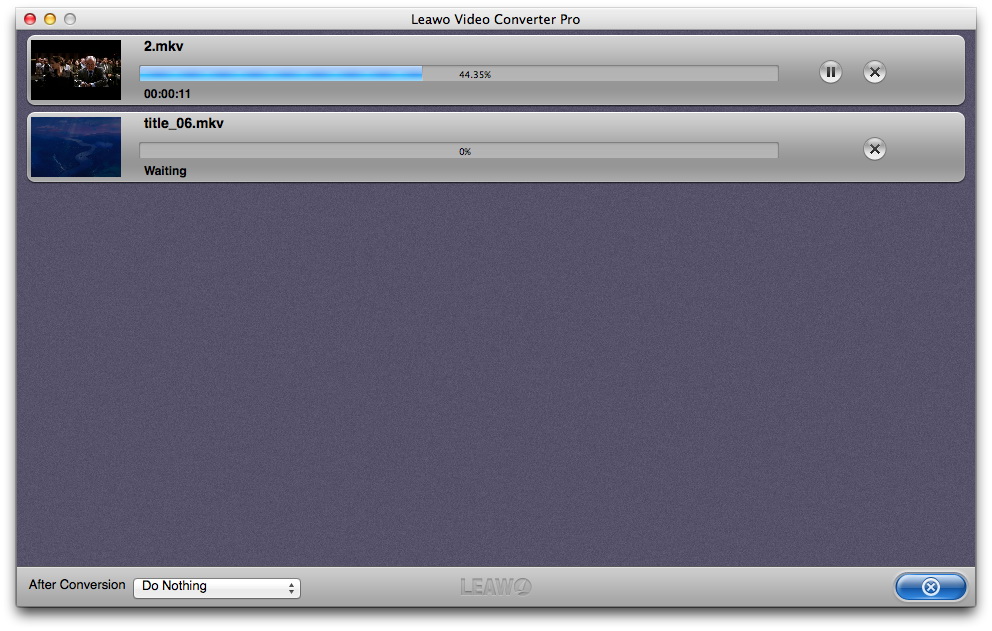
Step 4Start DVD or Video Converting Process
After output directory is set, you will be returned to the home interface. Click the convert button on the bottom right of the interface to start the conversion process from DVD to video or from video in one format to video in the other format. You can view or even pause the converting status on the main interface during the converting process takes place.
How to Create Photo Slideshows Using Leawo Video Converter Pro for Mac
Leawo Video Converter Pro for Mac can function as a photo slideshow creator characterized by creating photo slideshows from photos or photo folder. Photo slideshows created could be converted into other formats like MP4, AVI, FLV, etc. for playback on iOS devices like iPhone, iPad and iPod, Android devices, Windows Phone and BlackBerry devices, or for uploading to YouTube or Facebook for sharing with friends.
Step 1Import source photos
With Leawo Video Converter Pro for Mac running on, click “Photo Slideshow Creator” icon on the main program interface to browse and import source photos or photo folder for slideshow creation. The photo slideshow will be automatically generated the moment photos are loaded, and then the generated slideshow can be found on the left processing list.
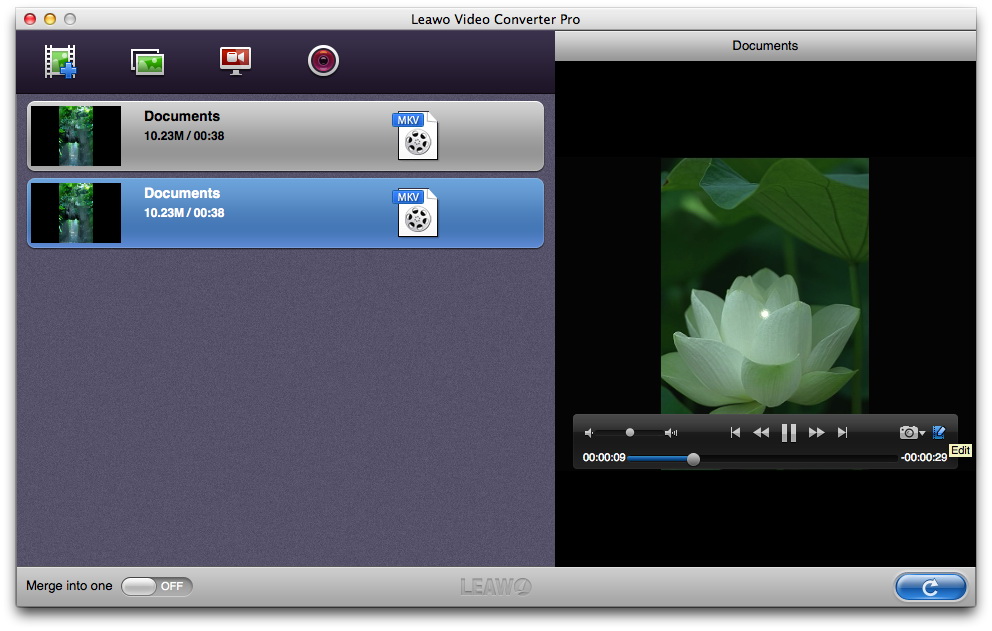
Step 2Edit slideshows
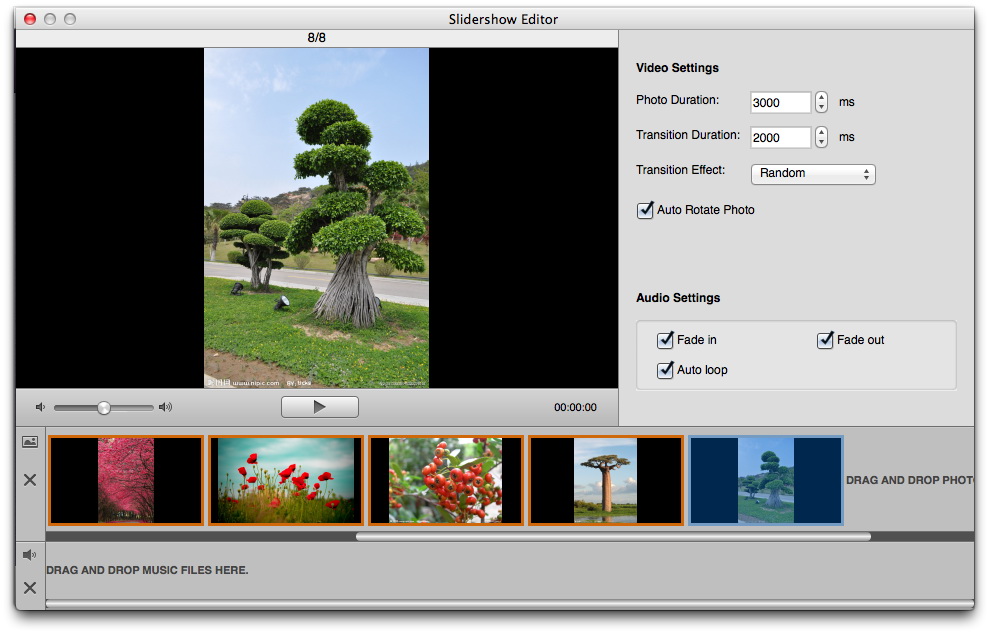
Double click the generated slideshow to get an instant preview on the right of the interface. On the previewing panel, click the “Edit” icon to call out the slideshow editing panel, where you could set Photo Duration, Transition Duration, Transition Effect and Audio Settings, and you could insert music files by directly dragging-and-dropping, etc.
Step 3Choose output format
On the main interface, click the clickable icon at the end of the slideshow panel to enter the profile setting panel to select output format. Moreover, for advanced purpose, you could custom video/audio parameters of output profile by clicking "+" buttom at the bottom left of the interface. Those parameters include: video and auido codec, quality, video size, bit rate, frame rate, aspect ratio, etc.
Step 4Set output directory
Click “LeawoVideoConverterPro > Preferences > Convert > Output” on the upper menu bar of the video converter pro to set output directory for output files saving.
Step 5Save slideshows to computer
Click the blue button on the bottom right corner of the main program interface to save photo slideshows in your desired format onto your MacBook. When finishing slideshows creating, you could transfer the slideshows to portable mobile devices for on-the-go enjoyment, or upload them to YouTube or Facebook for sharing.
How to Record Screen Activities Using Leawo Video Converter Pro for Mac?
Leawo Video Converter Pro for Mac is equipped with a built-in screen recorder that can be employed for Mac users to record on-screen activities.
Step 1Launch Screen Recorder
With Leawo Video Converter Pro for Mac running on, click the “Screen Recorder” icon on the program interface to start the screen-activity-recording process.

Step 2Set Detailed Recording Settings
Then the “Screen Recorder” settings panel will show up, and you are able to set the Video Name, Save To (output directory to save the recorded screen-action videos), audio source, video quality, record region (you could customize it), etc. When finishing settings, click the red button in the middle to get recording process started, and then the Screen Recorder will be minimized to the Dock panel which can be recovered by clicking.
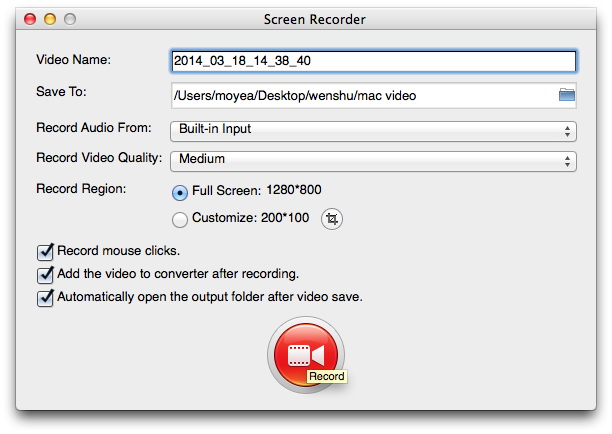
The recorded video is in MOV format by default. If you consider converting recorded video into other formats, you could check “Add the video to converter after recording” option and then follow the following steps to convert recorded video.
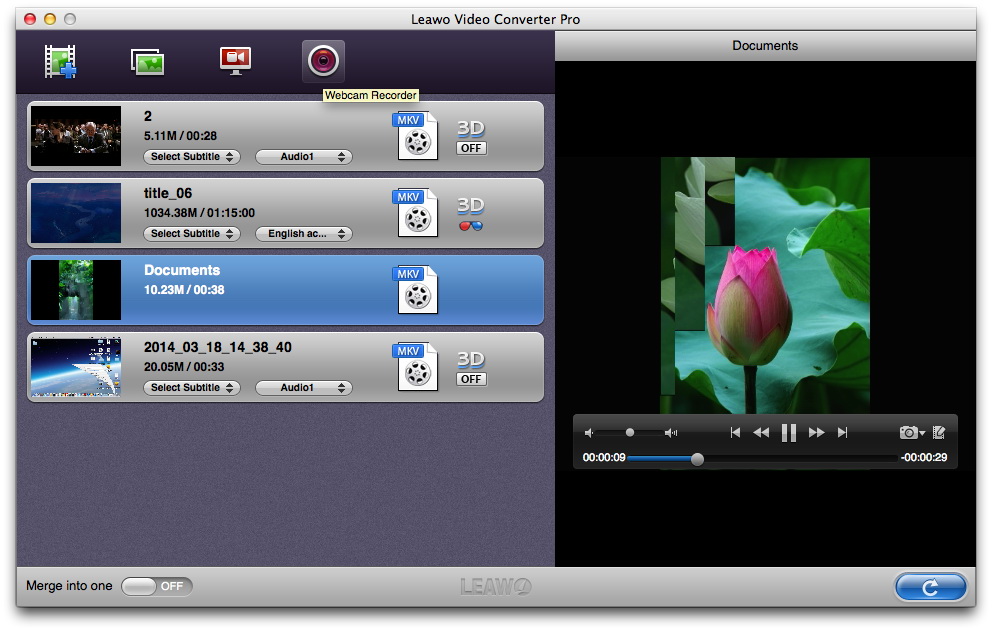
Step 3Select profile
After the recording is complete, Leawo Video Converter Pro for Mac would automatically load the recorded video to the left processing list panel. Recorded video is available for previewing by double clicking it. Also, you can convert the recorded video by clicking the format icon in front of 3D button to enter the profile setting panel to select your desired output format. If you are tired of selecting one by one, you can achieve quick format choosing by directly inputting your target format or output device into the format searching bar at the bottom of the interface.
For advanced purposes, you could click the “+” button on the profile panel to detail video and audio parameters for output files, including: video codec, bit rate, video size, frame rate, aspect ratio, audio codec, channels, etc.
Step 4Set output directory
Click “LeawoVideoConverterPro > Preferences > Convert > Output” on the upper menu bar of the program to set output directory for recorded video that is going to be converted into other formats.
Step 5Start converting recorded video
Click the bottom right button to start recorded video conversion from MOV format to other formats. After the conversion is completed, you can find the converted video on the output directory for further processing.
How to Record Videos Using Leawo Video Converter Pro for Mac?
Integrated with a Camera Video Recorder, Leawo Video Converter Pro for Mac helps you easily and conveniently record anything your Mac’s built-in camera or webcam captures, and then you could convert what you record into various video formats with the bulit-in video converter.
Step 1Launch Camera Video Recorder
With Leawo Video Converter Pro for Mac running on, click the “Webcam Recorder” icon on the program interface to begin the journey of camera recording.
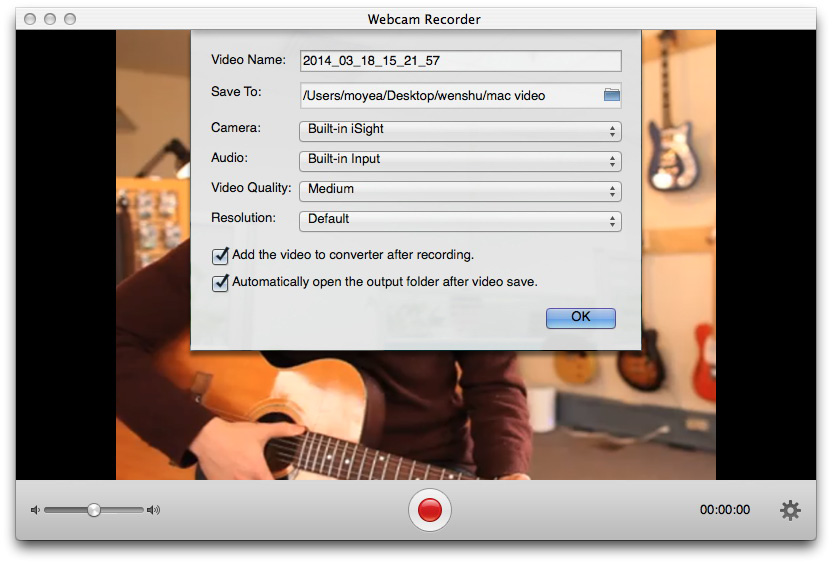
Step 2Set Detailed Webcam Recording Settings
On the Webcam Recorder interface, click the gear icon on the bottom right corner to call out the recording settings panel, where you are allowed to set Video Name, Save To (directory to save recorded videos), Camera (which camera to record), audio source, video quality, resolution, etc. After setting, click “OK” to confirm the setting.
Step 3Start recording
Click the red button in the middle of the main interface to start recording. By clicking the button again, you can pause the recording process. Aparting from recording video, the Camera Recorder could record audio as well.

The recorded video by Webcam Recorder is contained in MOV format by default. The program is humanized as it allows for format conversion. To get recorded video in other formats, you need to check “Add the video to converter after recording”. After checking, Leawo Video Converter Pro for Mac would automatically load the recorded video for converting the minute the recording is completed. Follow the steps below to learn how to convert recorded video if you desire to.
Step 4Select output format
Click “LeawoVideoConverterPro > Preferences > Convert > Output” to set output directory to save what you record in converted formats. Then, click the icon in front of 3D button to enter the Profile setting panel to set output format.
If you want to perfect the output result, you can click “+” button to customize video and audio parameters like video codec, audio codec, bit rate, aspect ratio, frame rate, channels, etc, and then press "OK" to confirm the detailed settings and to return to the main interface.
Step 5Start converting
On the main program interface of Leawo Video Converter Pro for Mac, click the button on the bottom right corner to start video conversion process.
How to Edit Video Using Leawo Video Converter Pro for Mac?
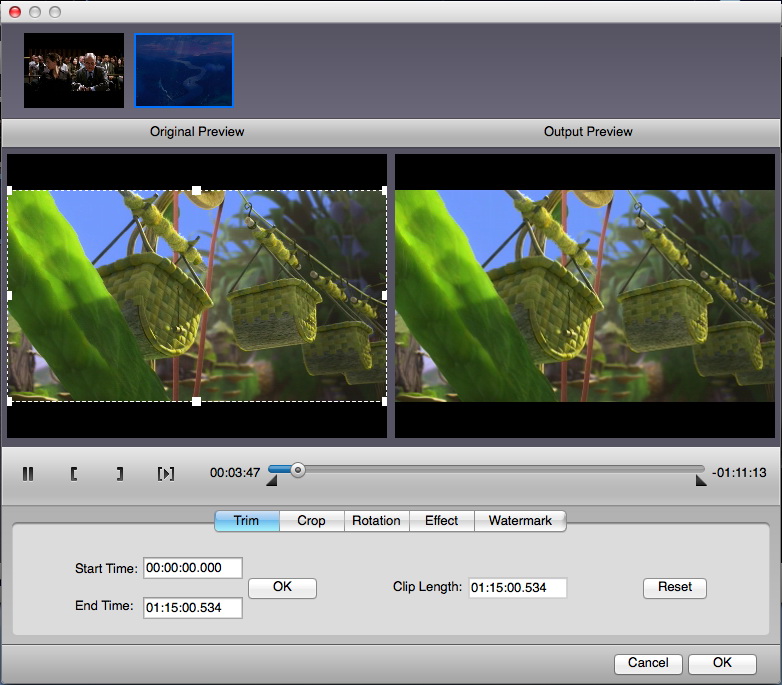
In addition to the capability of DVD/video converting and video recording, the Video Converter Pro for Mac is also praised for its useful video editing features enabling you to customize your DVD/video content before the DVD/video conversion. Right click each DVD/video chapter and select "Media Edit" to enter the video editing panel, where you can find five editing features, namely, Trim, Crop, Rotation, Effect and Watermark.
Video Length Trimming
Click the Trim tab to trim video length to preserve desired video segment either by dragging the twin limiters on the player progress bar or by setting the values of the Start Time and End Time.
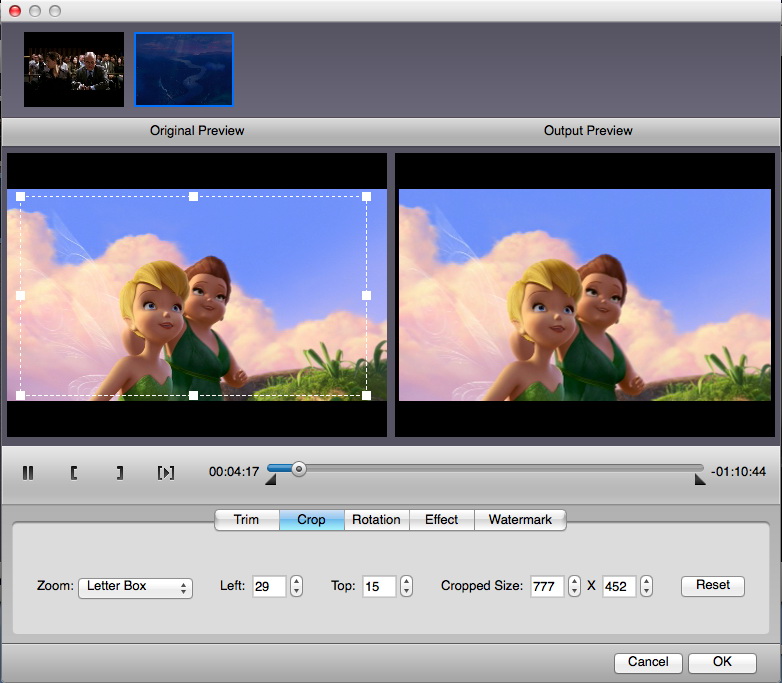
Video Size Cropping:
Under the Crop function, you can crop video size to remove unwanted and unnecessary black margins so as to save space for your devices. Firstly choose a Zoom style in the clickable drop-down box, then set the parameters of left and top direction or directly drag the dot frame on the Original Preview window on the left of the interface, finally press "OK" to confirm the setting. While you are setting, you can have an output preview on the Output Preview window on the right of the interface. If you are not satisfied with the output preview, you can click "Reset" button to reset.
Video Rotating:
You can rotate the video to a special angle for some specific devices and unique angle view under "Rotation" tab. Four rotation methods are available: vertical rotation, horizontal rotation, clockwise 90 degree rotation and counterclockwise 90 degree rotation.

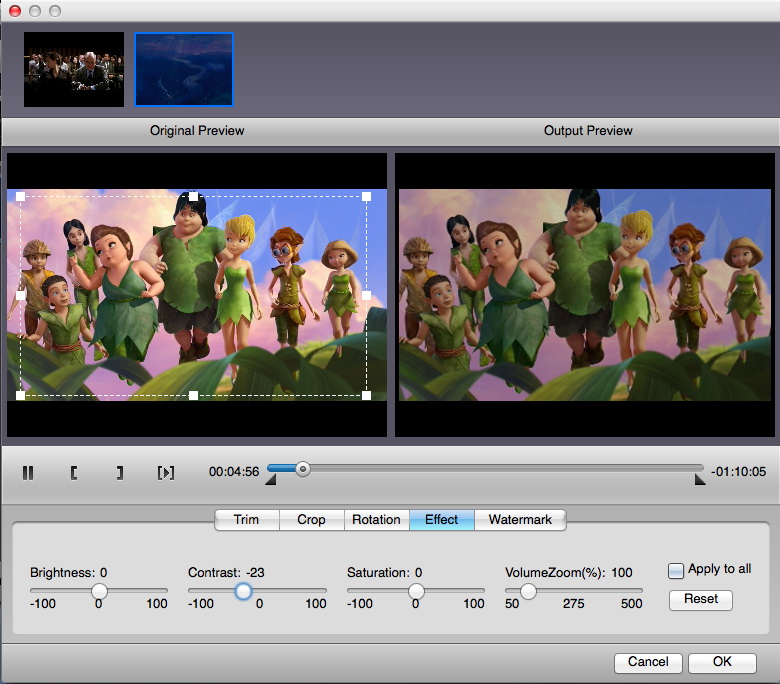
Video Effects Adjusting:
Click Effect tab to change video effects like Brightness, Contrast, Saturation, and VolumeZoom by directly dragging the slider.
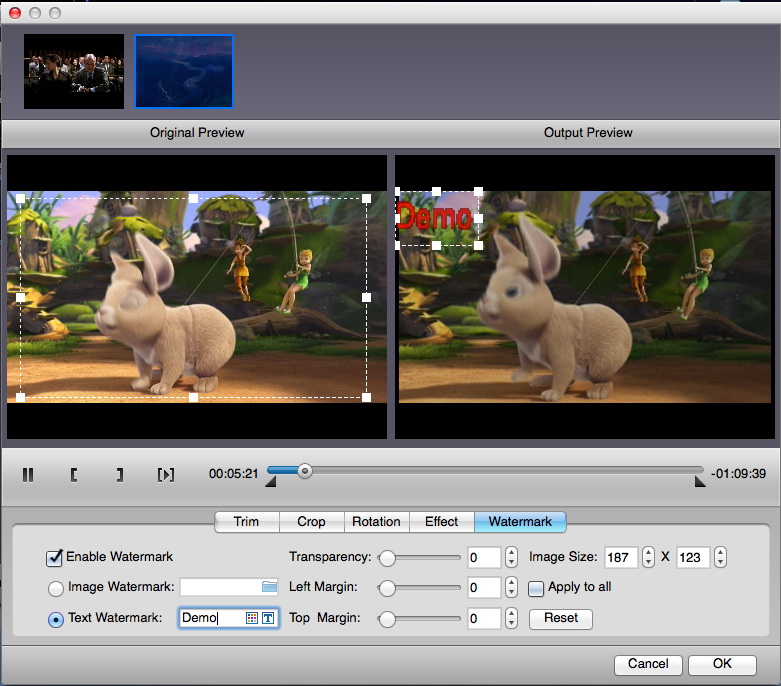
Watermark Adding:
In Watermark tab, you can choose to add image or text watermark onto your video content. Check "Enable Watermark" and then you could freely choose to add either image or text watermark. You shall adjust watermark parameters such as Transparency, Left Margin and Top Margin. When image watermark is added, you shall adjust Image Size. When text is added, you are allowed to set text font, color and size.
How to Convert 2D to 3D Using Leawo Video Converter Pro for Mac?
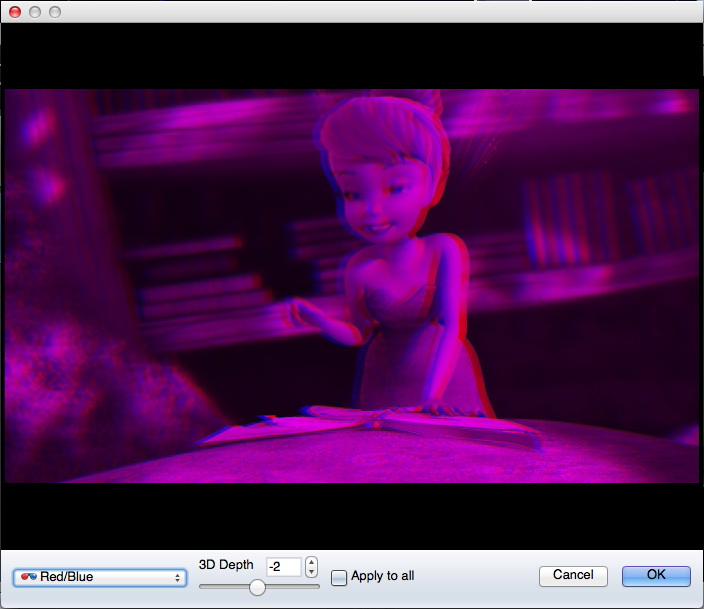
Leawo Video Converter Pro for Mac could play the role of a 2D to 3D converter, which means that it could creat 3D movies from 2D DVD files or 2D videos for a better 3D movies enjoyment. Click 3D button and you can freely add a 3D effect onto your DVD/video files before 3D movies creation. Choose one 3D effect that meets your demand from the six 3D effects available: Red/Cyan, Red/Green, Red/Blue, Red/Yellow, Interleaved and Side by side.
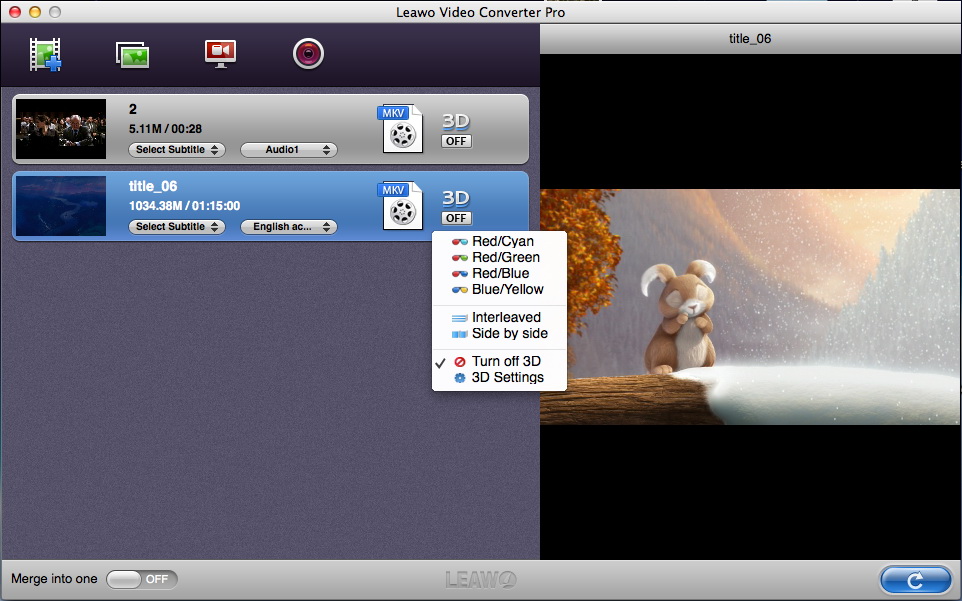
You can click 3D Settings to enter the 3D previewing panel, on which you can select 3D effect, set 3D Depth and preview 3D outcome you have set.
![]()
Users Say
As consumers, I love companies offering solid product guarantees. It proves the company has faith in its product, and is making a solid effort to gain your trust.
-From Donald through our support center
Social Network
Join Our Newsletter: