How to use Leawo Video Converter Ultimate for Mac
Although there are only 5 programs contained inside Leawo Video Converter Ultimate for Mac, there are more than 5 solutions. One program possesses more than one function. Functionally speaking, it is safe to say that the media converter suite contains Mac Video Converter, Mac Audio Converter, Mac DVD Converter, Mac DVD Creator, Mac DVD Cloner, Photo Slideshow Video Maker, Photo Slideshow DVD Burner, and Mac Video Downloader. It is able to convert DVD, video and audio files, burn videos to DVD disc, folder or ISO file, back up ISO file onto DVD disc, clone DVD content, download regular videos and live streams from video sharing sites, create photo slideshows and burn to DVD, etc. Moreover, the program users are allowed to edit media files, design disc menu and create 3D movies.

Back up DVD

Convert DVD/video
Burn Video
Burn ISO

Download

Photo Solutions

Edit

2D to 3D
How to Copy and Back up DVD
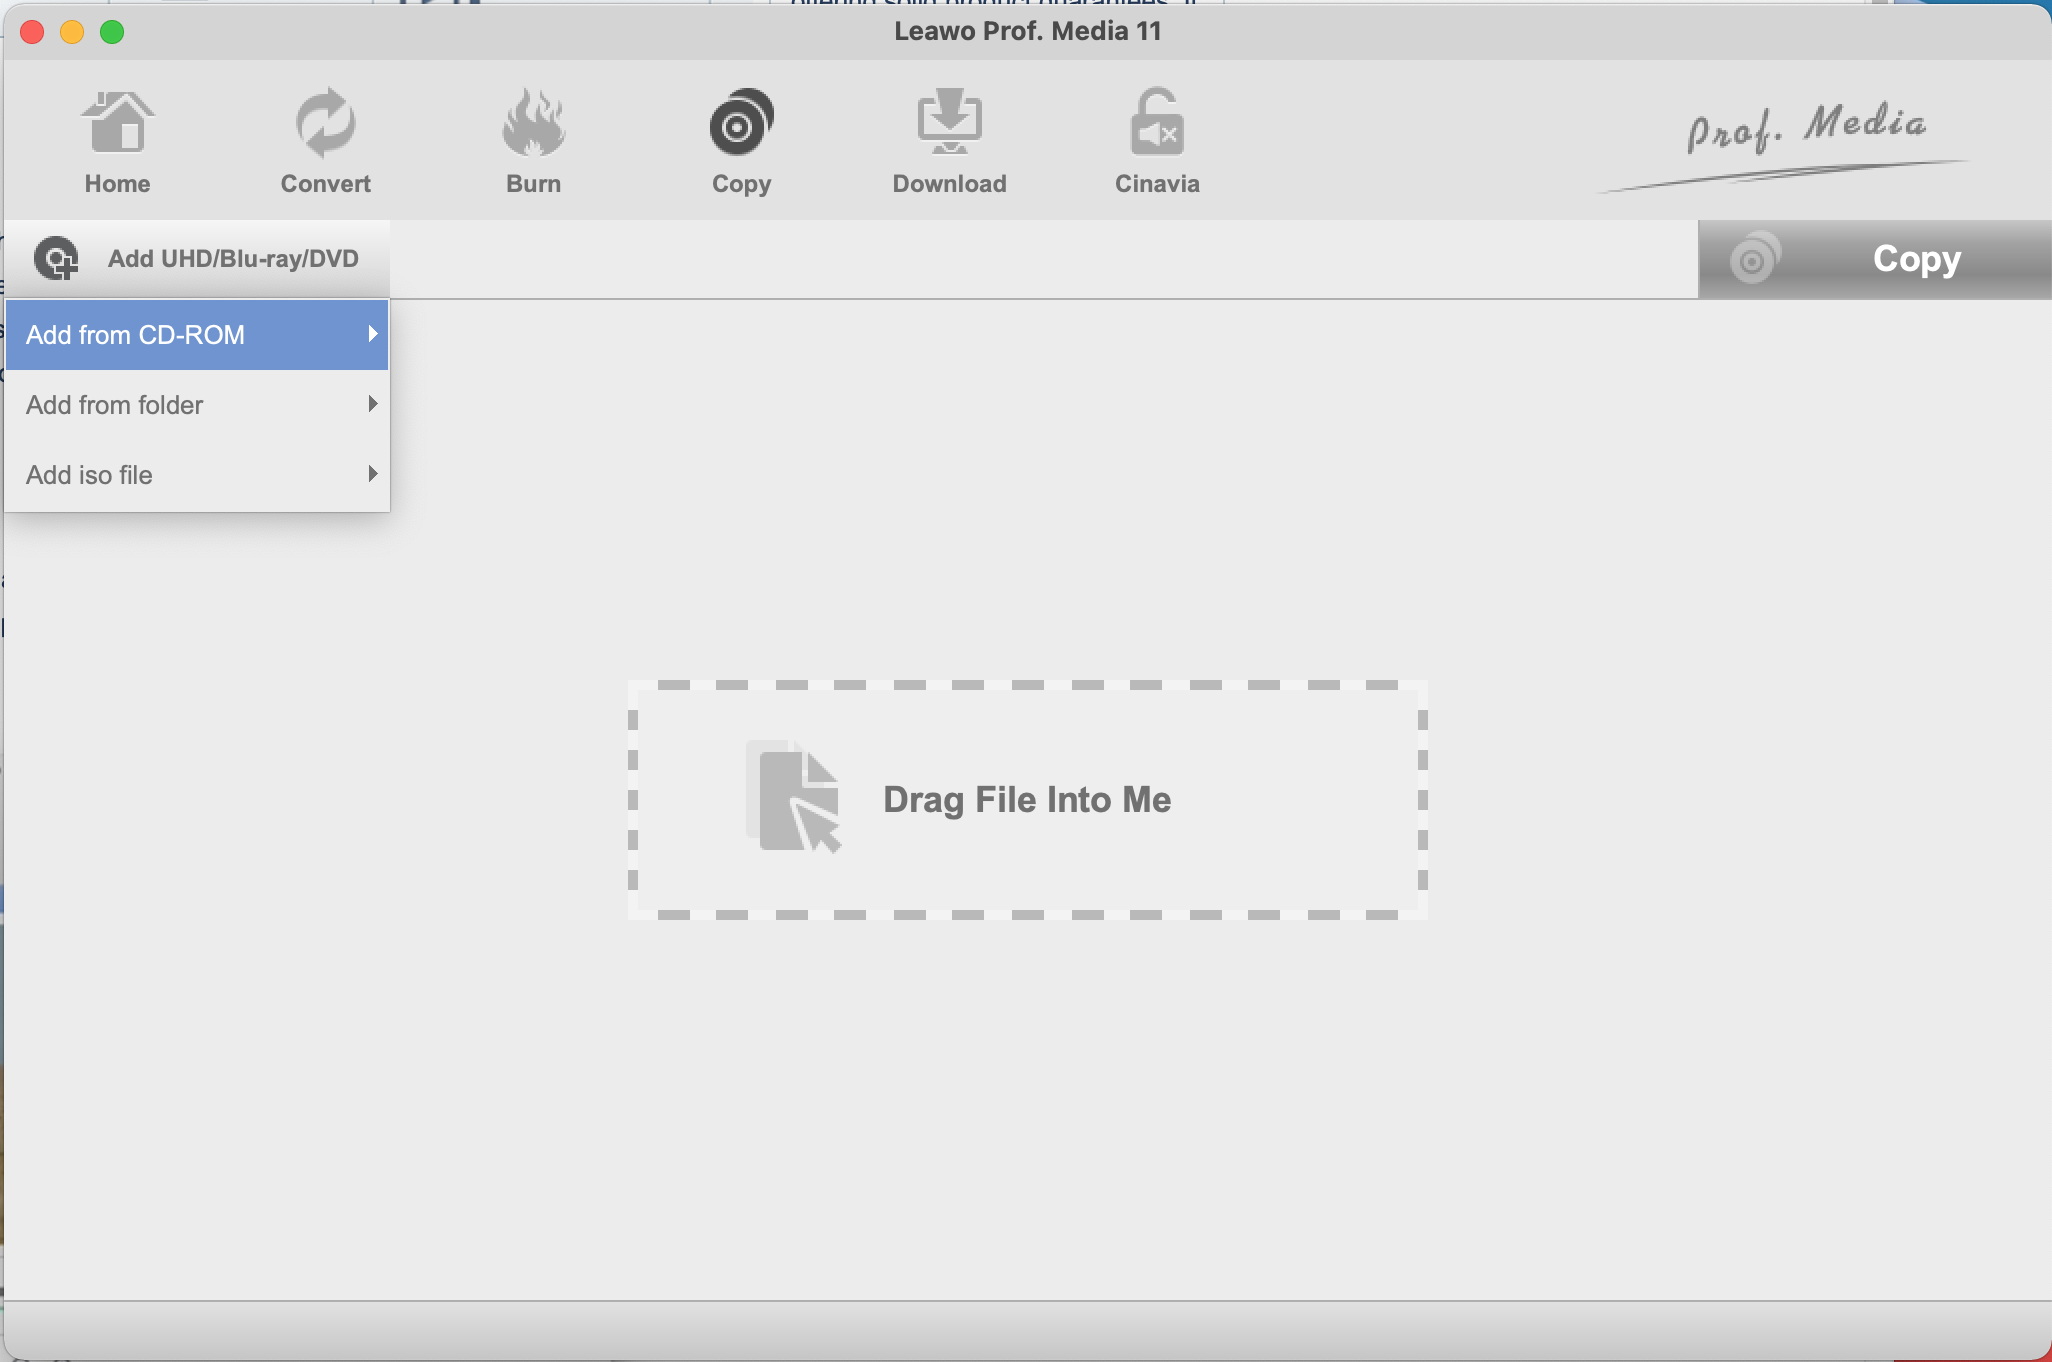
Step 1 Add DVD file
Insert your source DVD disc into the DVD drive or get source DVD folder/ISO image file ready. Under the “Copy” module, click the inverted drop-down arrow icon next to the “Add UHD/Blu-ray/DVD” button and then select “Add from CD-ROM”, "Add from folder" or "Add iso file" option to load souce DVD file according to your needs.
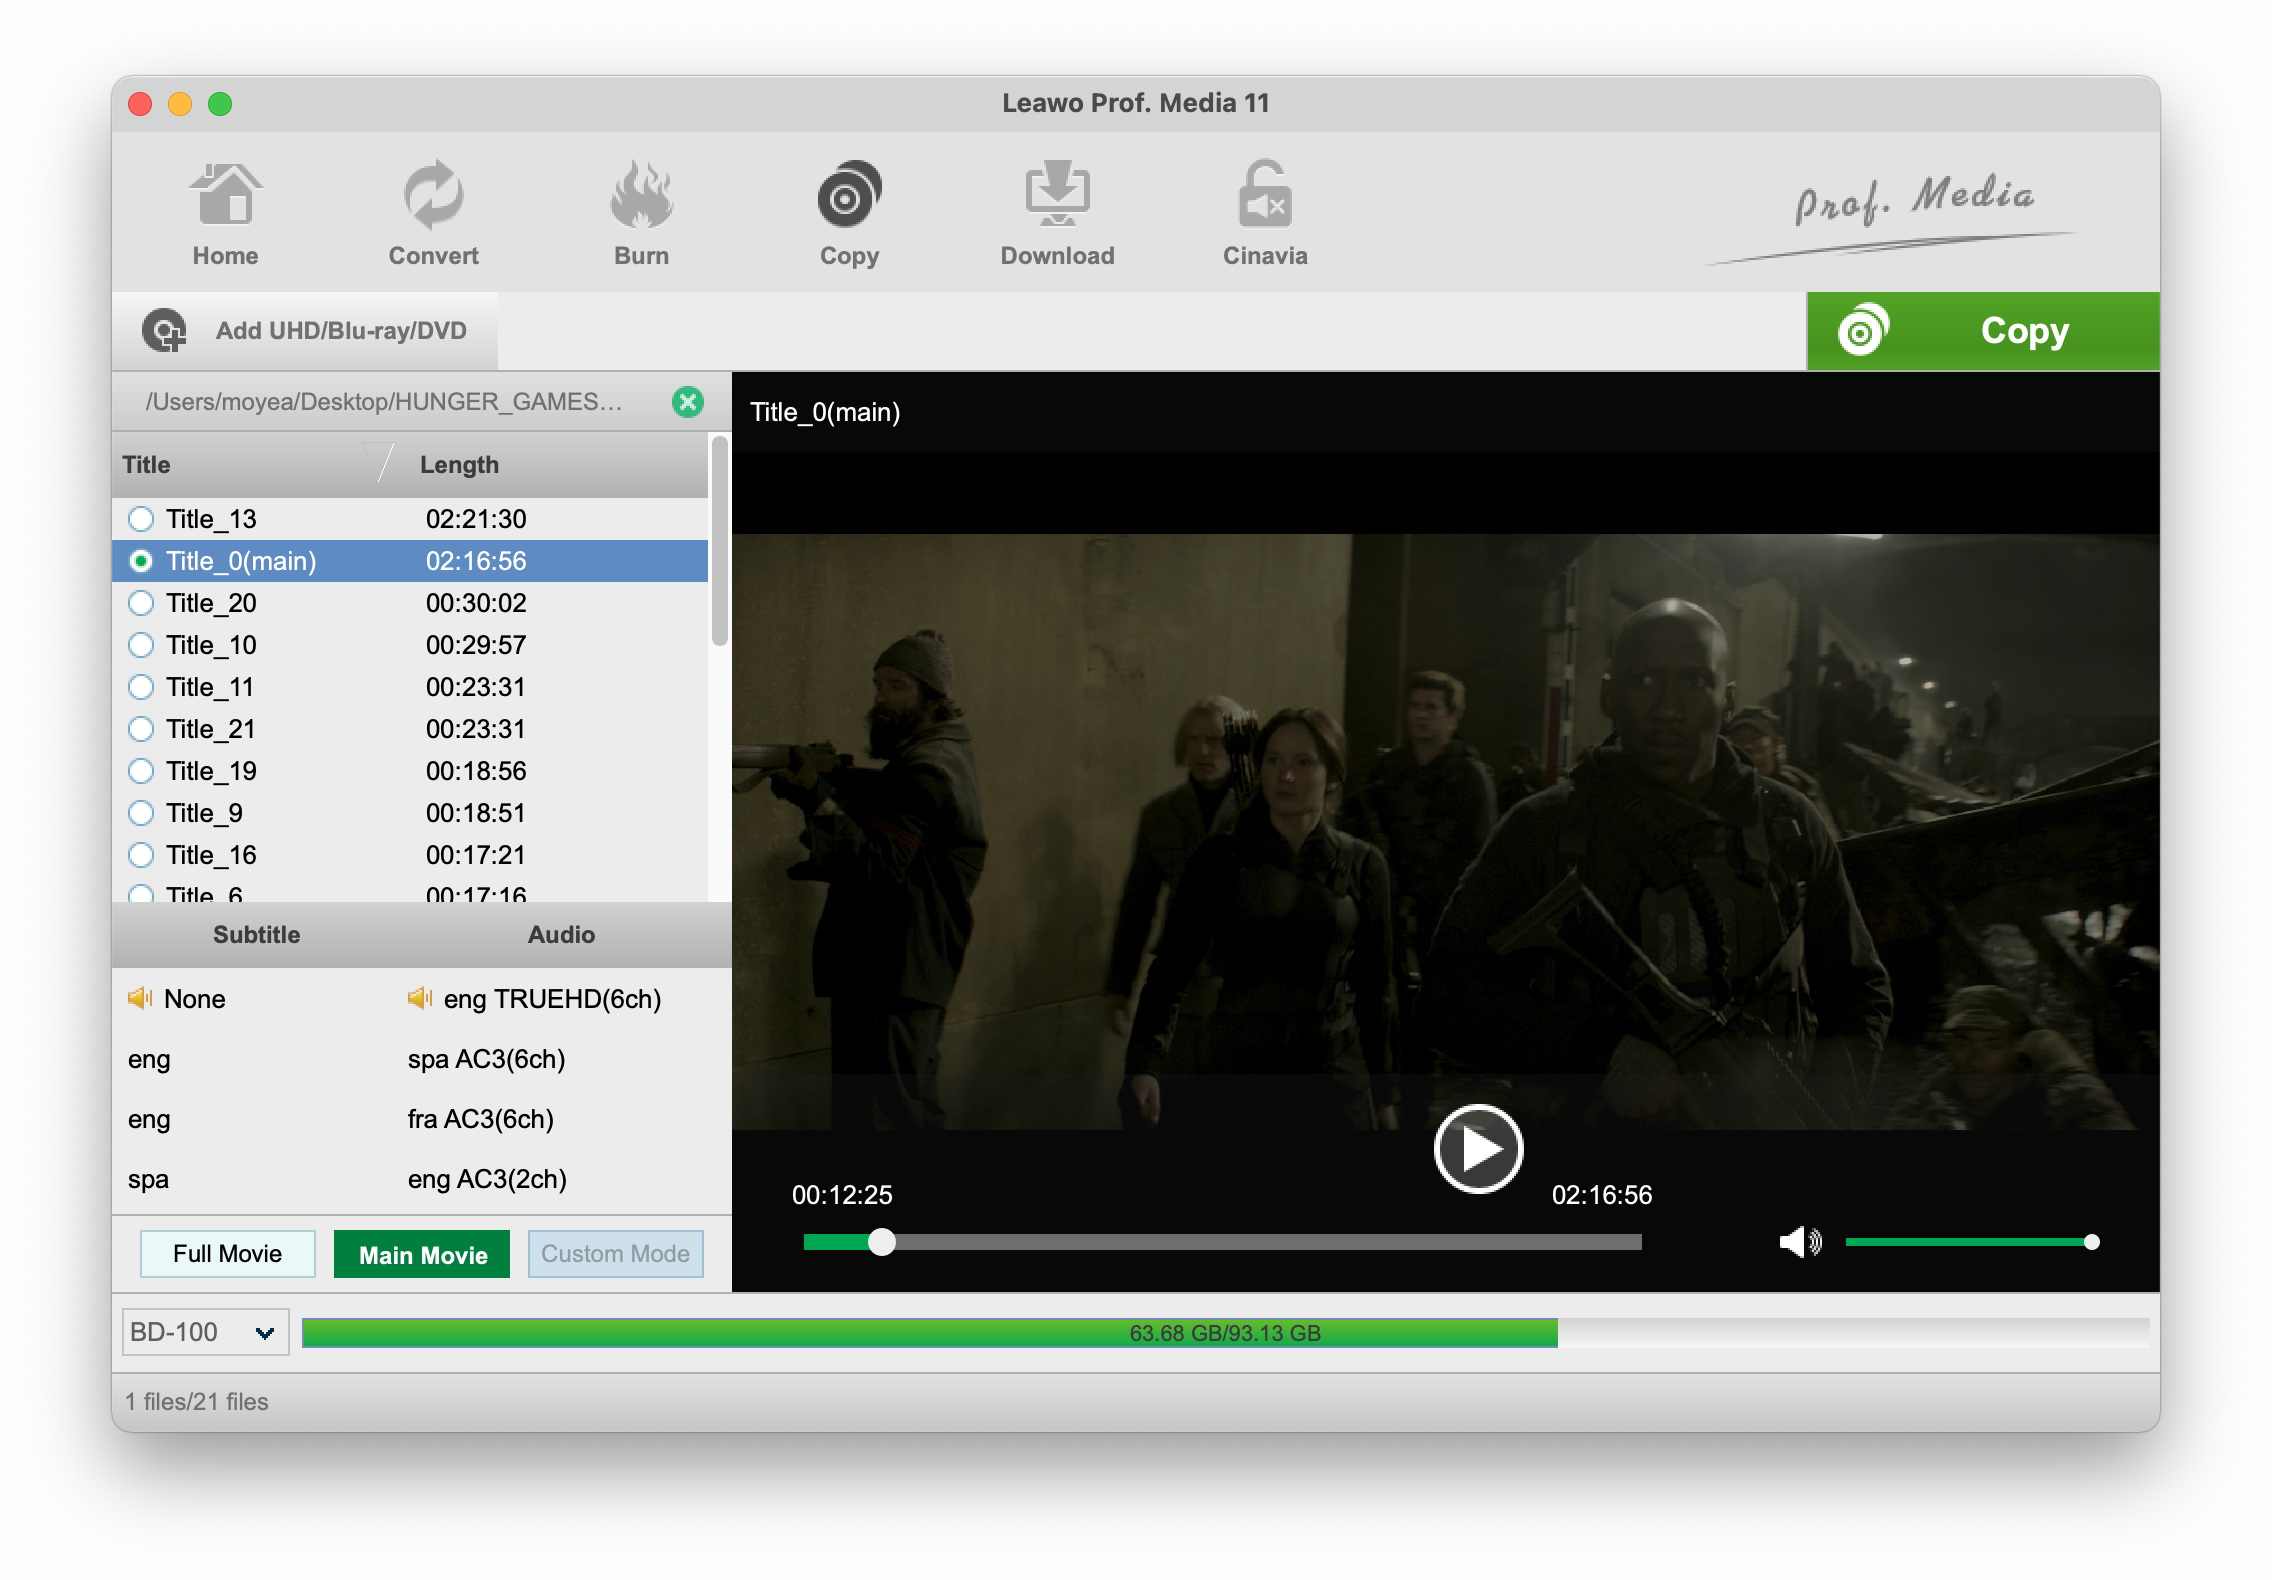
Step 2 Choose DVD copy mode
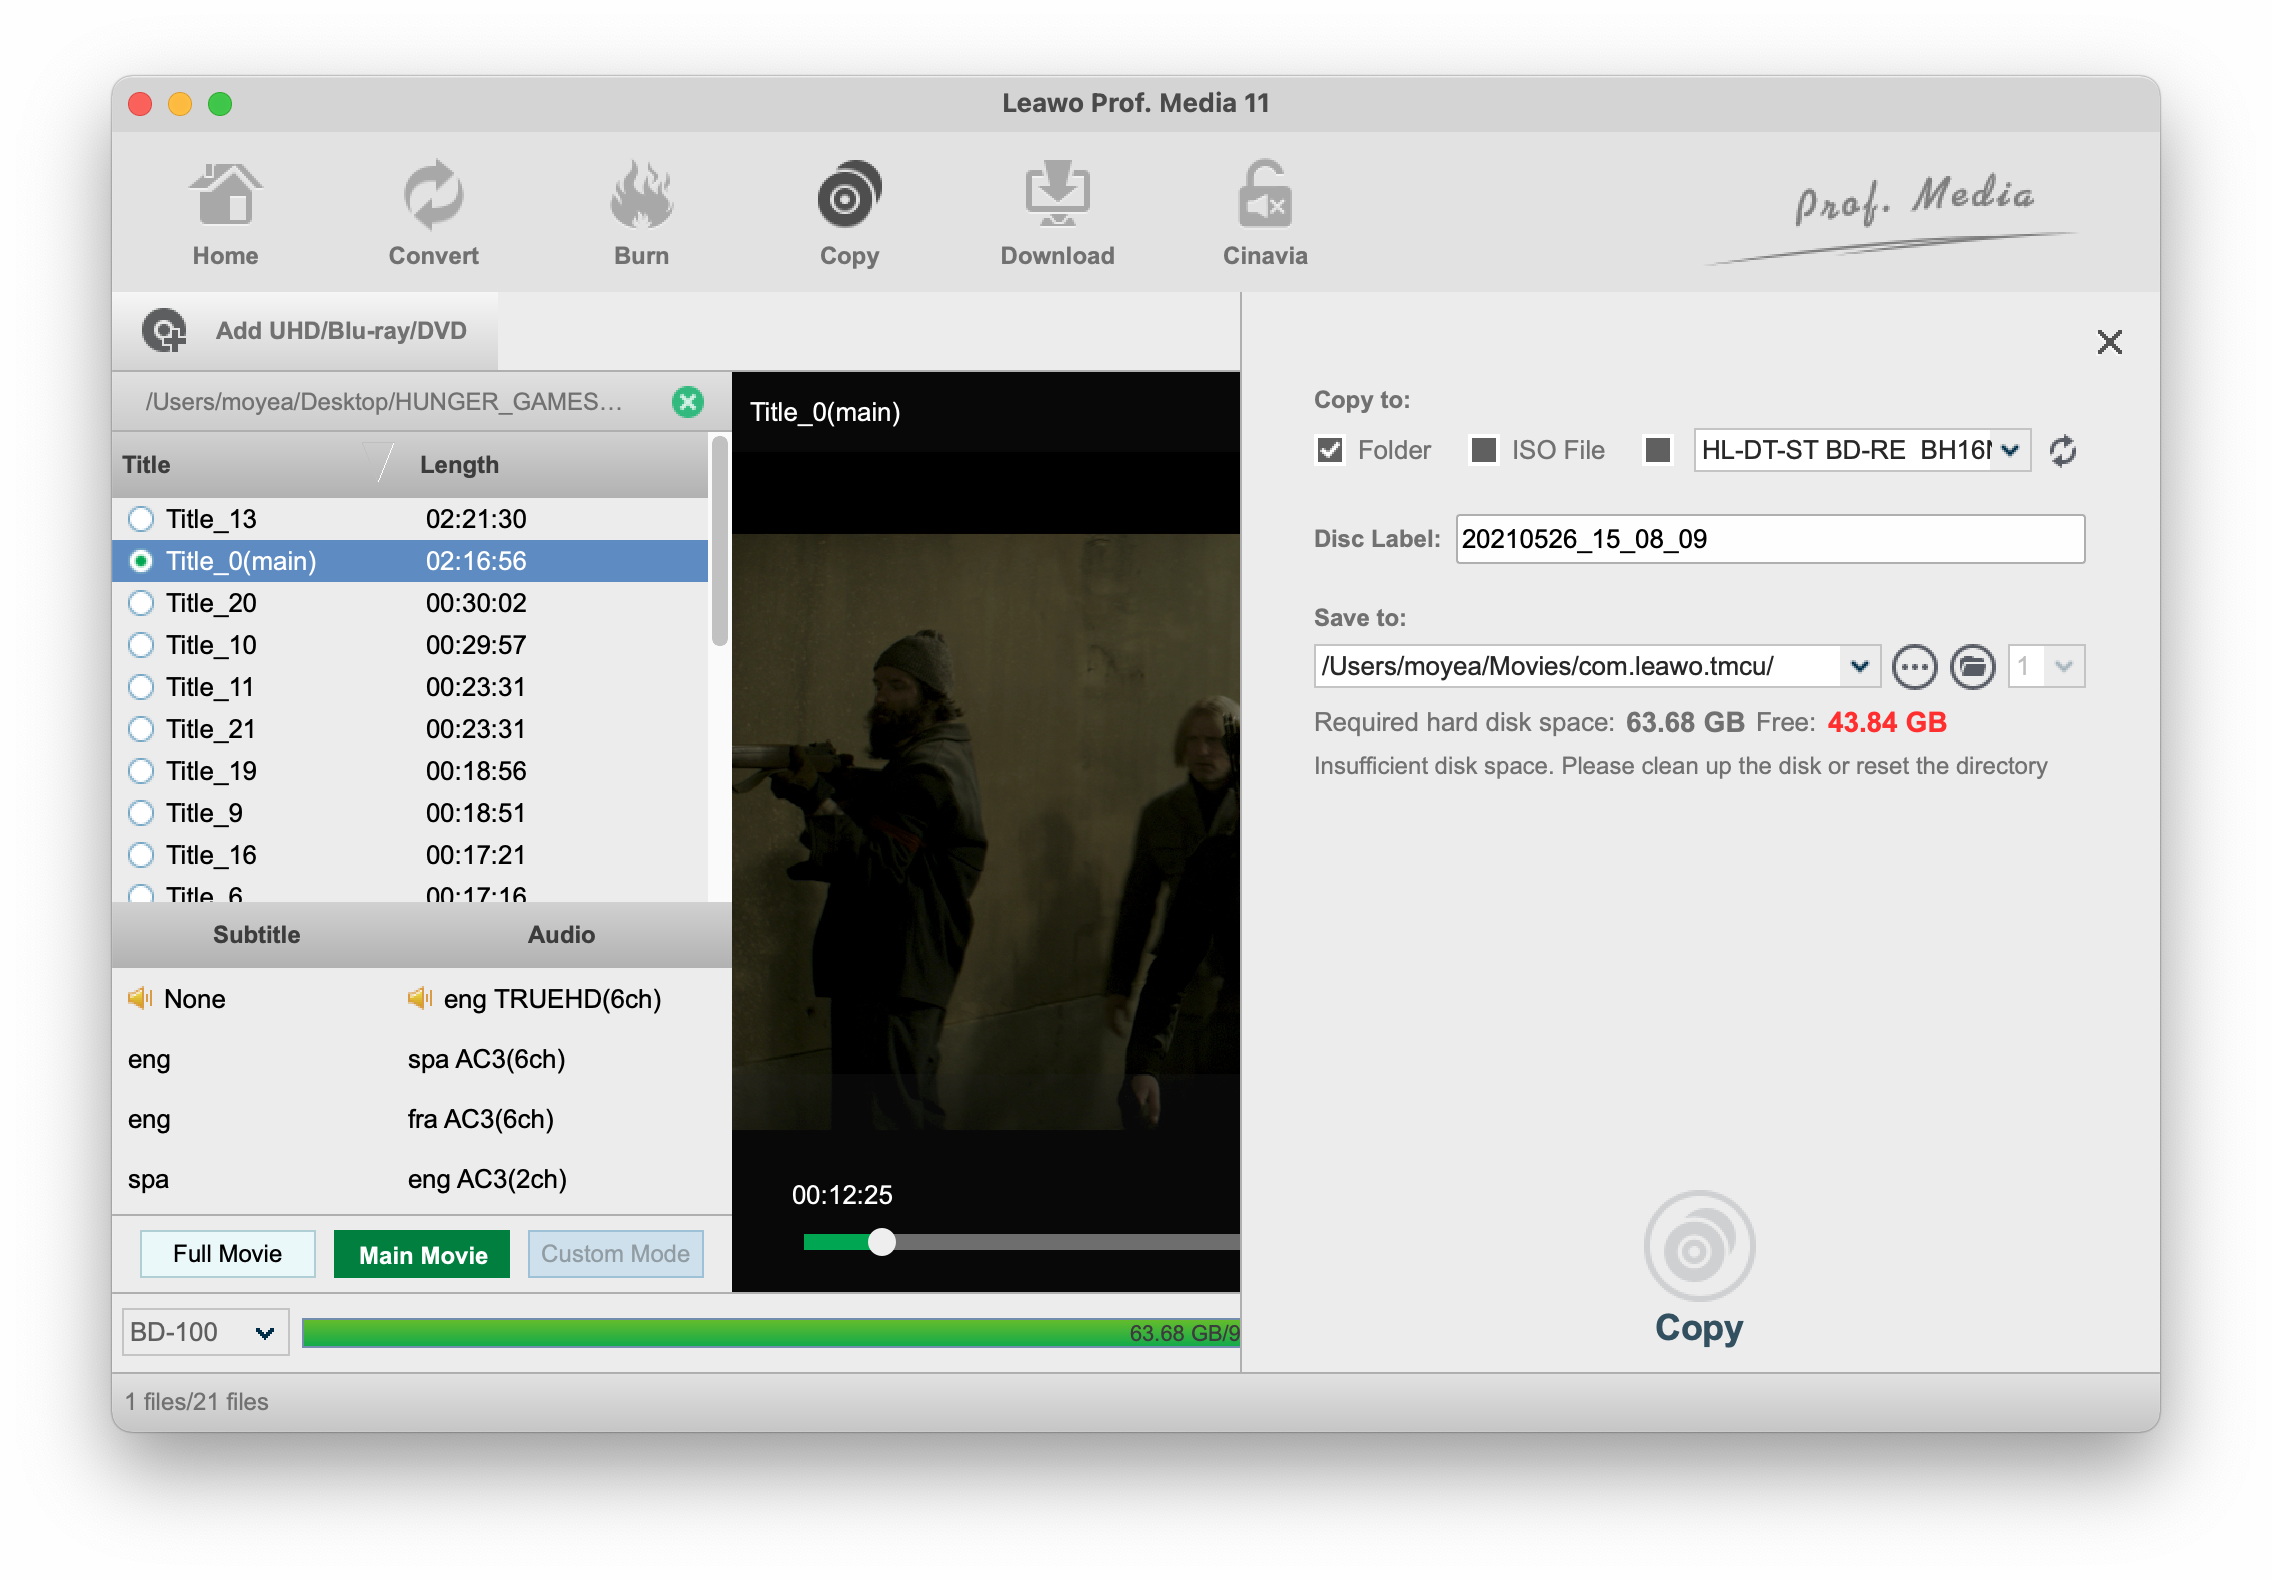
After loading source DVD file, you will get 3 different DVD copy modes: Full Movie, Main Movie and Custom Mode. Full Movie mode enables you to copy and back up all DVD titles from source DVD file, Main Movie mode takes the longest DVD title as the default title for you to copy but allows you to switch to another one, while Custom Mode enables you to freely select any DVD title(s) you want to copy and back up. After choosing DVD copy mode, select subtitles and audio tracks. Meanwhile, at the bottom left corner, select either DVD-9 or DVD-5 for output upon your needs.
Step 3 DVD backup settings
Click the green “Copy” button and then on the popup sidebar complete more DVD backup settings, including: "Copy to", "Disc Label" and "Save to" options. "Copy to" option allows multiple choices. Choose one according to your need.
Note: If you want to clone and back up DVD disc to DVD disc but have one DVD drive only, you could firstly clone DVD disc to ISO image file, and then eject source DVD disc to insert target DVD disc to copy the ISO image file to blank DVD disc with this program.
Step 4 Start copying DVD
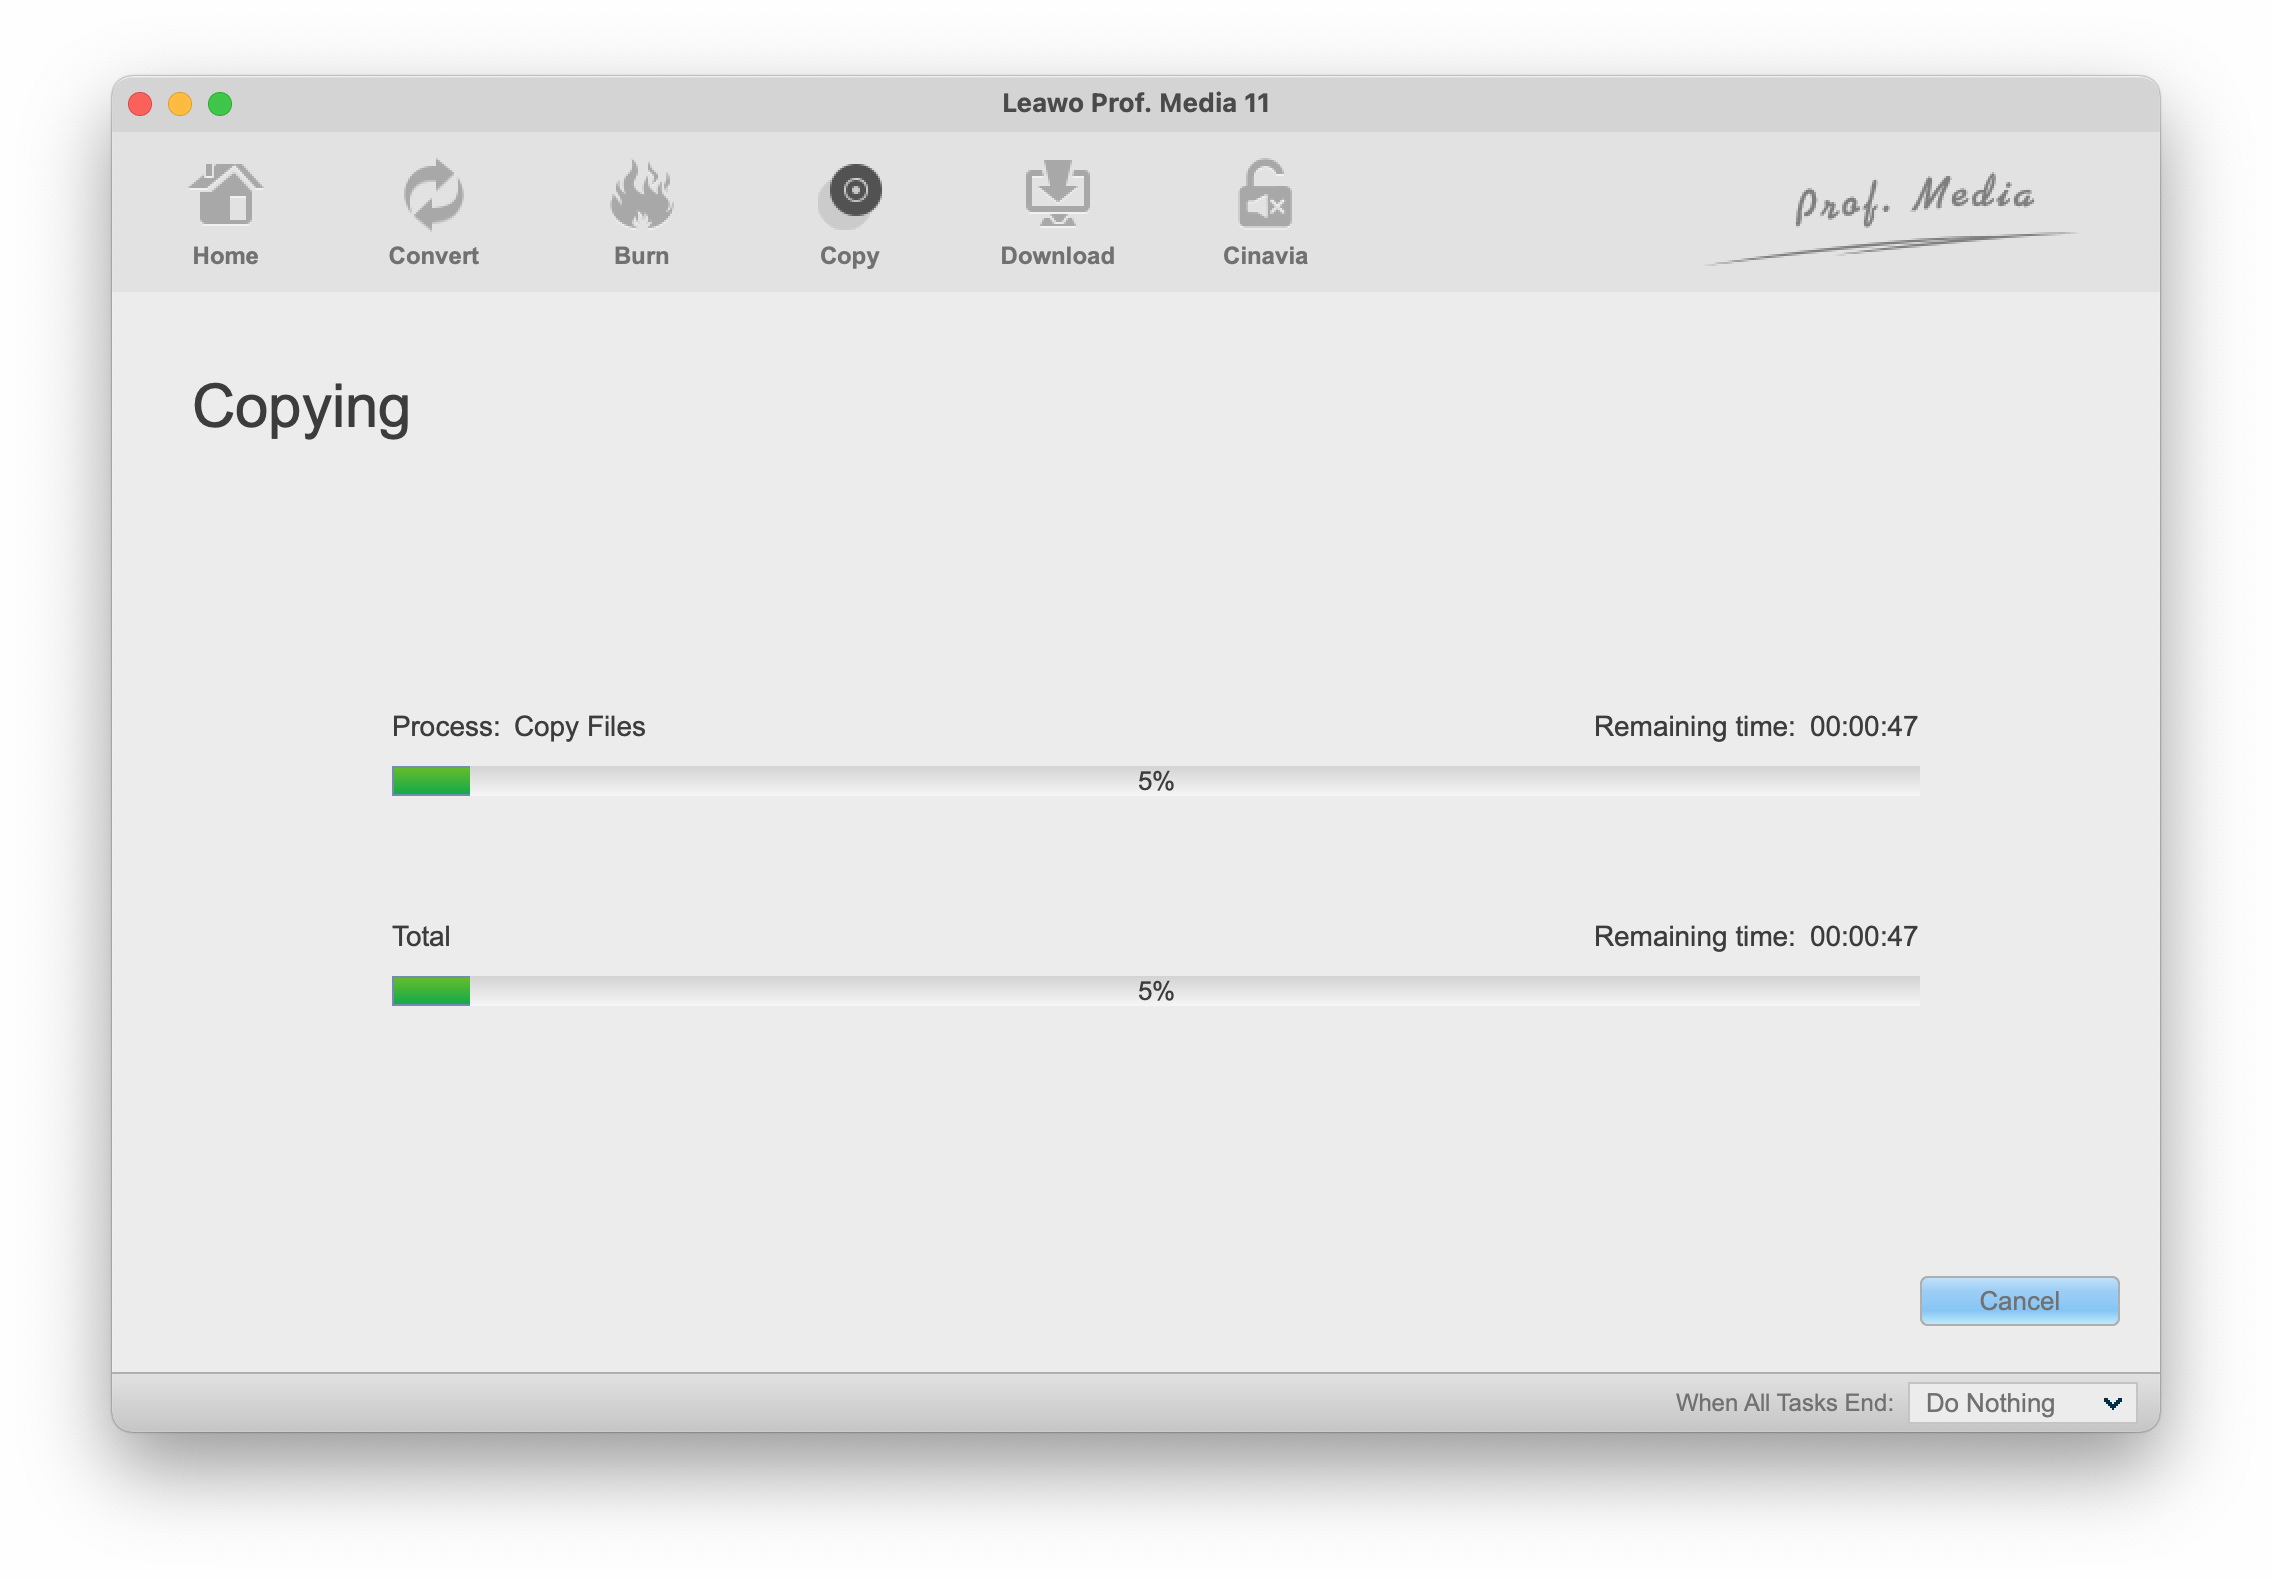
Click the “Copy” button at the bottom of the sidebar to start copying DVD movies to computer or blank disc. Leawo Video Converter Ultimate for Mac will immediately start the DVD backup process. You could view the DVD backup process on the copying interface.
Convert DVD and Video for Mac Users
Step 1 Add source files
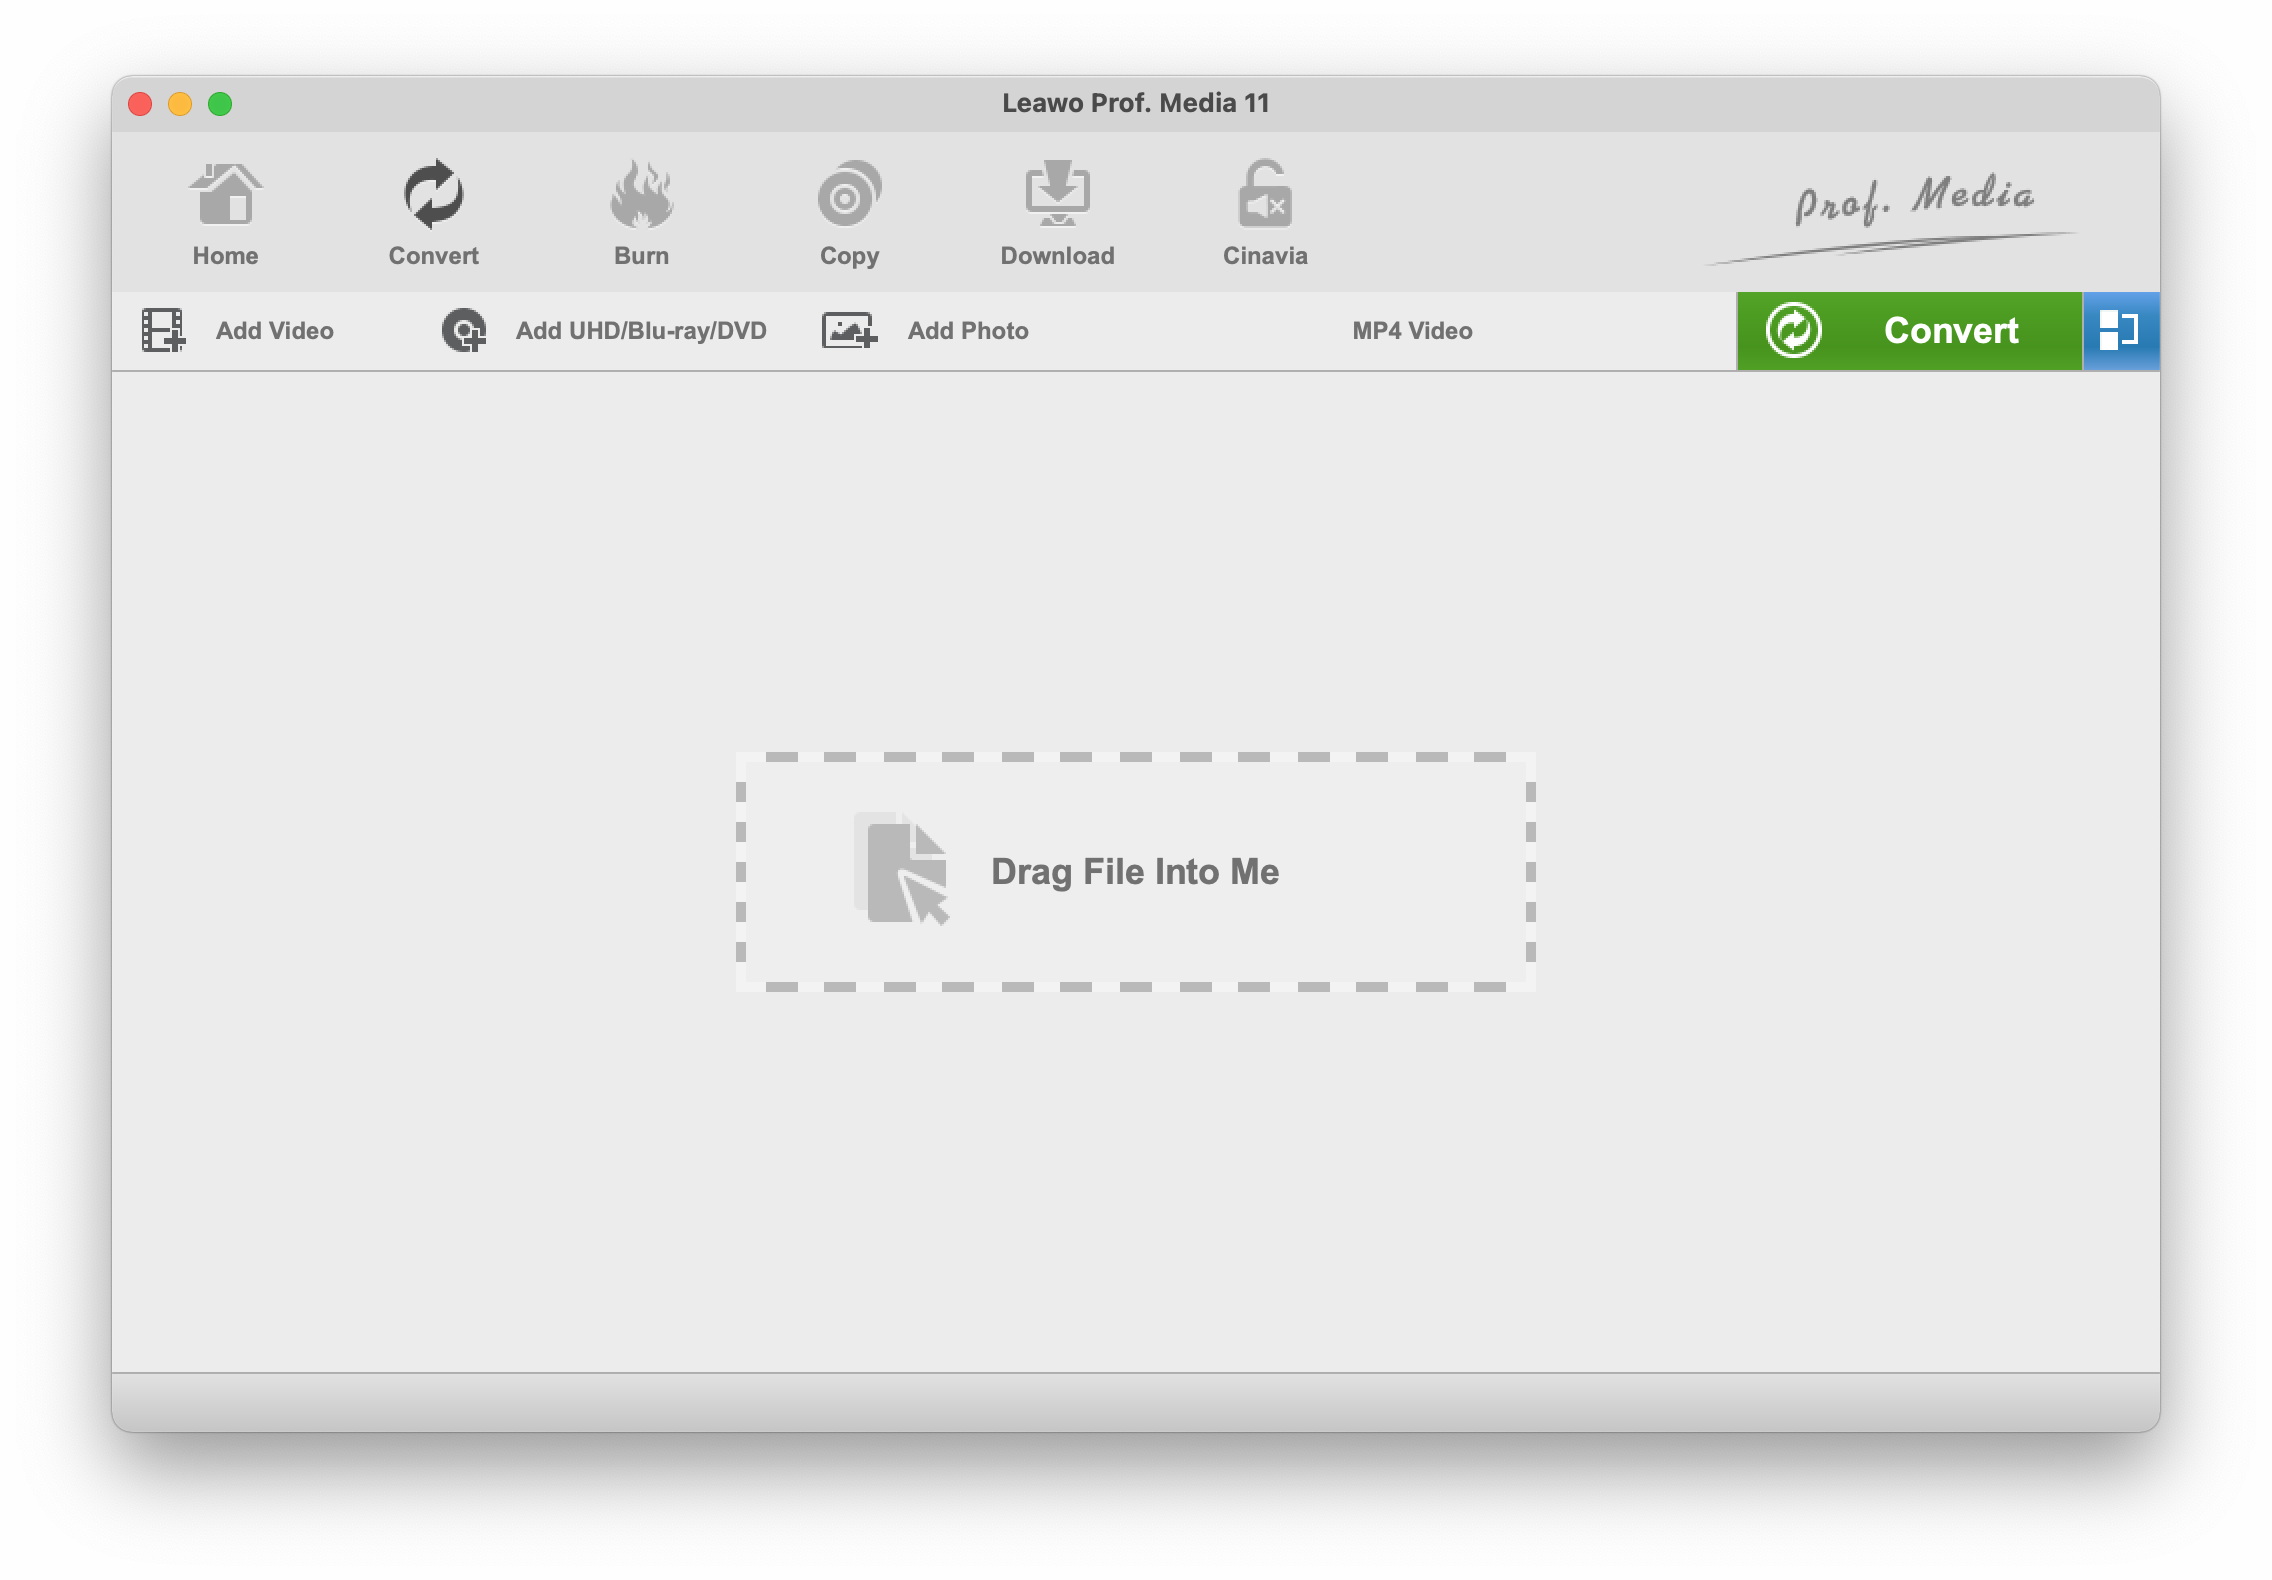
Click the “Convert” option on the top right of the main interface to enter the converting module. Click “Add Video” button to browse and load source video or/and audio files for converting, or click the “Add UHD/Blu-ray/DVD” button to import DVD source file (or to import source video/DVD files/folders by direct dragging-and-dropping). After loading, you can select your favourite subtitles and audio tracks from source to save in output file.
Note: There are three movie loading modes available for choosing when converting DVD movies.
Full Movie: If you choose Full Movie mode, the software will load the whole source files.
Main Movie: If you choose Main Movie mode, the software will automatically load the longest title of all files.
Custom Mode: If you choose Custom Movie mode, you are allowed to freely determine to load which titles.
Step 2 Set output profile
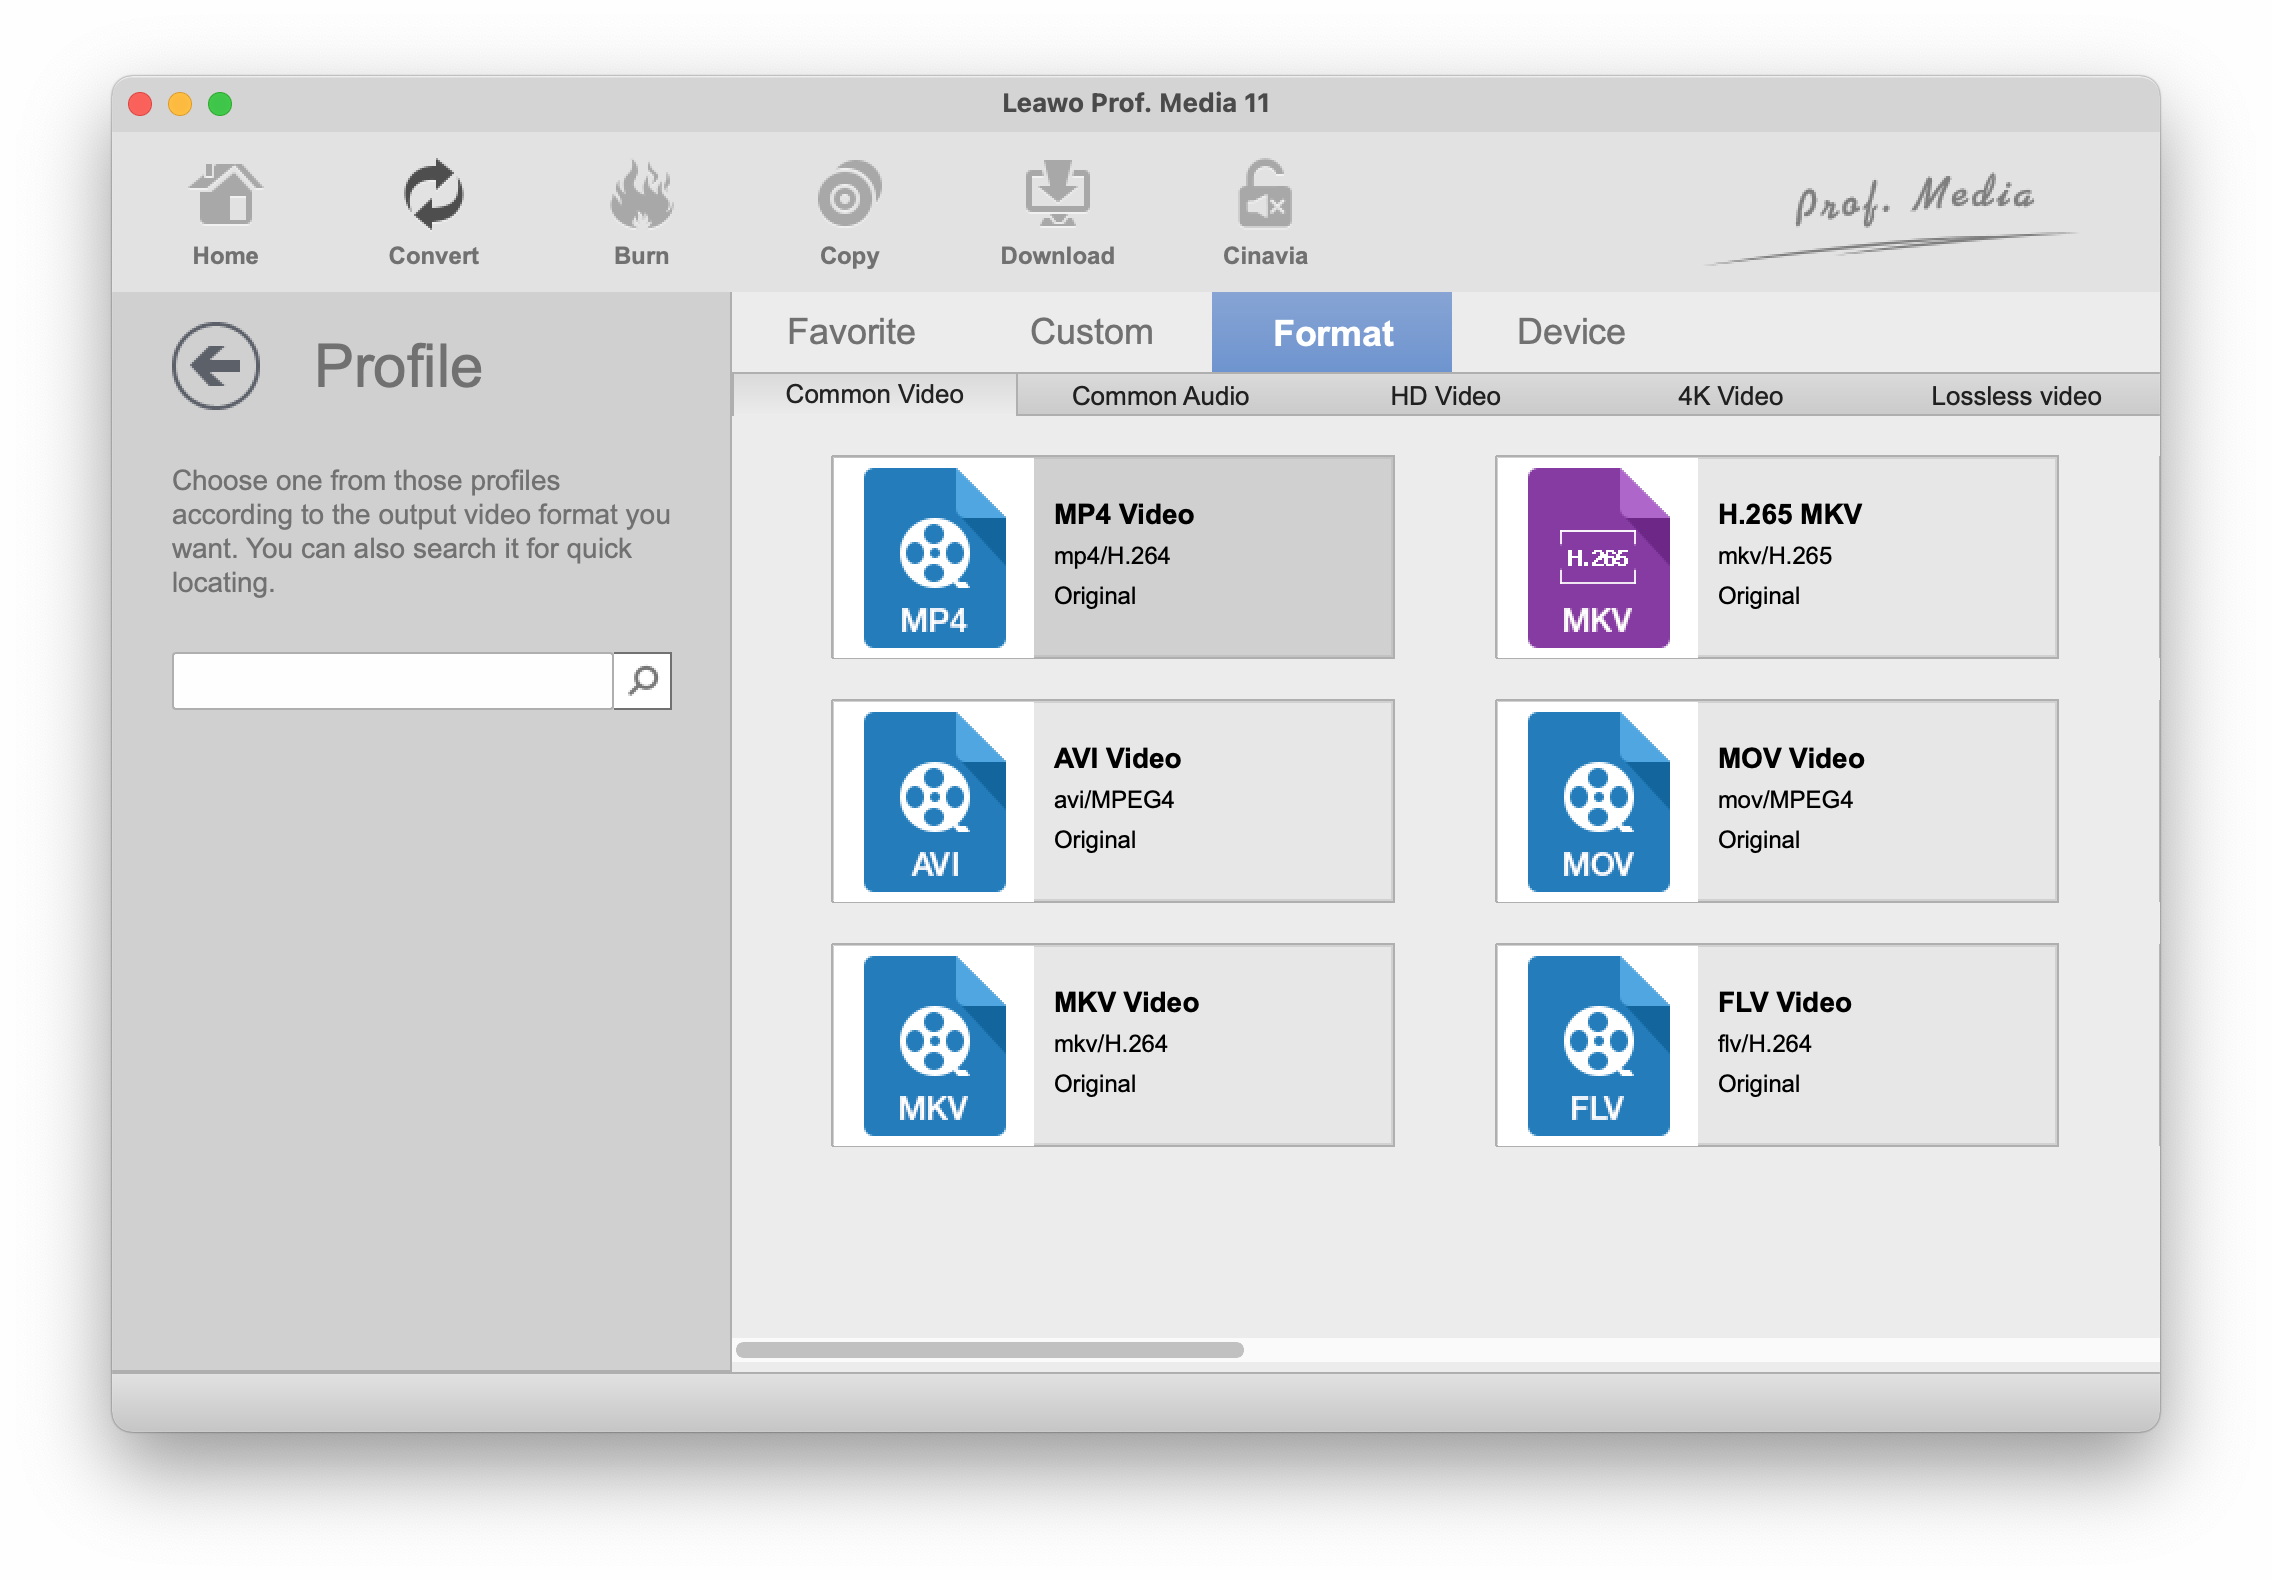
.Click the drop-down list named "MP4 Video" by default next to "Add Photo" icon on the sub-menu bar, then select "Change" option to enter the Profile panel, where you could freely select profiles from as output format, or you could directly choose output device name in "Device" column. On the right side of the Profile panel, there is a profile searching bar for quick format locating. If you are tired of looking for the format, you can directly input the format name in the bar and the relative format will show itself, which will save you a lot of time and energy.
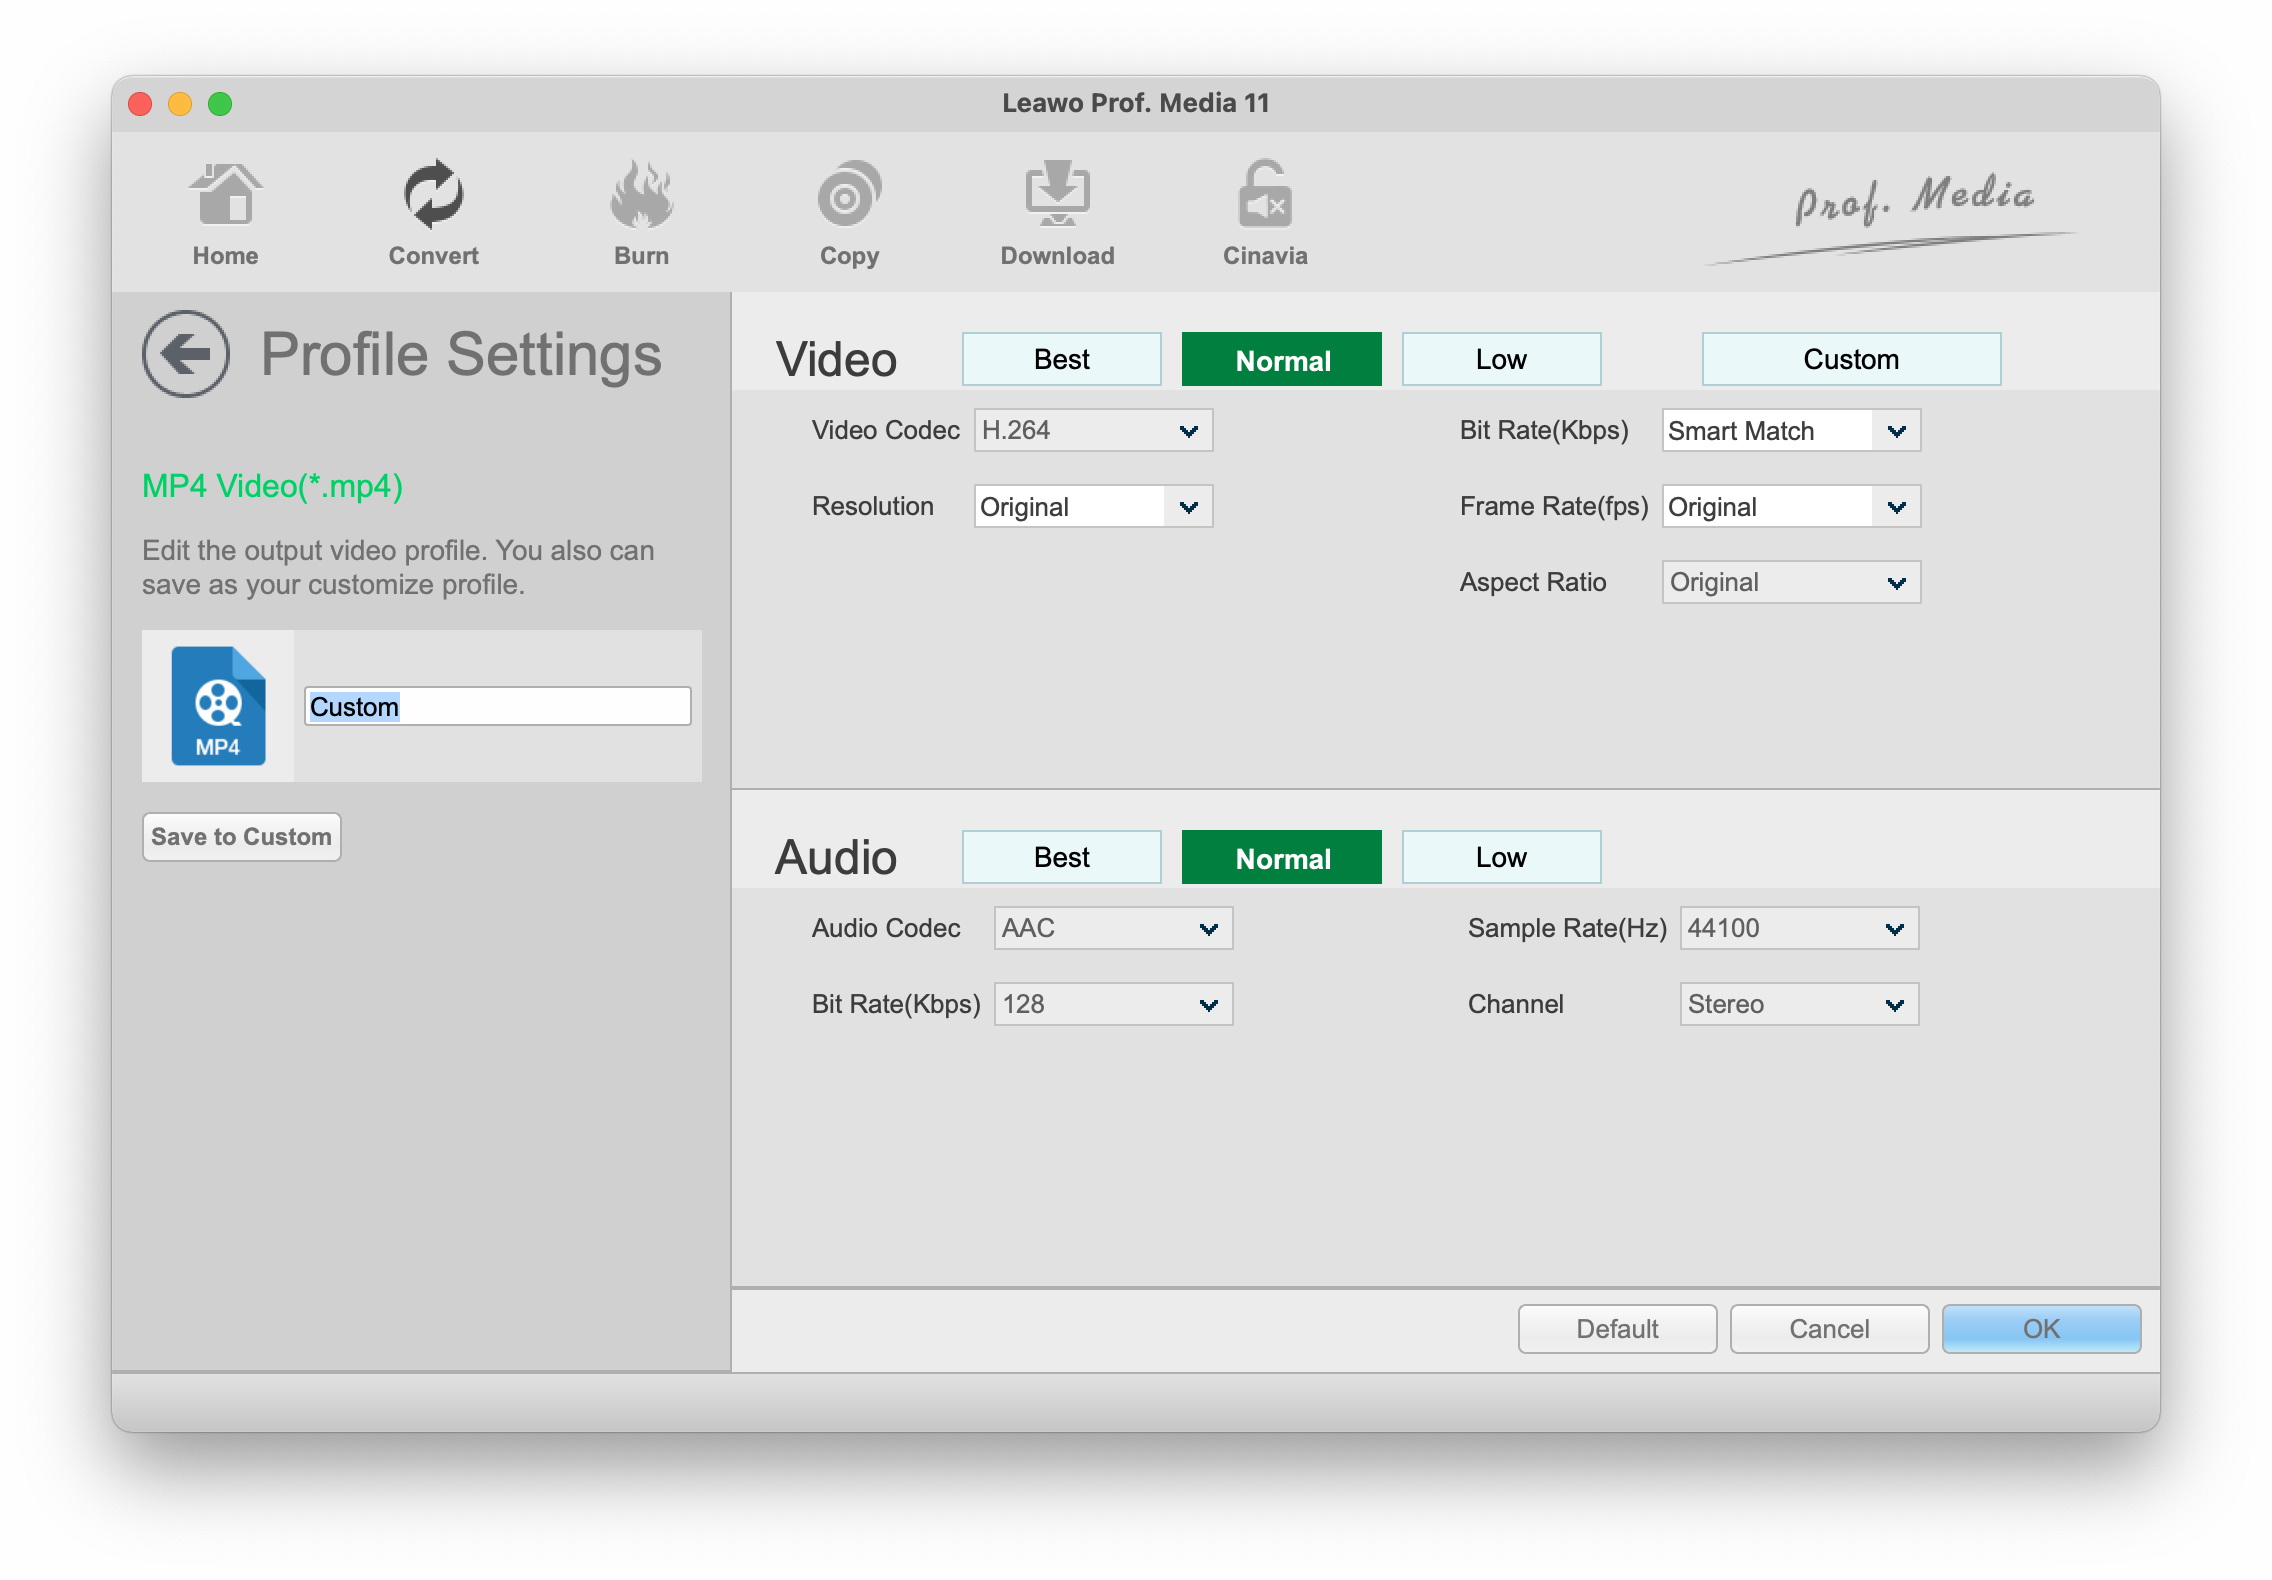
Note: After selecting output profile, reopen drop-down box on the left of the green “Convert” button and then select “Edit” option to call out the Profile Settings panel, on which you could adjust video codec, quality, bit rate, resolution, frame rate, aspect ratio, audio codec, audio quality, sample rate, etc.
Step 3 Set output directory
After selecting the output profile, you are automatically returned to the main interface, or you will return to the main interface once you press "OK" button when performing advanced profile settings, and then click the green “Convert” button on the sub-menu bar. A sidebar will pop up on the right. On the sidebar, you can choose output directory in “Save to” box.

Step 4 Start converting
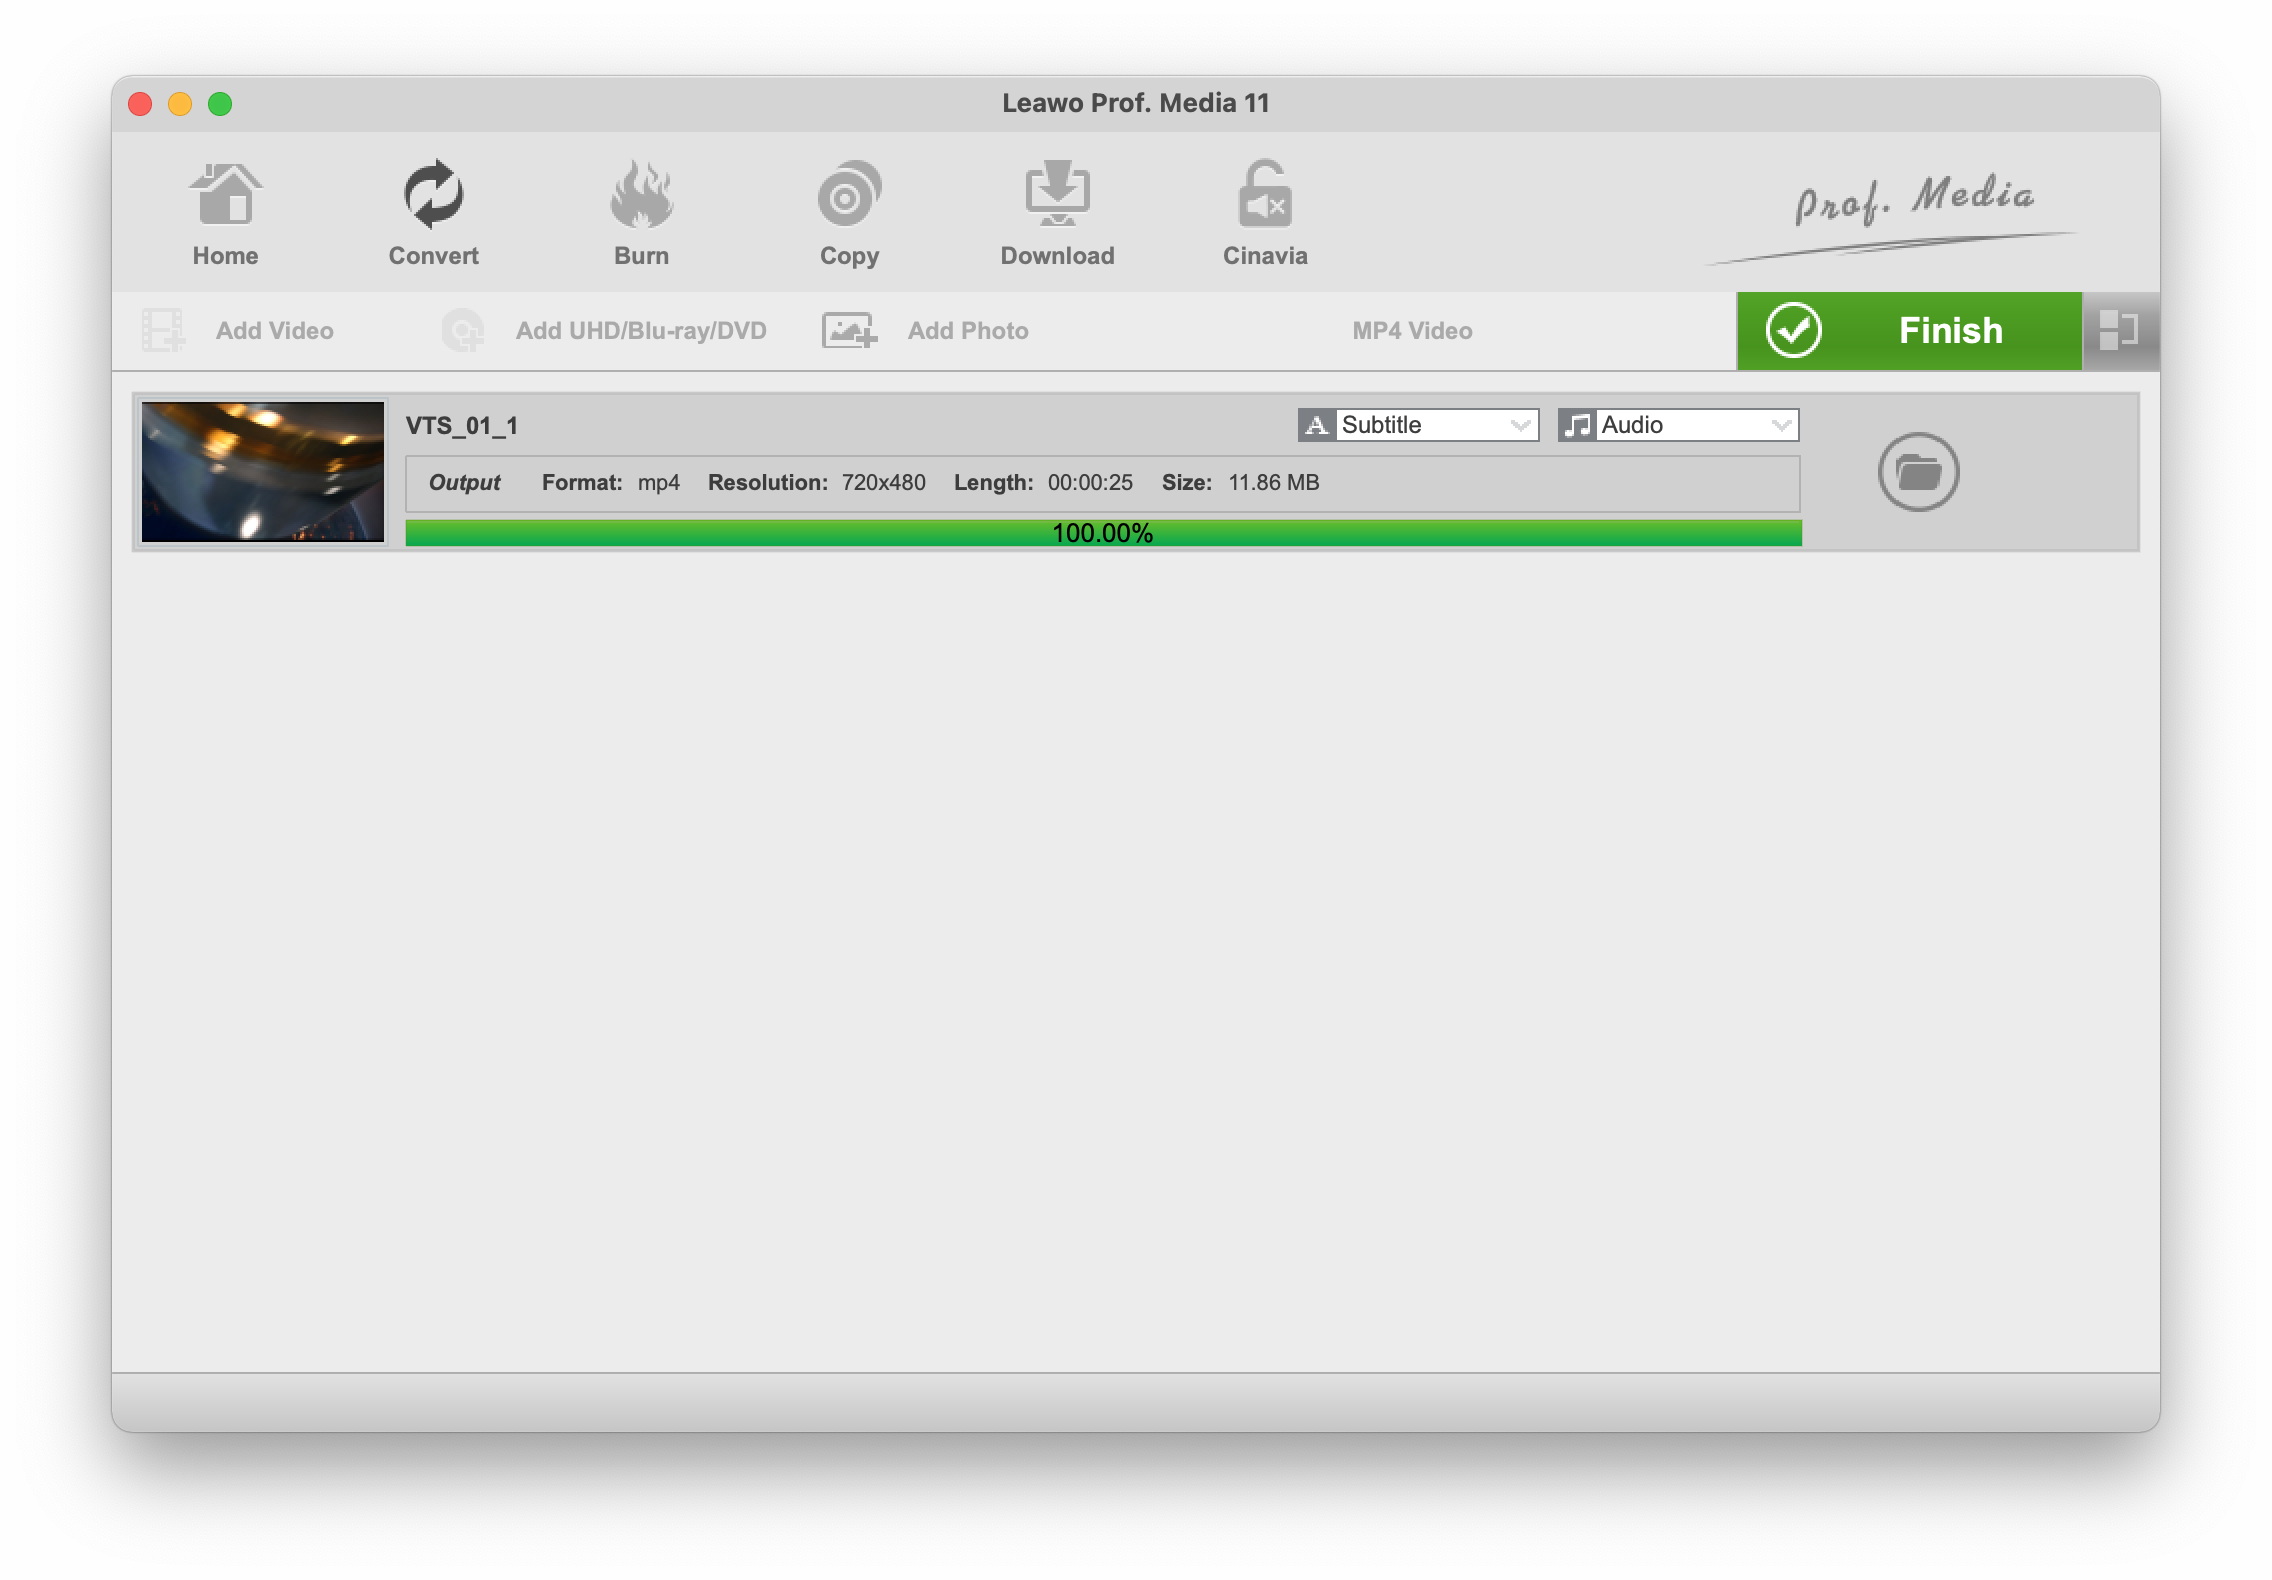
Get the conversion process started by clicking the "Convert" button at the bottom of the sidebar and you are guided to the converting interface, where you could view and even pause/restart all converting progress.
How to Burn Video to DVD
Step 1 Import video files
Under "Burn" module on the upper menu of the main interface, click “Add Video” icon to import source videos or drag-and-drop source videos directly. Source video folders can also be imported for burning to DVD movies. When loading process is done, you shall set the target disc type(DVD-5, DVD-9), quality and aspect ratio at the bottom of the program interface.
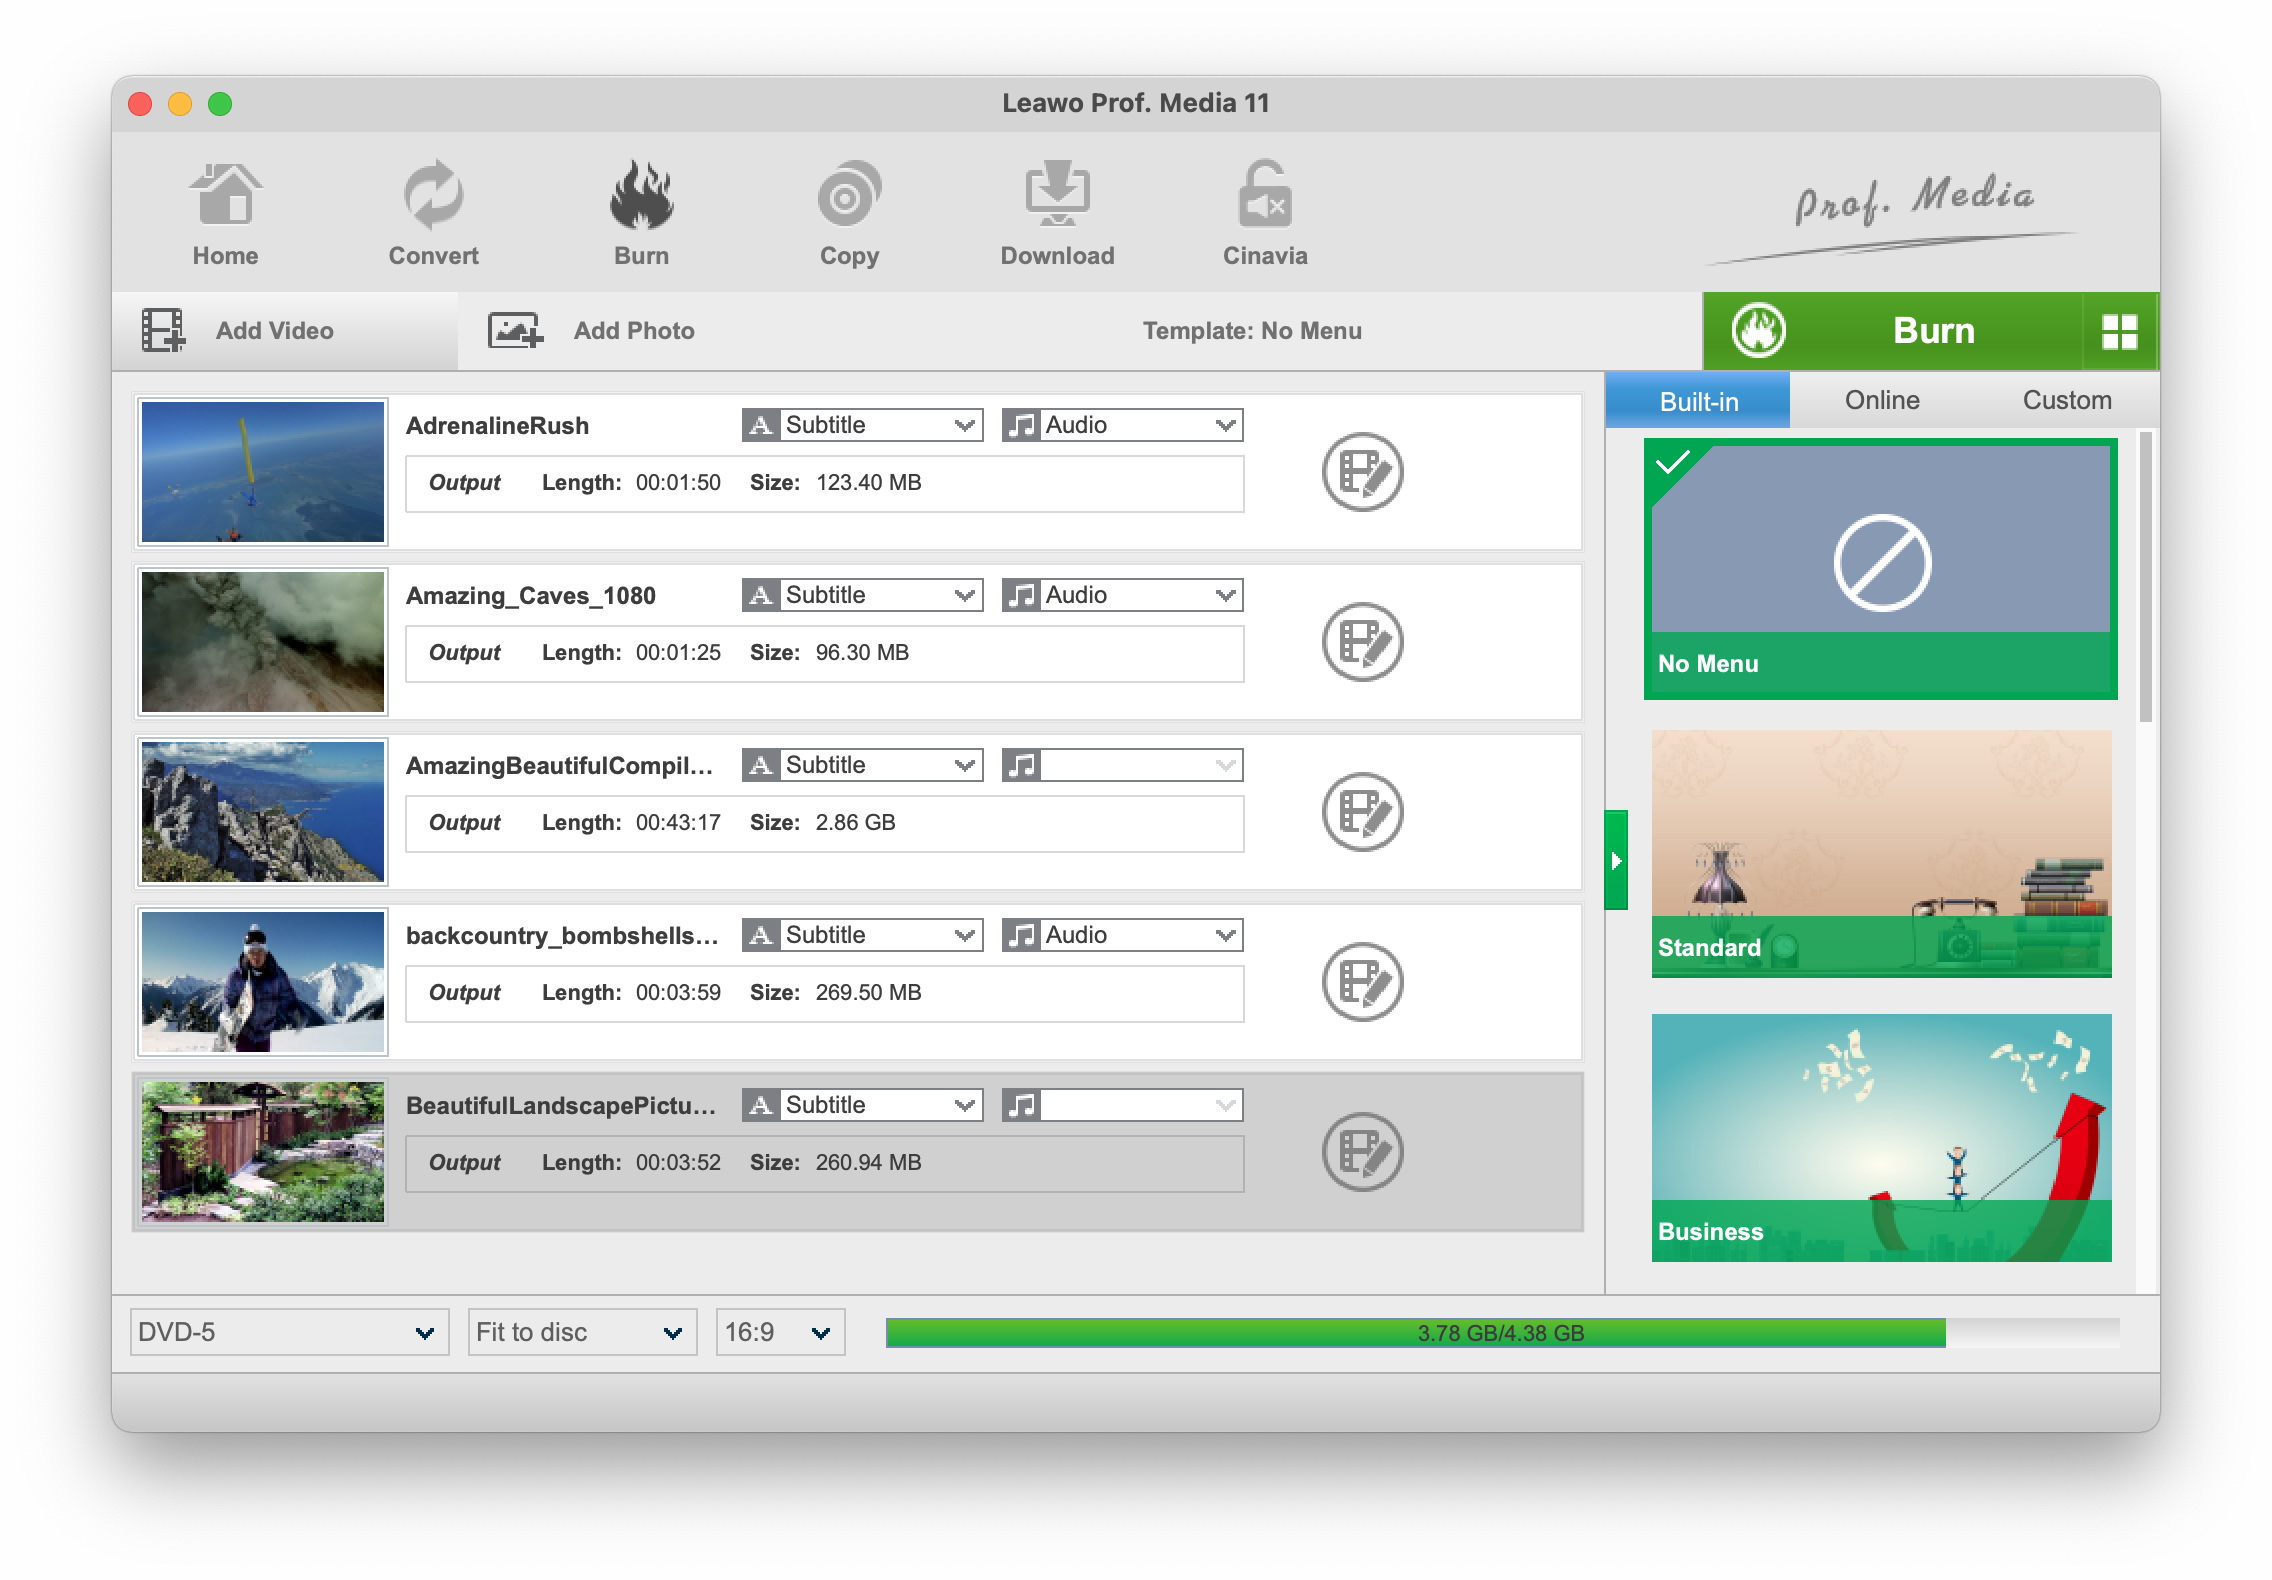
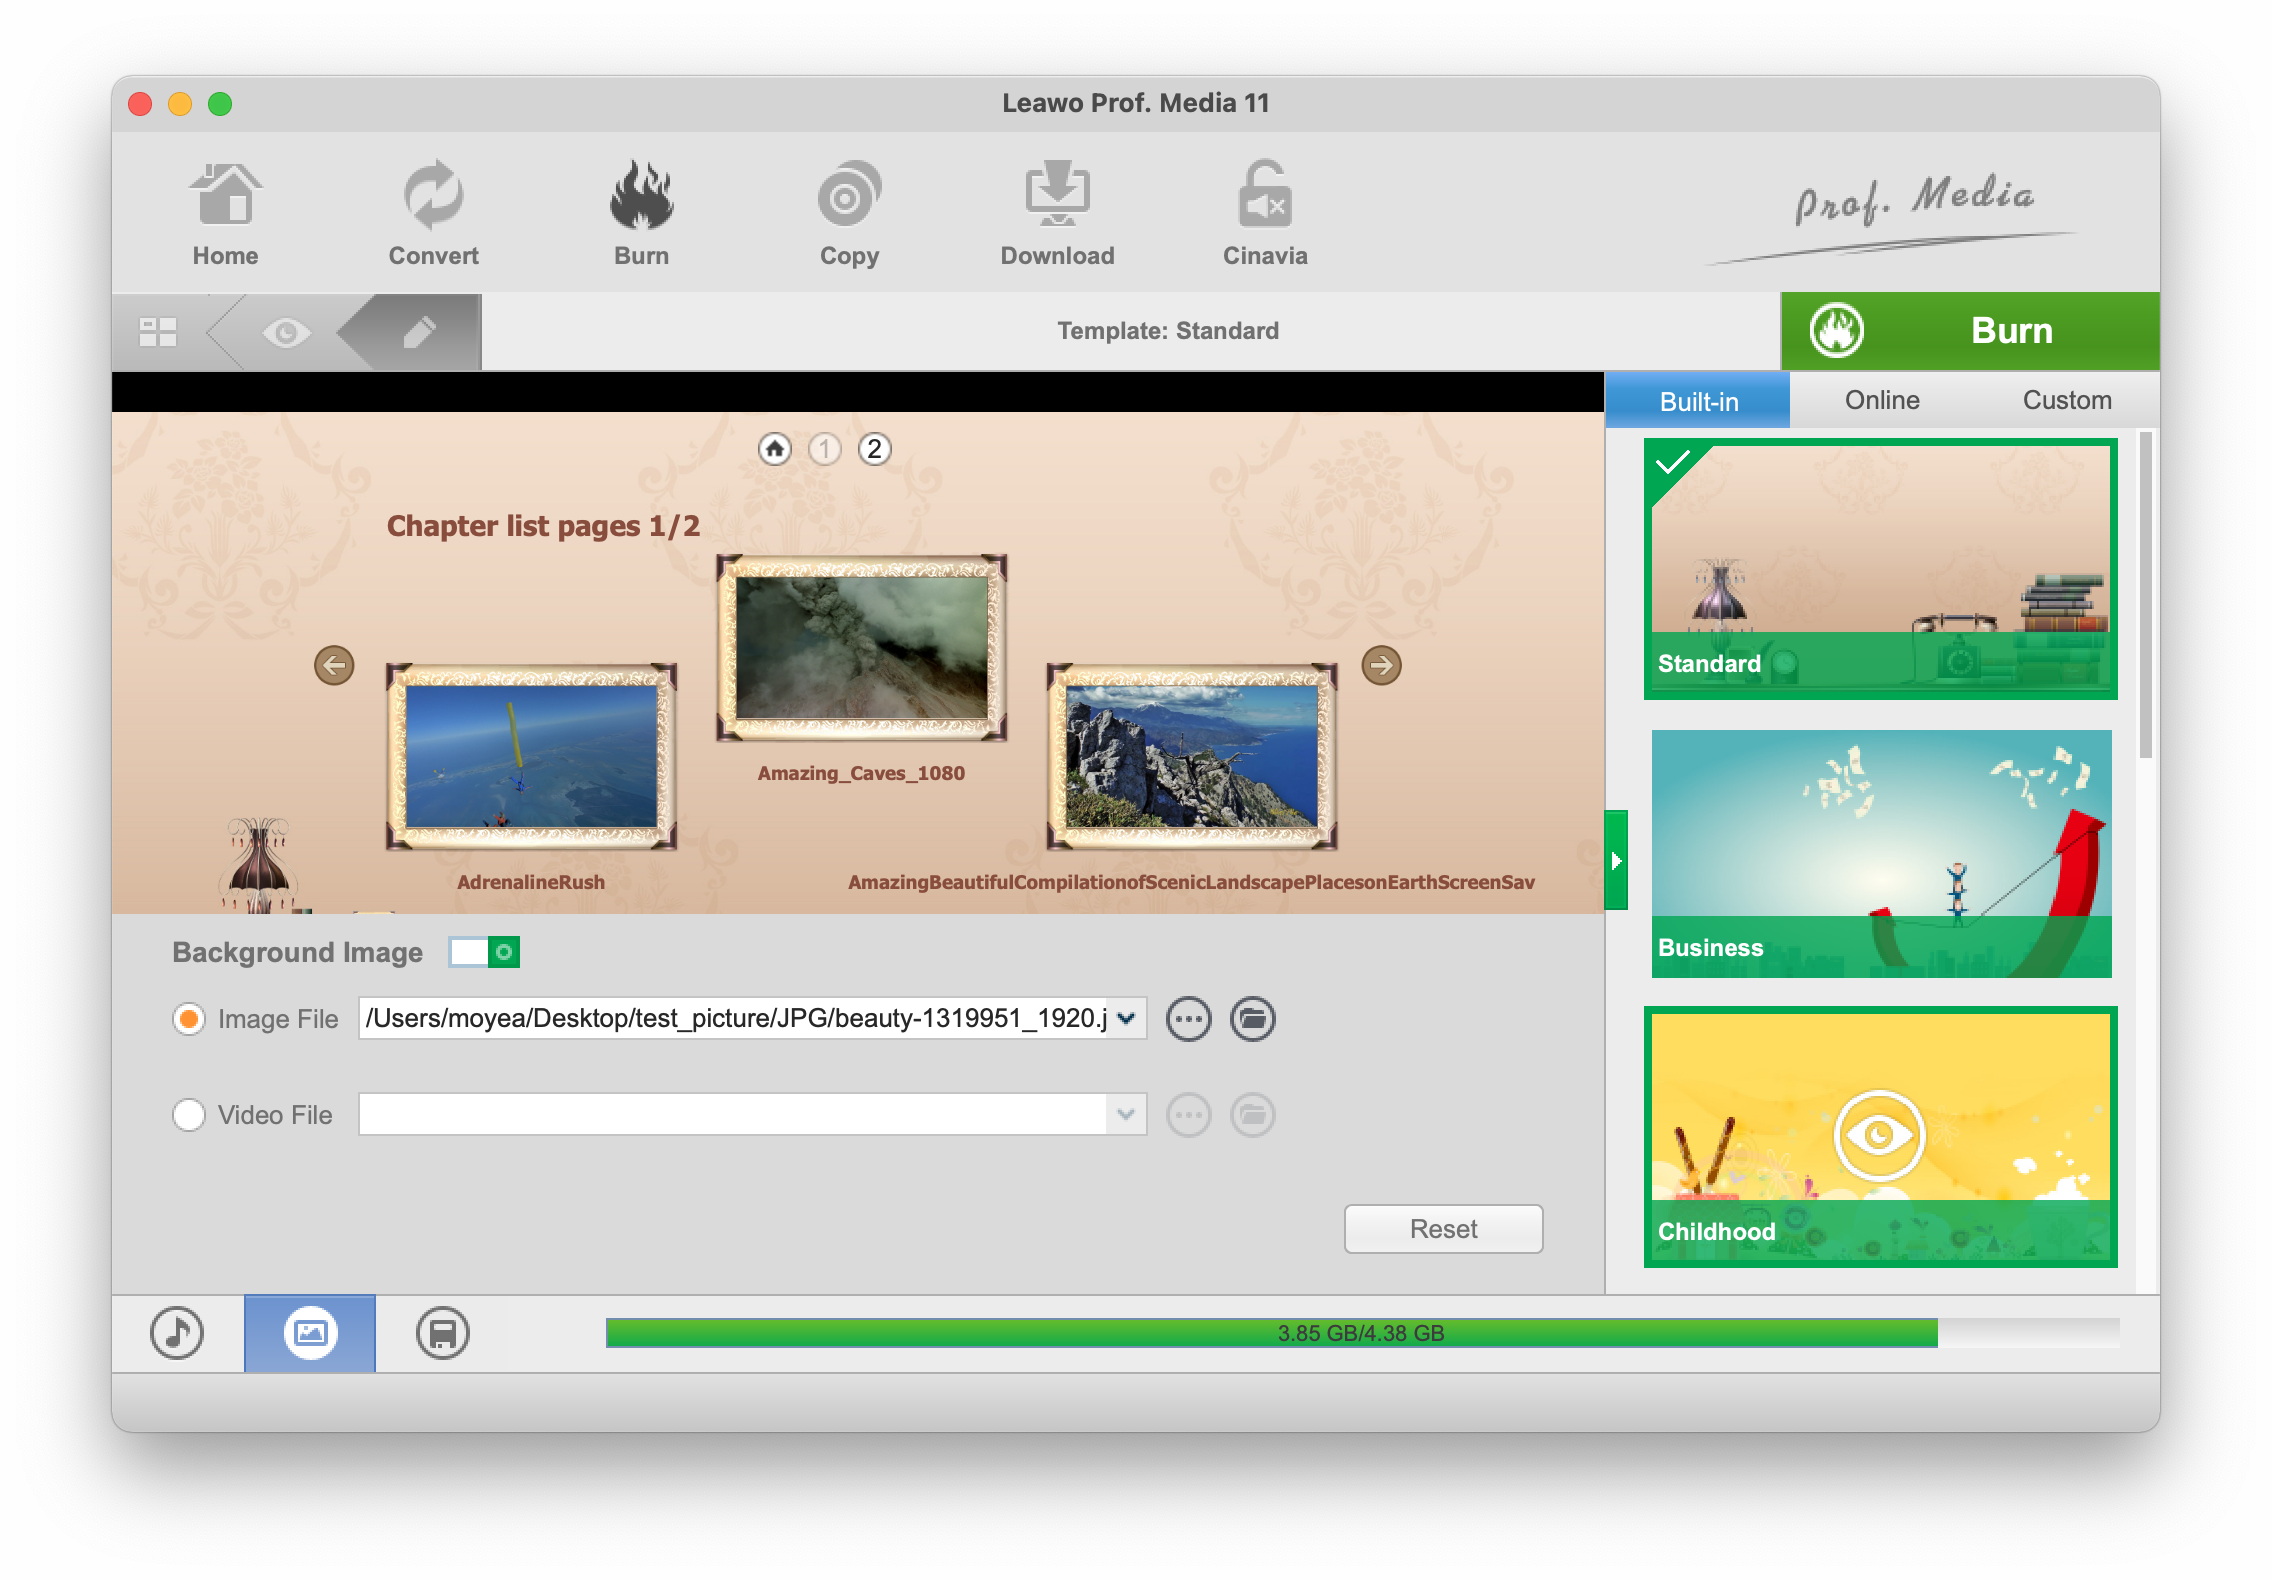
Step 2 Select disc menu
You can customize the DVD disc menu by selecting a desired template from the sidebar on the right side of the interface. After selecting, you can click the eye icon in the middle of selected template to have a preview. On the occasion of not wanting a disc menu, you can just click "No Menu" option.
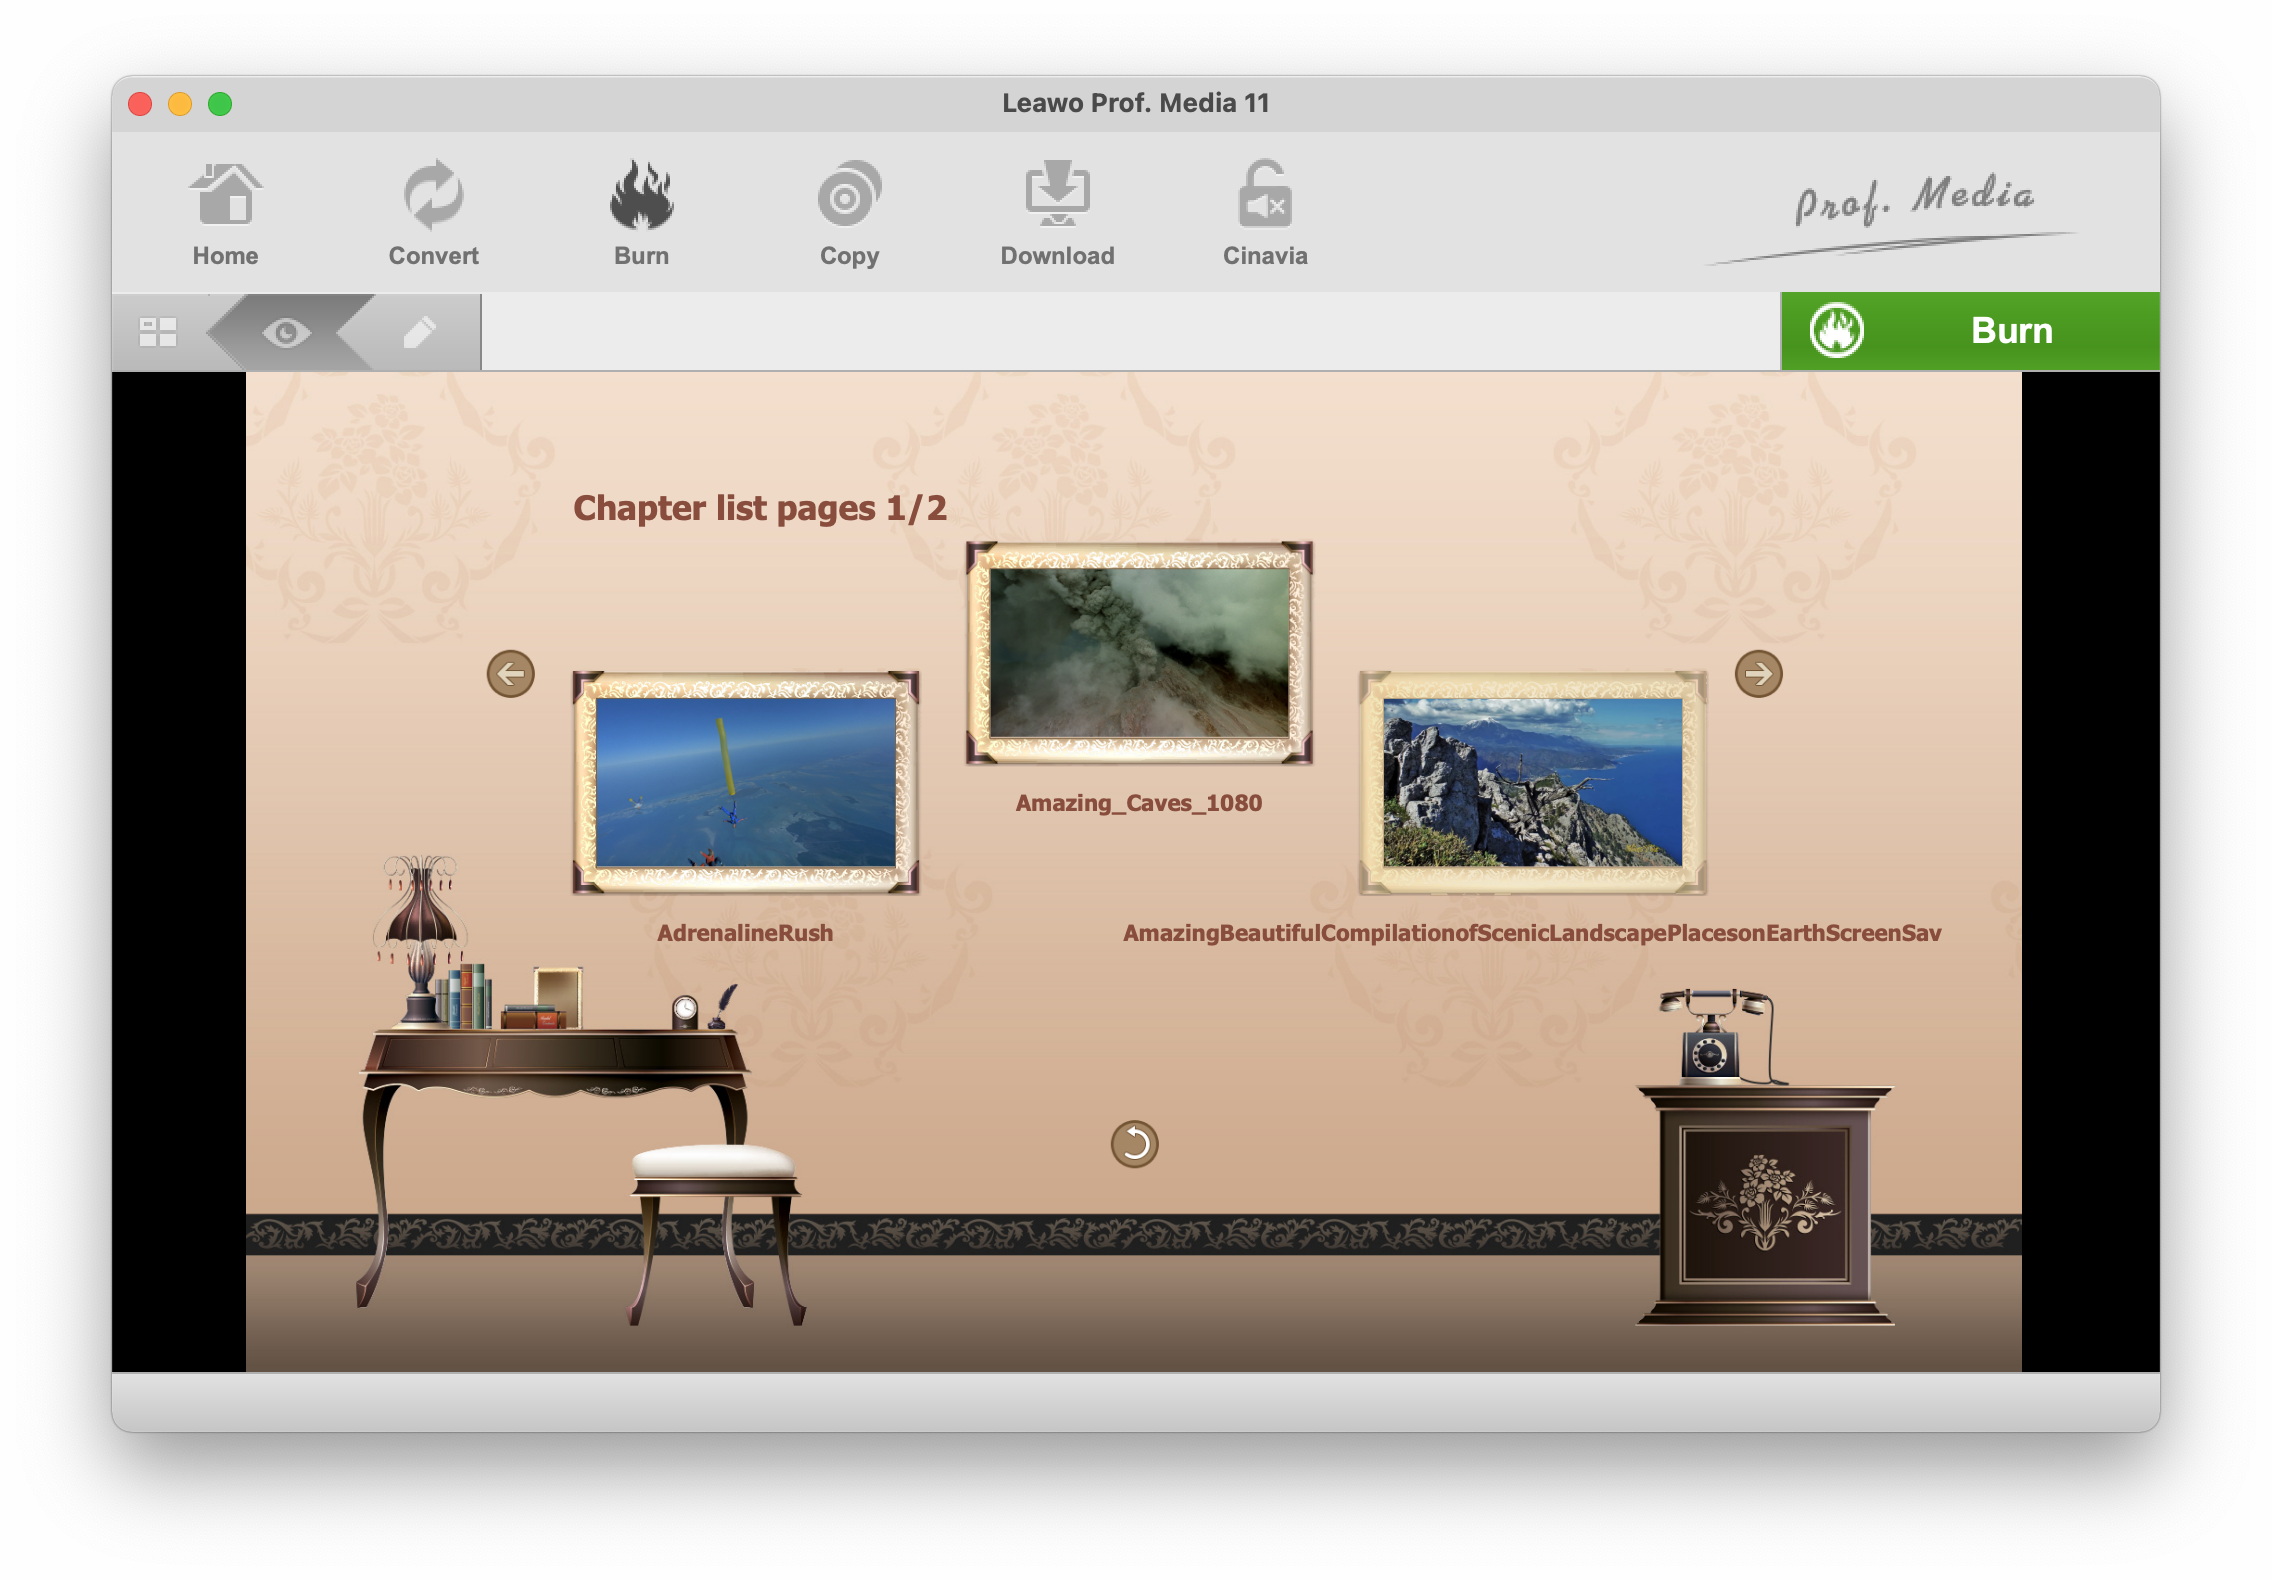
Note: Equipped with an internal menu editor, Leawo Video Converter Ultimate enables you to design your own disc menu. During menu previewing, you shall click the pencil icon on the sub-menu bar of the menu preview panel to start disc menu designing. You can design the disc menu by adding background music, image, or video, changing main menu and chapter titles, adjusting title text content, color, size, font, position, etc.
Step 3 Burn settings
After disc menu design is completed, click the green “Burn” button on the sub-menu bar and a final burning setting sidebar will pop up. On the popup sidebar, you shall set "Burn to", "Disc Label", and "Save to".
Note: You can choose DVD folder burning, ISO File burning or DVD disc burning. You shall choose at least one of the three burning options, however, burning video to DVD disc requires a DVD disc inserted to the DVD drive that is connected with your computer.

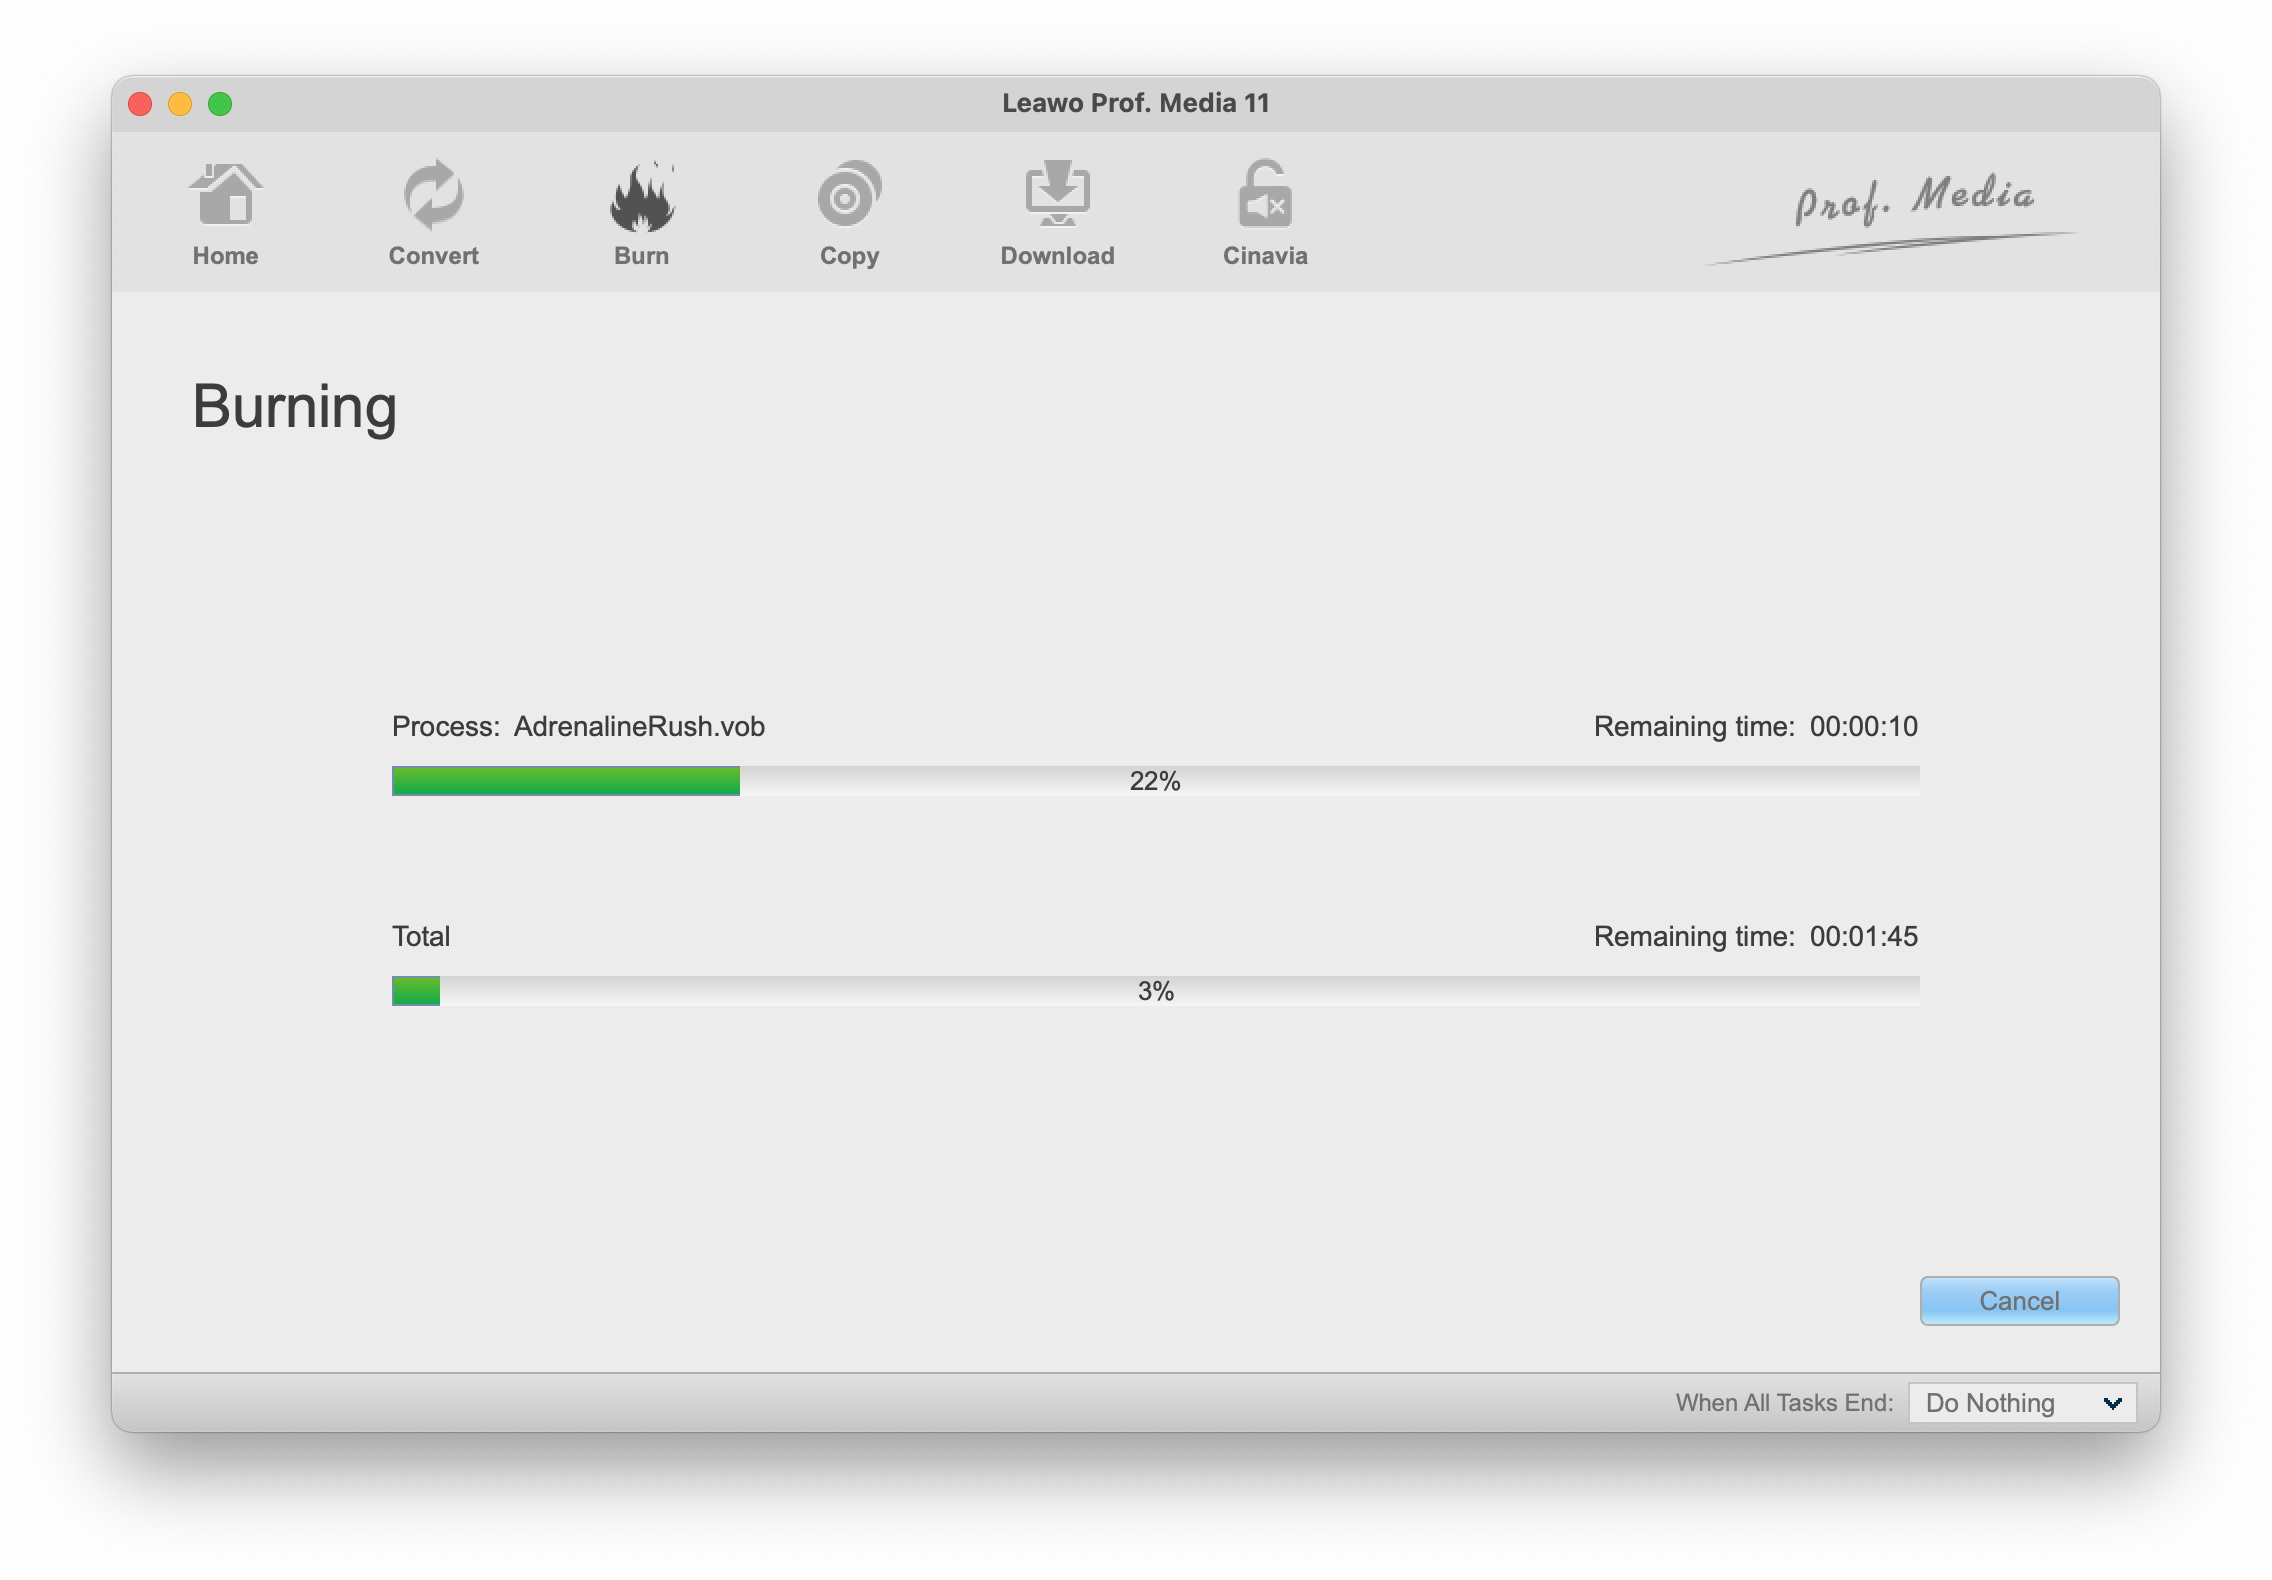
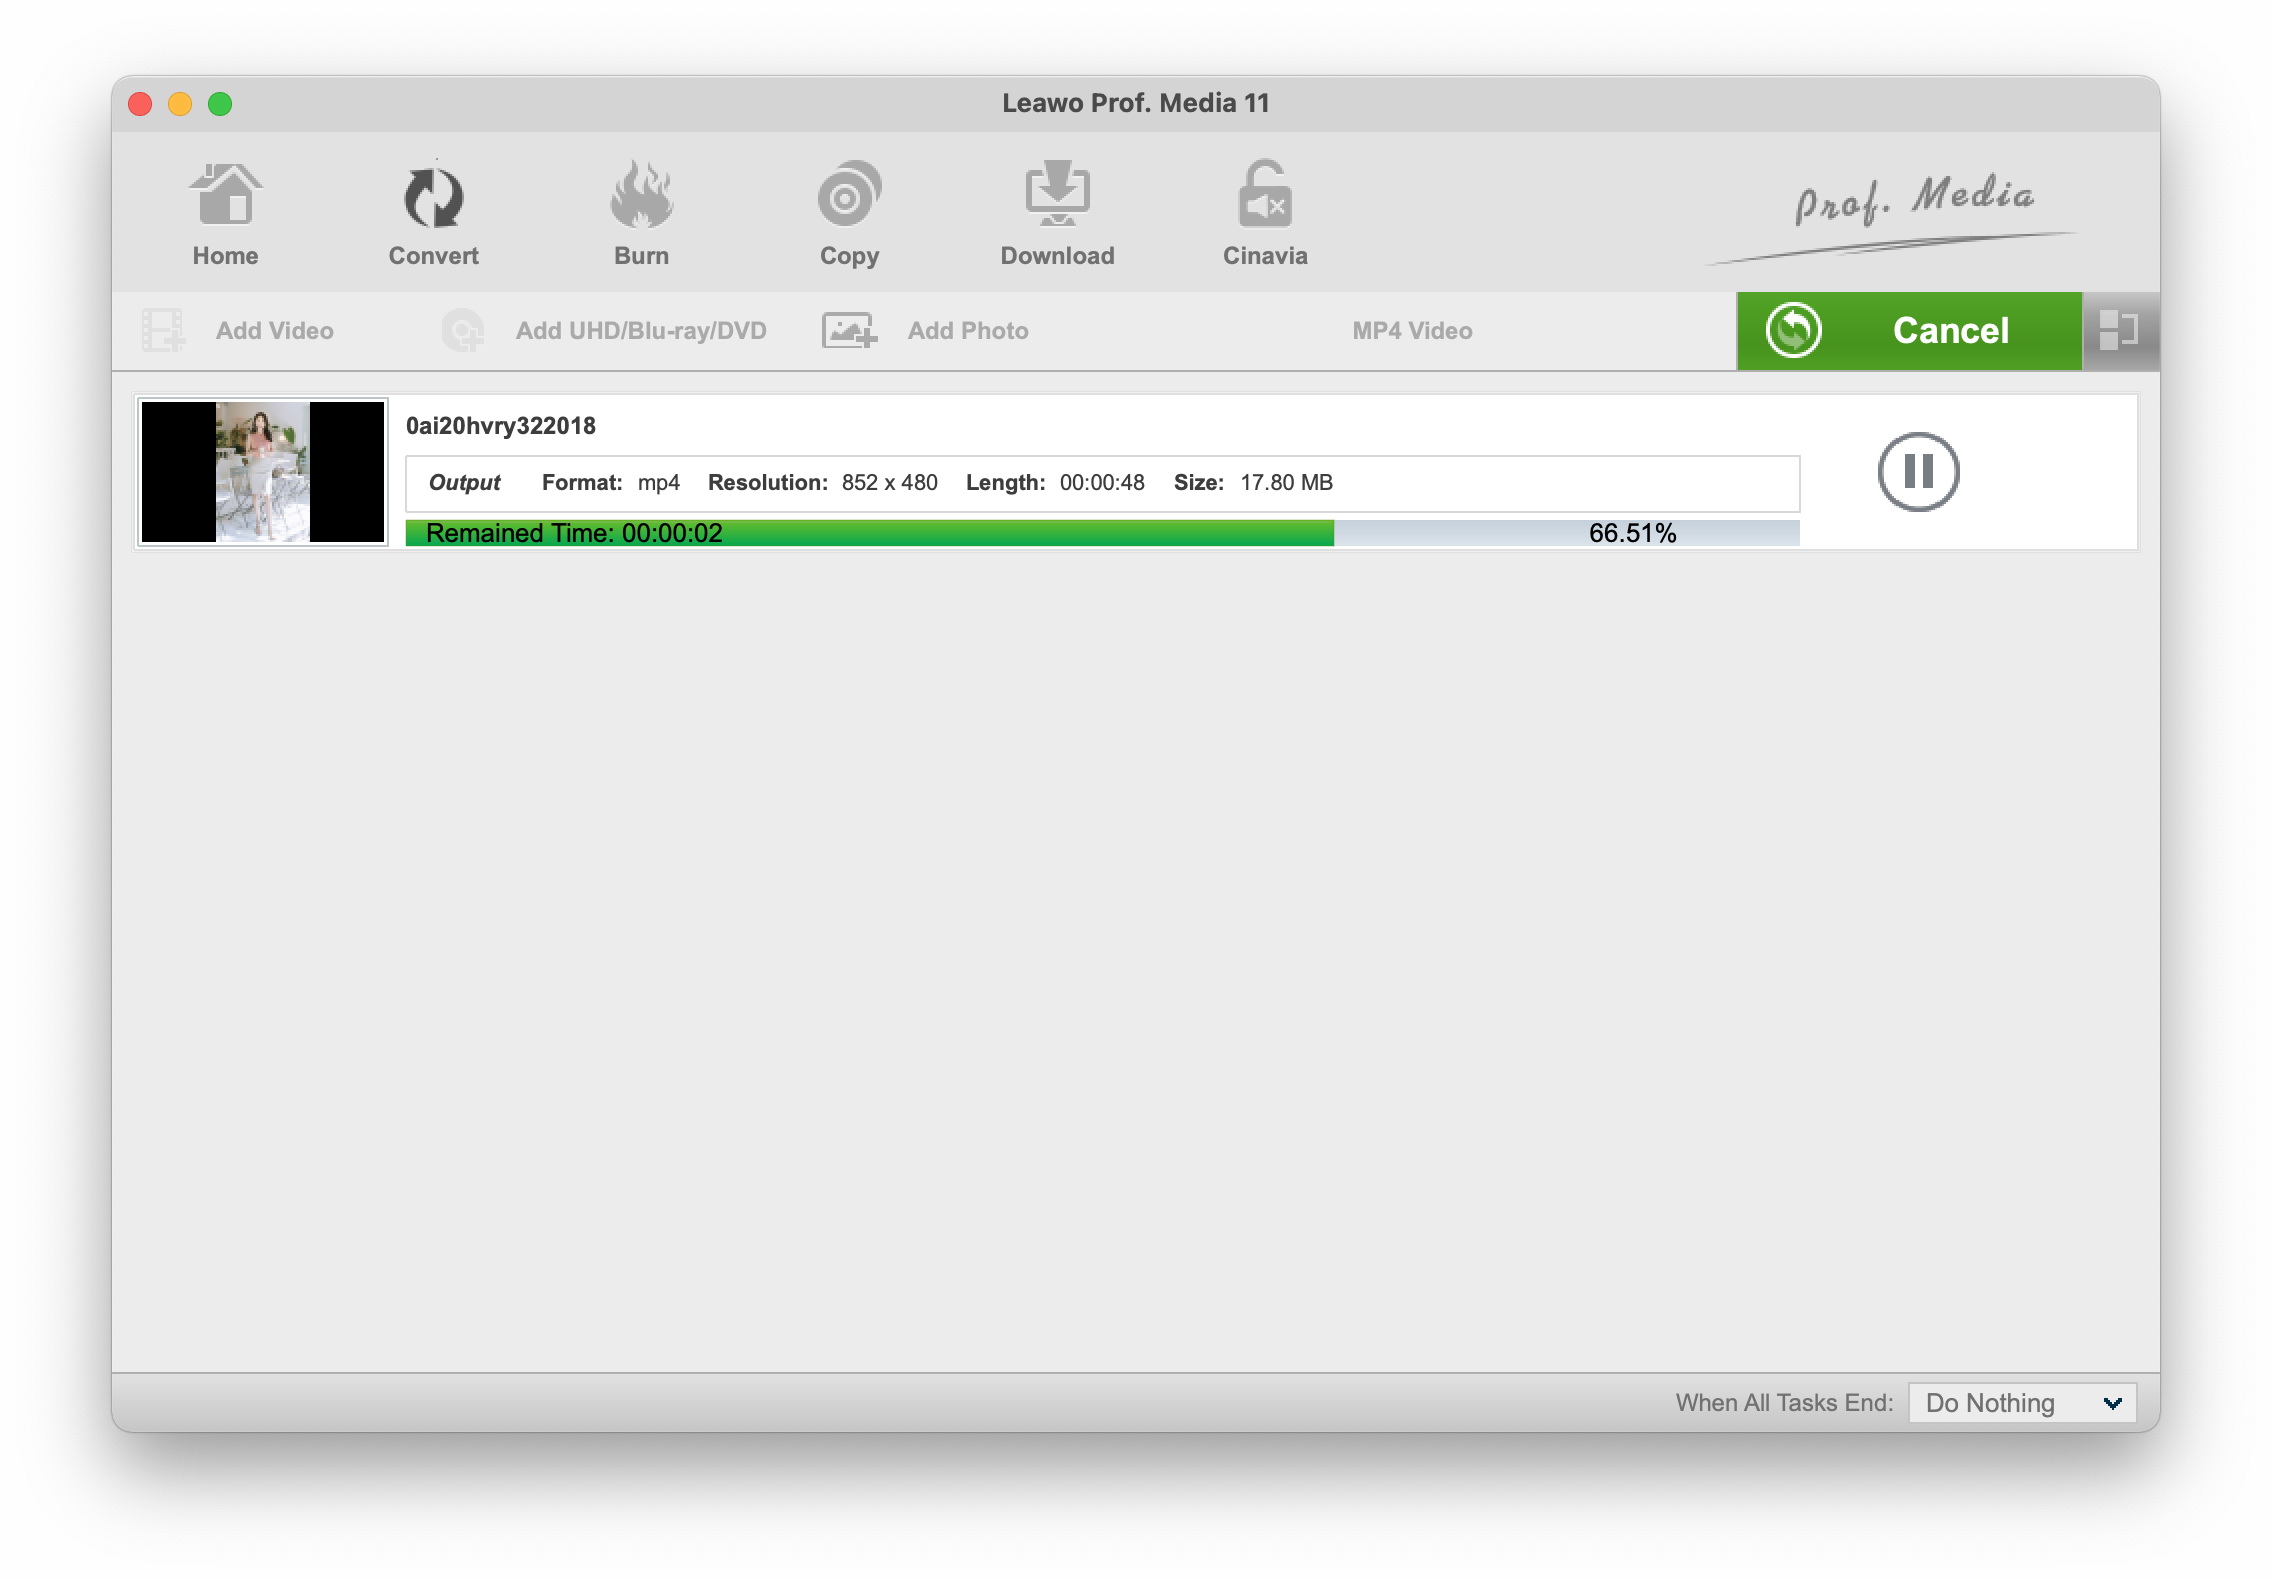
Step 4 Start burning
After settings, click the “Burn” button at the bottom of the burning setting sidebar to start burning. During the burning process, you can preview the burning remained time.
Burning ISO to DVD
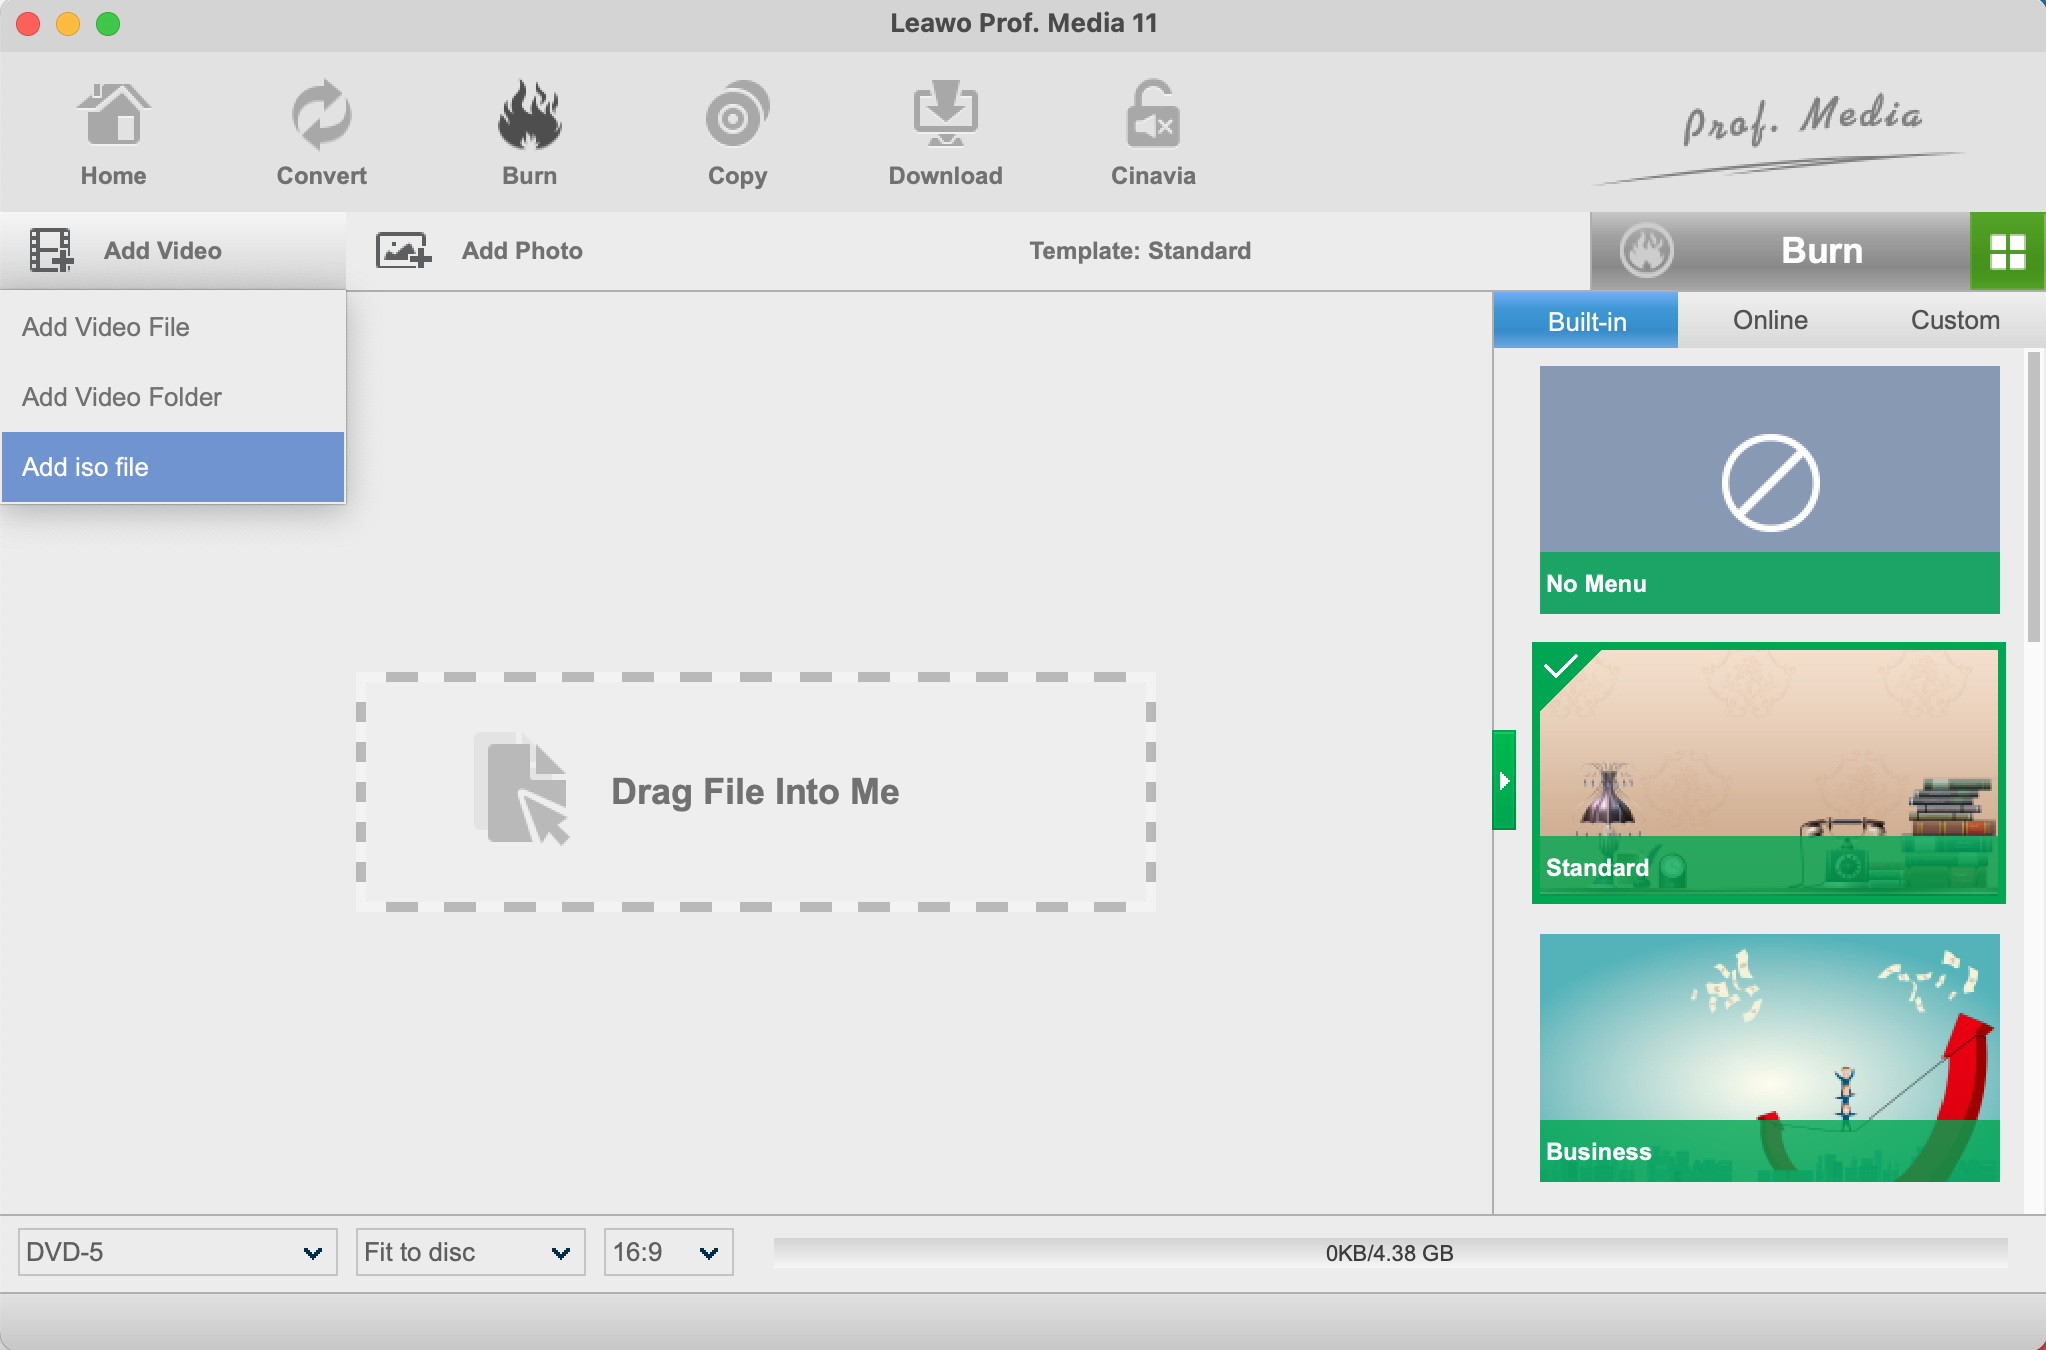
Step 1 Load ISO file
Insert a blank and writable disc into the disc drive beforehand and launch Video Converter Ultimate. Under the “Burn” module, there is a hidden fuction in the "Add Video" button. Click the inverted drop-down arrow icon next to the “Add Video” button and then select “Add iso file” option to browse and load ISO file for burning.
Step 2 Perform burning settings
An “Add iso file” window will pop up the moment the iso file is loaded. On the popup window, you shall set "Copy to" and "Disc Label".
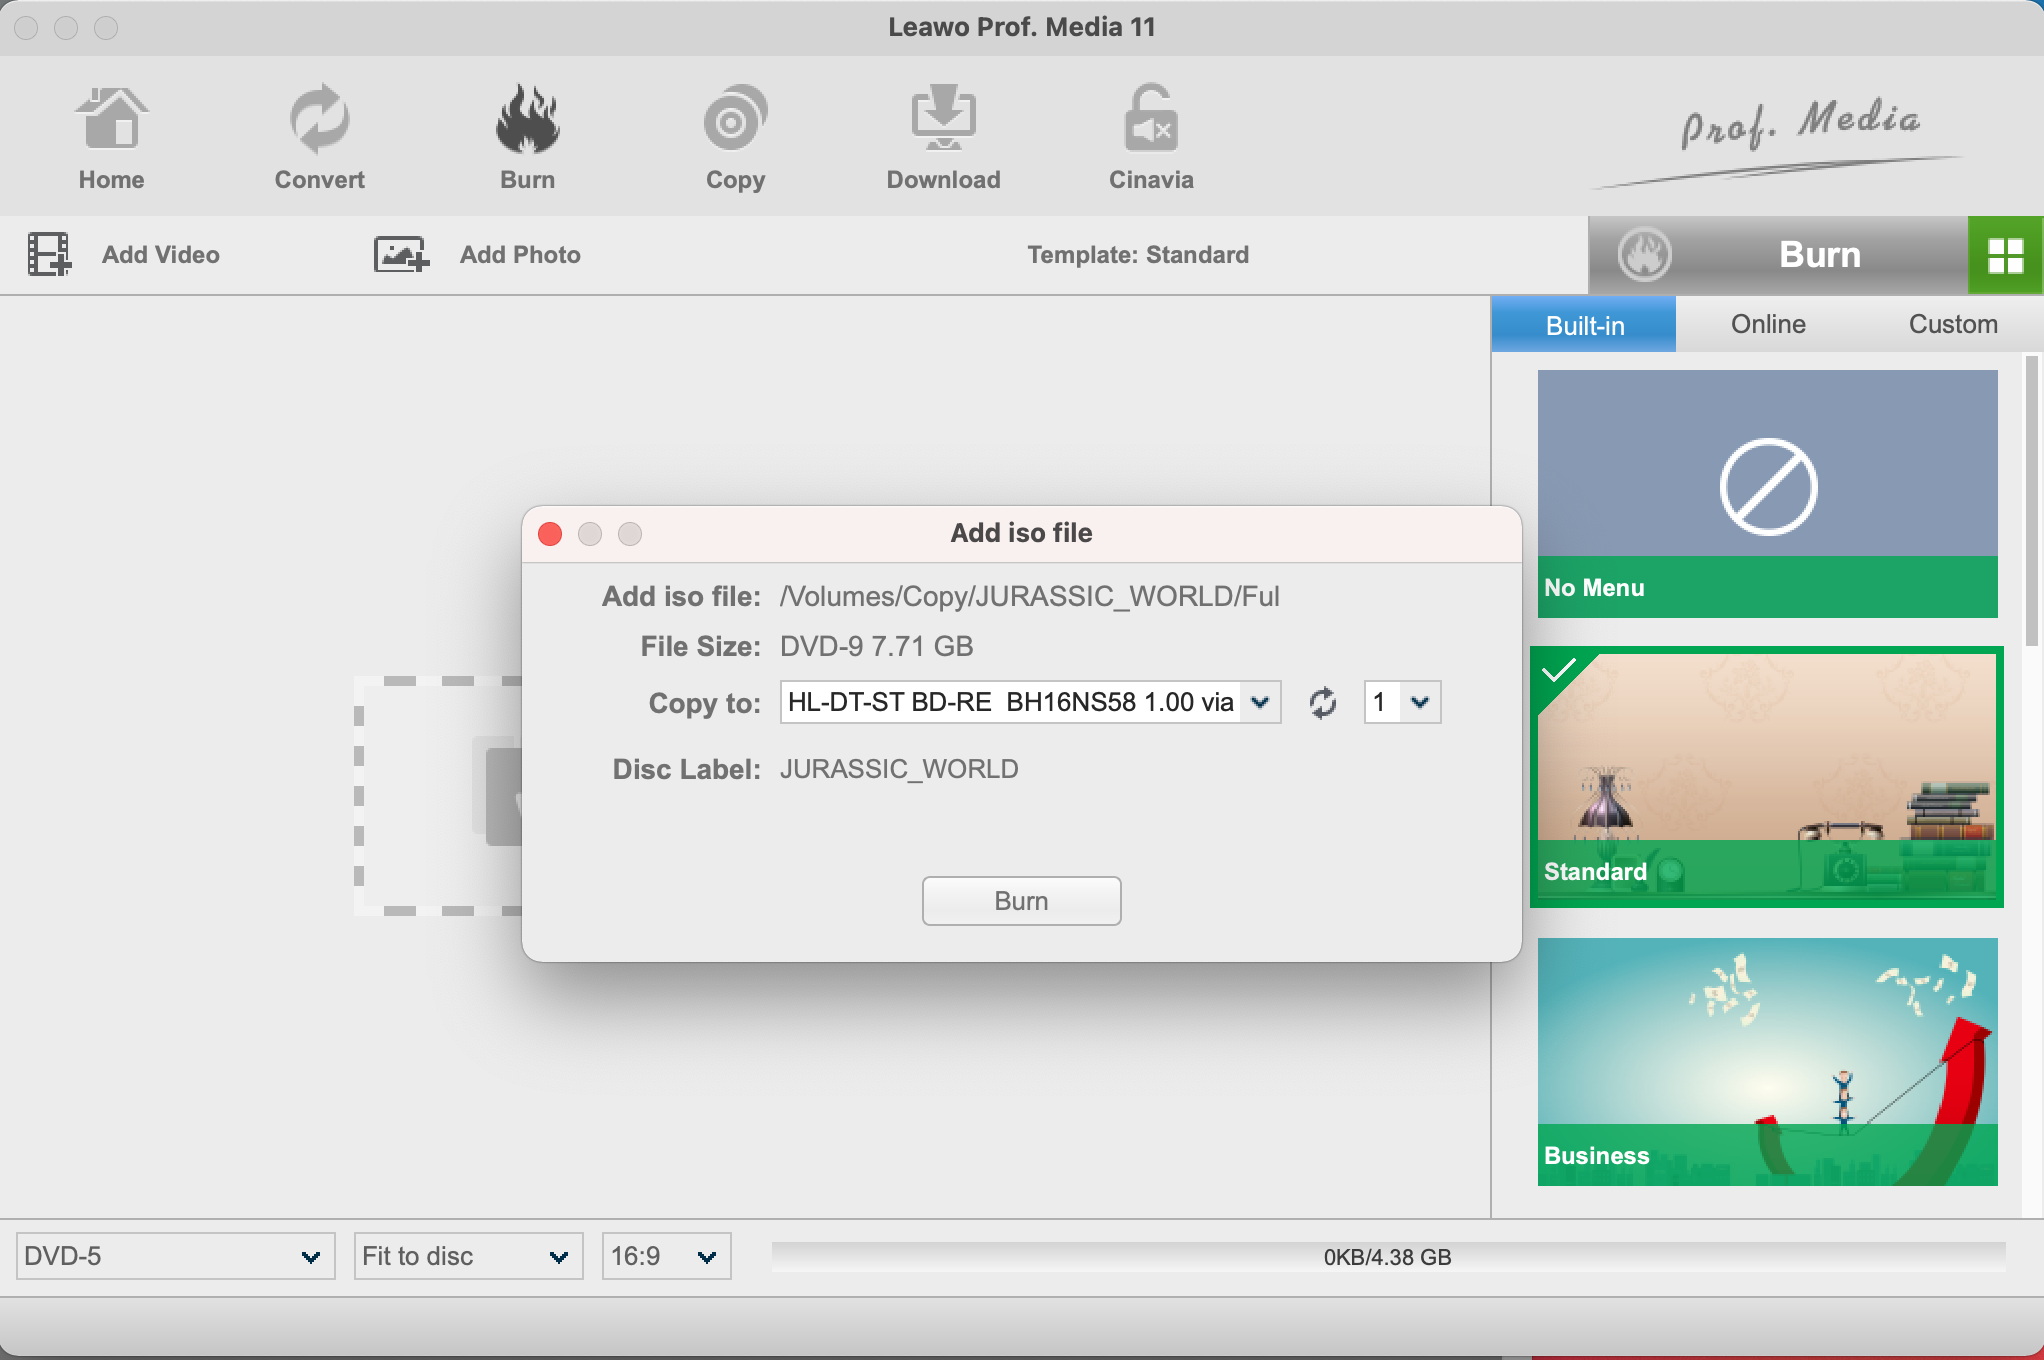
Note: If you don't insert a writable DVD disc, you cannot set "Copy to" on the popup window.
Step 3 Start the burning process from ISO to disc
Click the “Burn” button on the “Add iso file” window to start ISO to disc burning. You can also view the buring remained time.

Download Online Videos
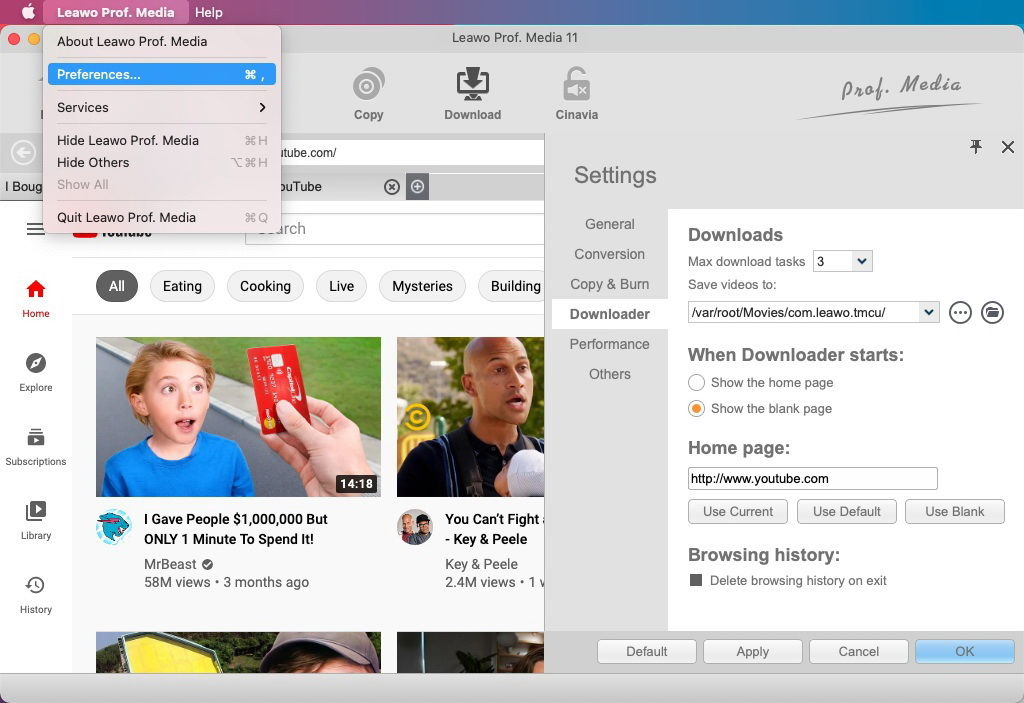
Step 1 Set download path
On the program menu bar, click "Leawo Prof. Media > Preferences" option to call out the "Settings" panel. Then, open the "Download" tab to set download path in the "Save videos to" option.
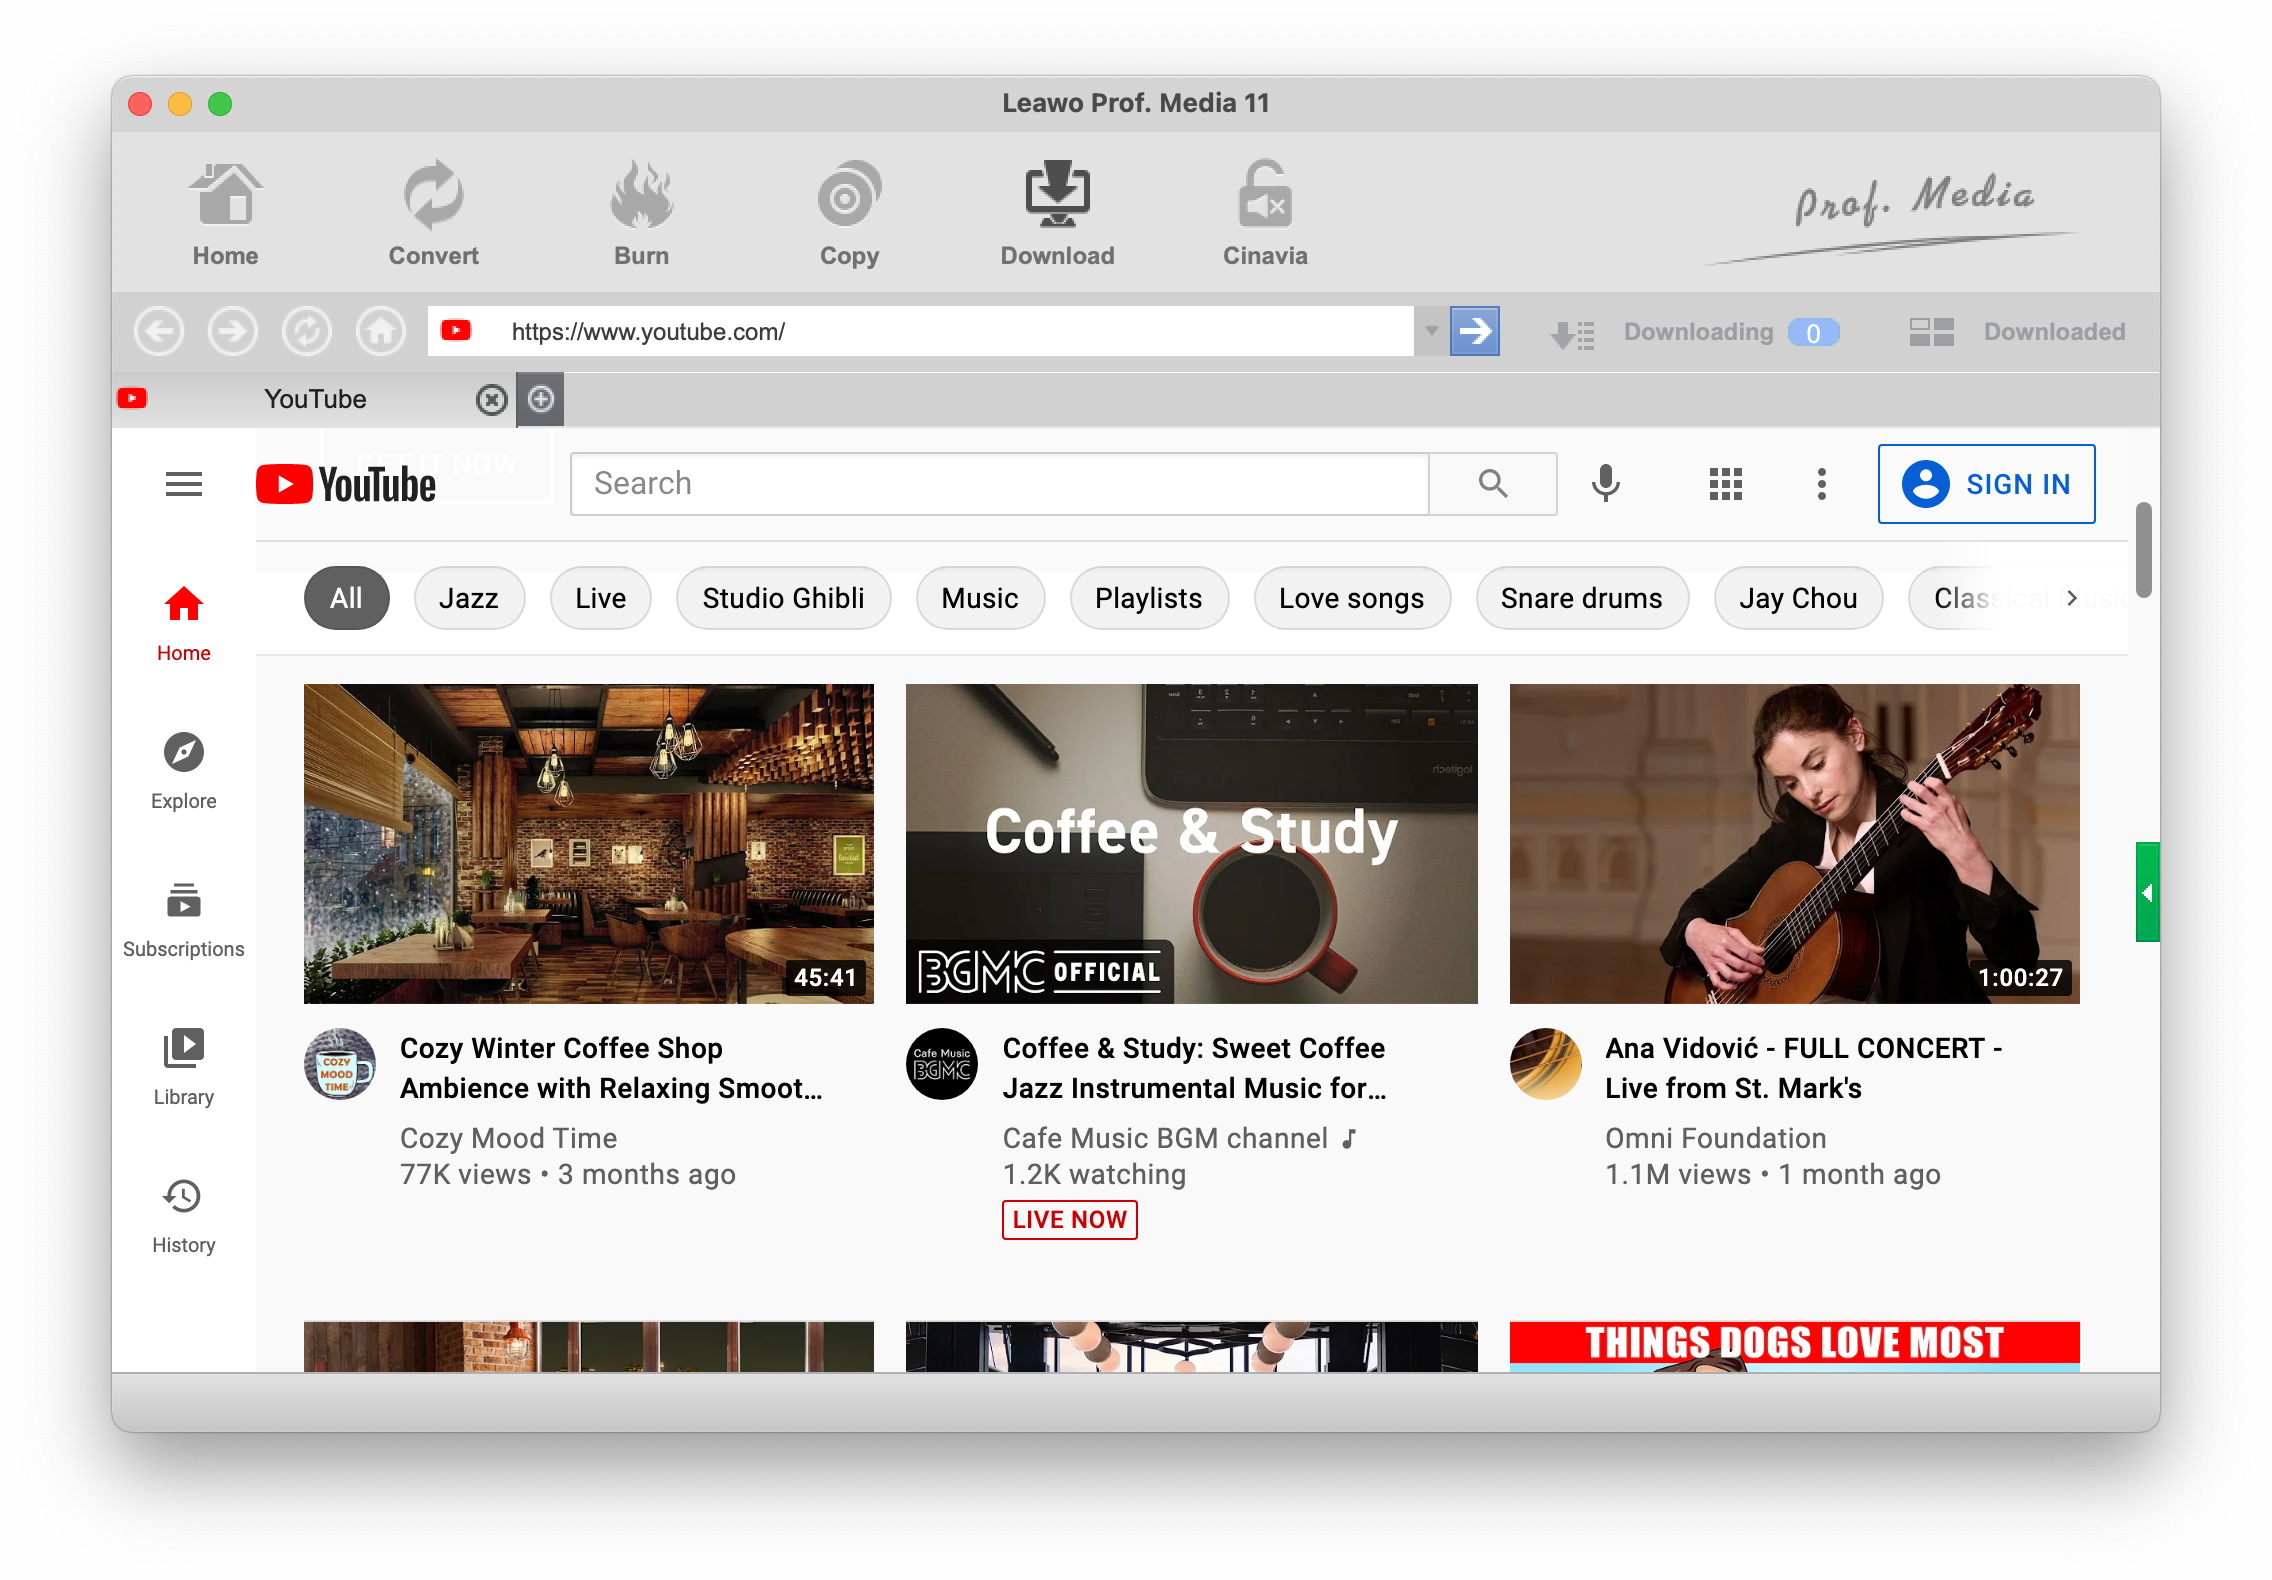
Step 2 Paste video URL
In "Download" section, there is a built-in web browsers and a video player. You shall copy the target video URL, paste it into the browser address bar, and press "Enter" key on the keyboard to let the video downloader detect target videos. The video length, size, quality and format will be displayed in each one video detected. Usually, there is more than one video detected. You can choose the most suitable one to download.
Step 3 Download online video
On the video detection list, select a video that best suits your need, and click the download icon to start downloading. You could find all downloading videos under “Downloading” tab.
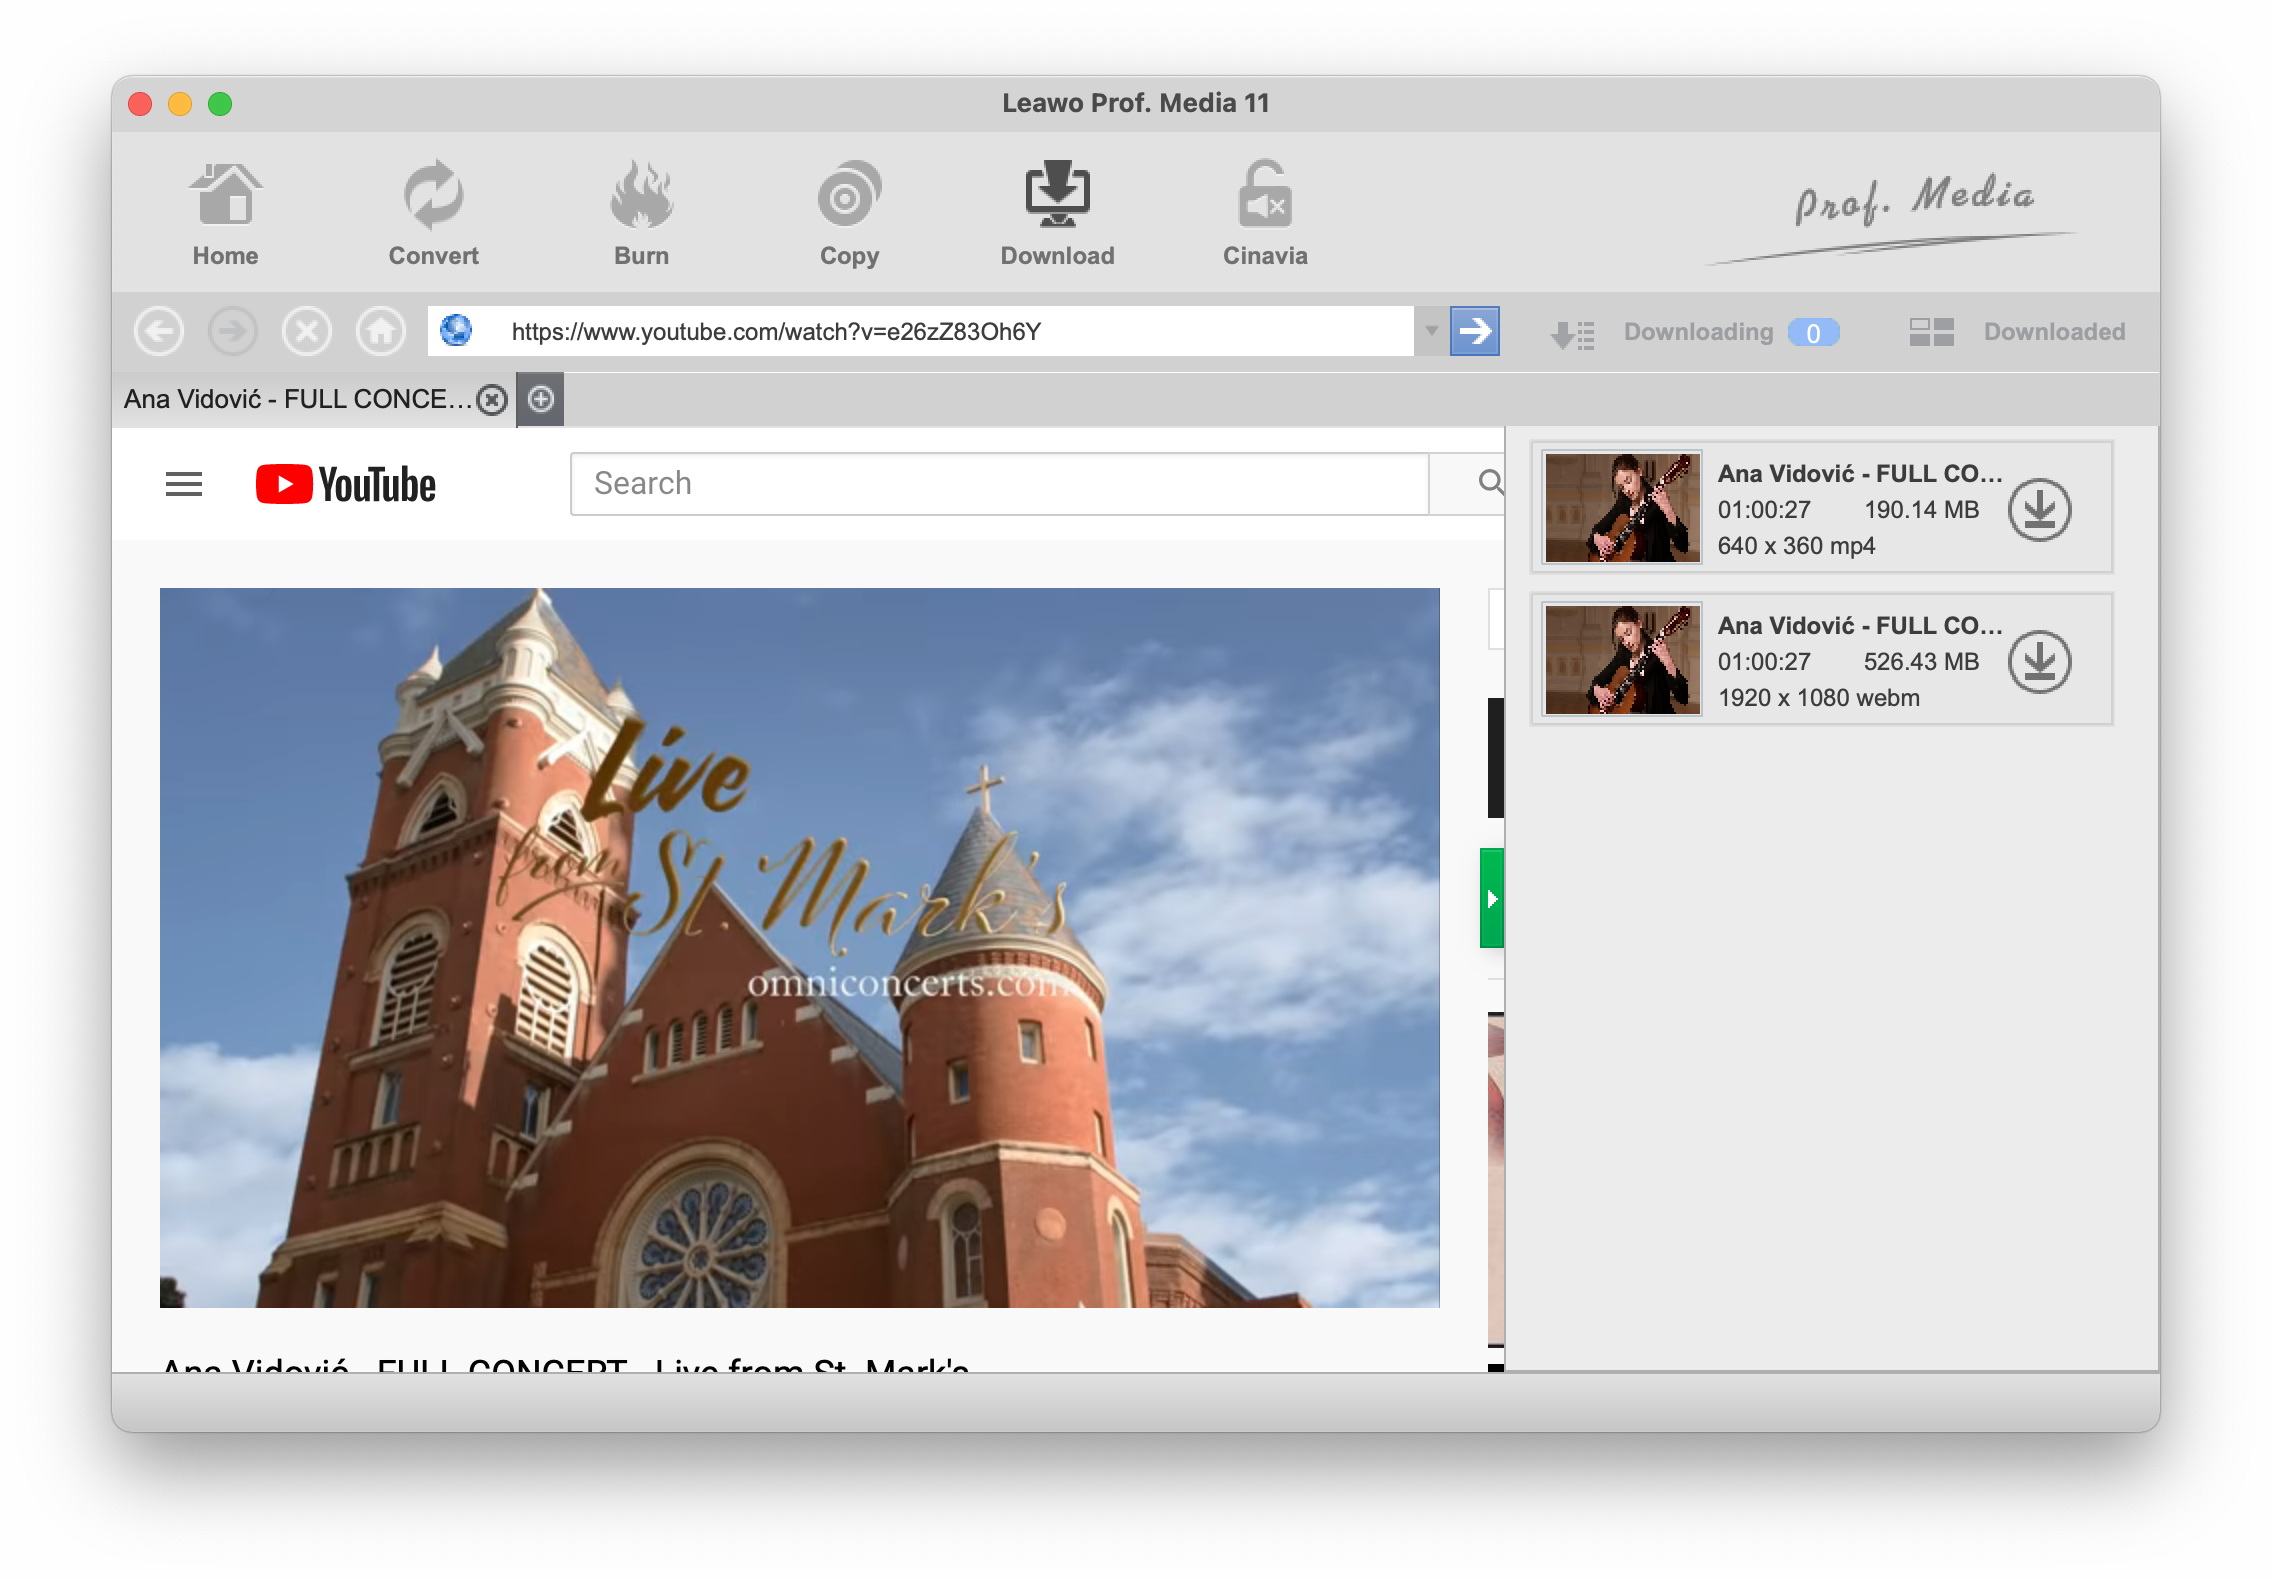
Step 4 After-download options
When downloading is completed, you can find all downloaded videos under "Downloaded" tab. You could play back the downloaded videos, convert downloaded videos to other formats by right clicking and then selecting "Add to Convert" option, and burn downloaded videos to DVD movies by right clicking and then selecting "Add to Burn" option.
Turn Photos to Photo Slideshow Video
Step 1 Import source photos
Open the "Convert" module and then click the "Add Photo" option or "Add Photo Folder" under the inverted triangle icon to browse and import source photos for making photo slideshow. Selected photos would be automatically generated into slideshow upon loading. Once photo slideshow is generated, you are permitted to play back and edit the slideshow by choice.

Step 2 Select output format
Click the drop-down list next to the "Add Photo" button and then select "Change" option to enter the Profile panel for output format setting. During the step, you can look for your desired format one by one in "Format" column or directly input the format name into the profile searching bar on the left. What's more, if you know the name of the output device, you can conveniently set output device in the "Device" column.
Note: After setting output profile, if necessary or for more advanced purposes, you could re-open the drop-down list and then click the "Edit" option to enter the Profile Settings panel, on which you could detail video and audio parameters of selected profile such as video codec, resolution, bit rate, aspect ratio, frame rate, audio codec, Sample Rate, Channels. Press "OK" button to return to the main interface.
Step 3 Set output directory
Once output profile is set, you will be returned to the main interface. Or if you complete profile settings, press "OK" button and then return to the main interface. On the main interface, click the big green "Convert" button to activate a sidebar, where you shall open the "Save to" box to set an output directory.

Step 4 Output slideshow video
Finally, click the bottom "Convert" button on the sidebar to start outputting generated slideshow. The output photo slideshow would be in the format you have just chosen.
Burn Photos to Photo Slideshow DVD
Step 1 Add source photos
Enter the burning program by clicking the "Burn" button on the upper menu of the interface, and then click the "Add Photo" button to import photos. A batch of photos loading is available by clicking "Add Photo Folder" instead. Photo slideshow is generated the moment photos or photo folder is imported into the program. You could play back and edit generated photo slideshows afterwards on the internal media player and video editor respectively. Before the burning process takes place, you are required to set output disc type(DVD-5, DVD-9), quality and aspect ratio at the bottom.
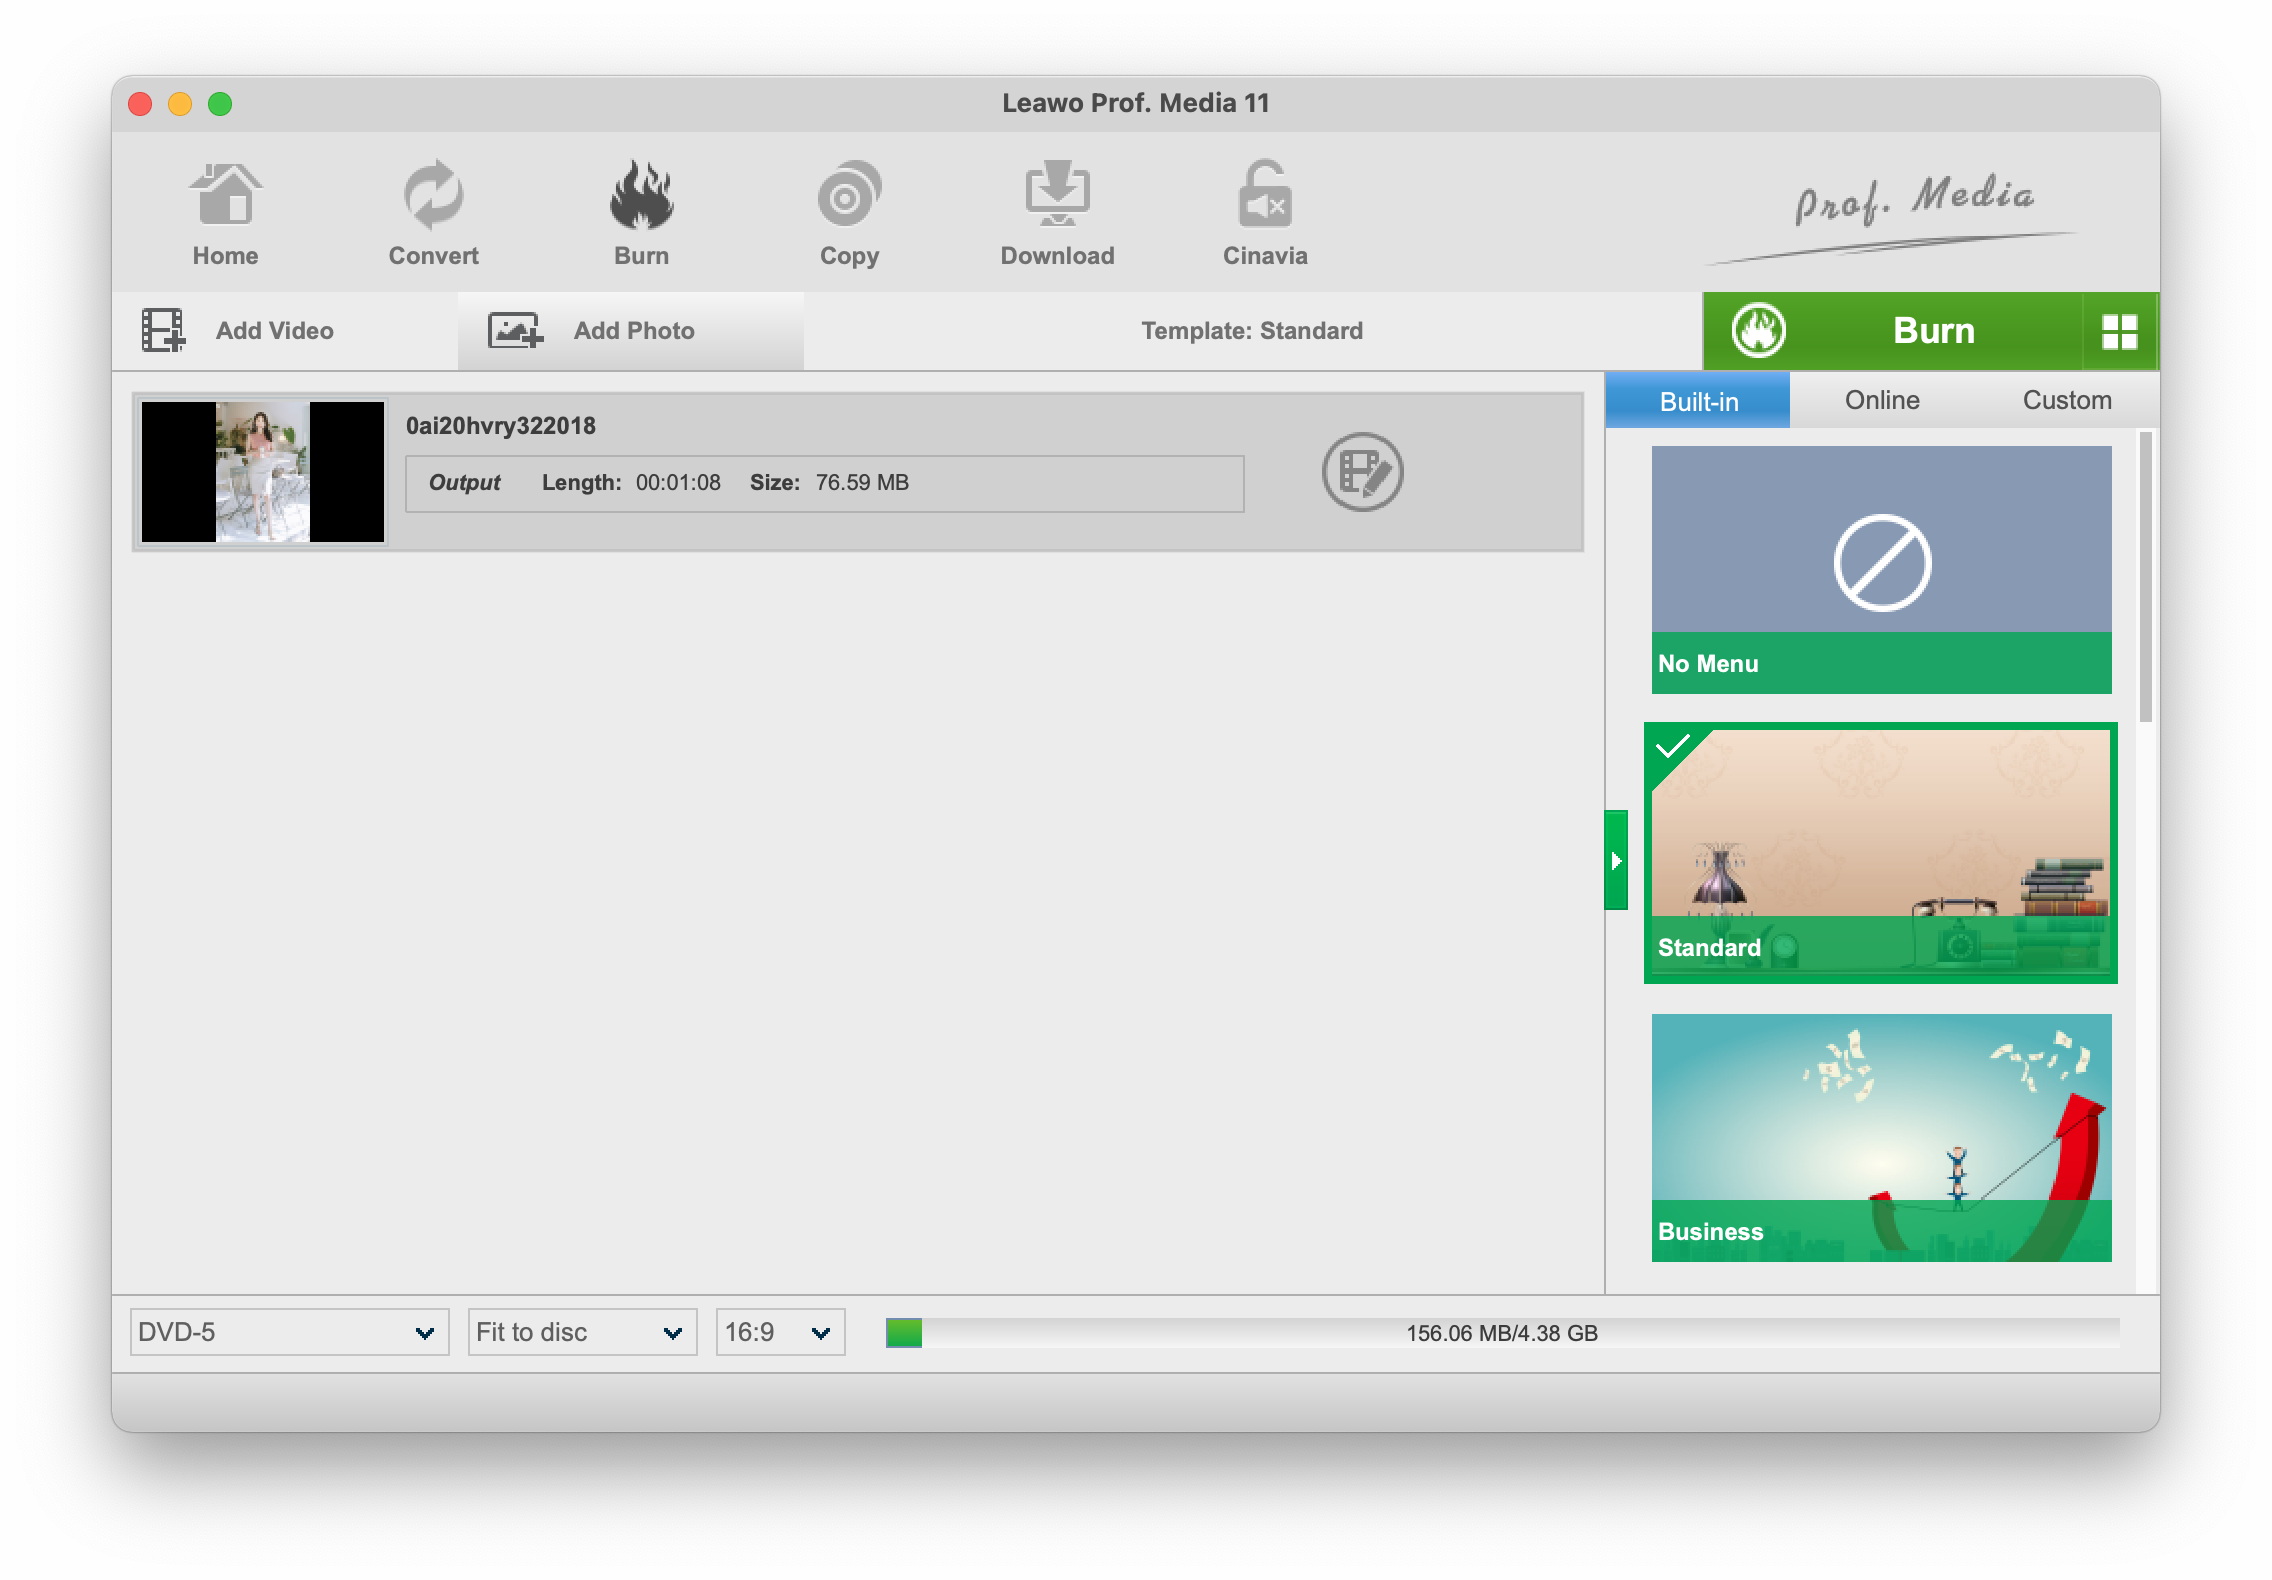
Step 2 Set disc menu
Templates from the sidebar on the right could be selected to make disc menus to the final DVD photo slideshow. After template is selected, click the eye icon at the middle of selected disc menu template to get an instant preview.

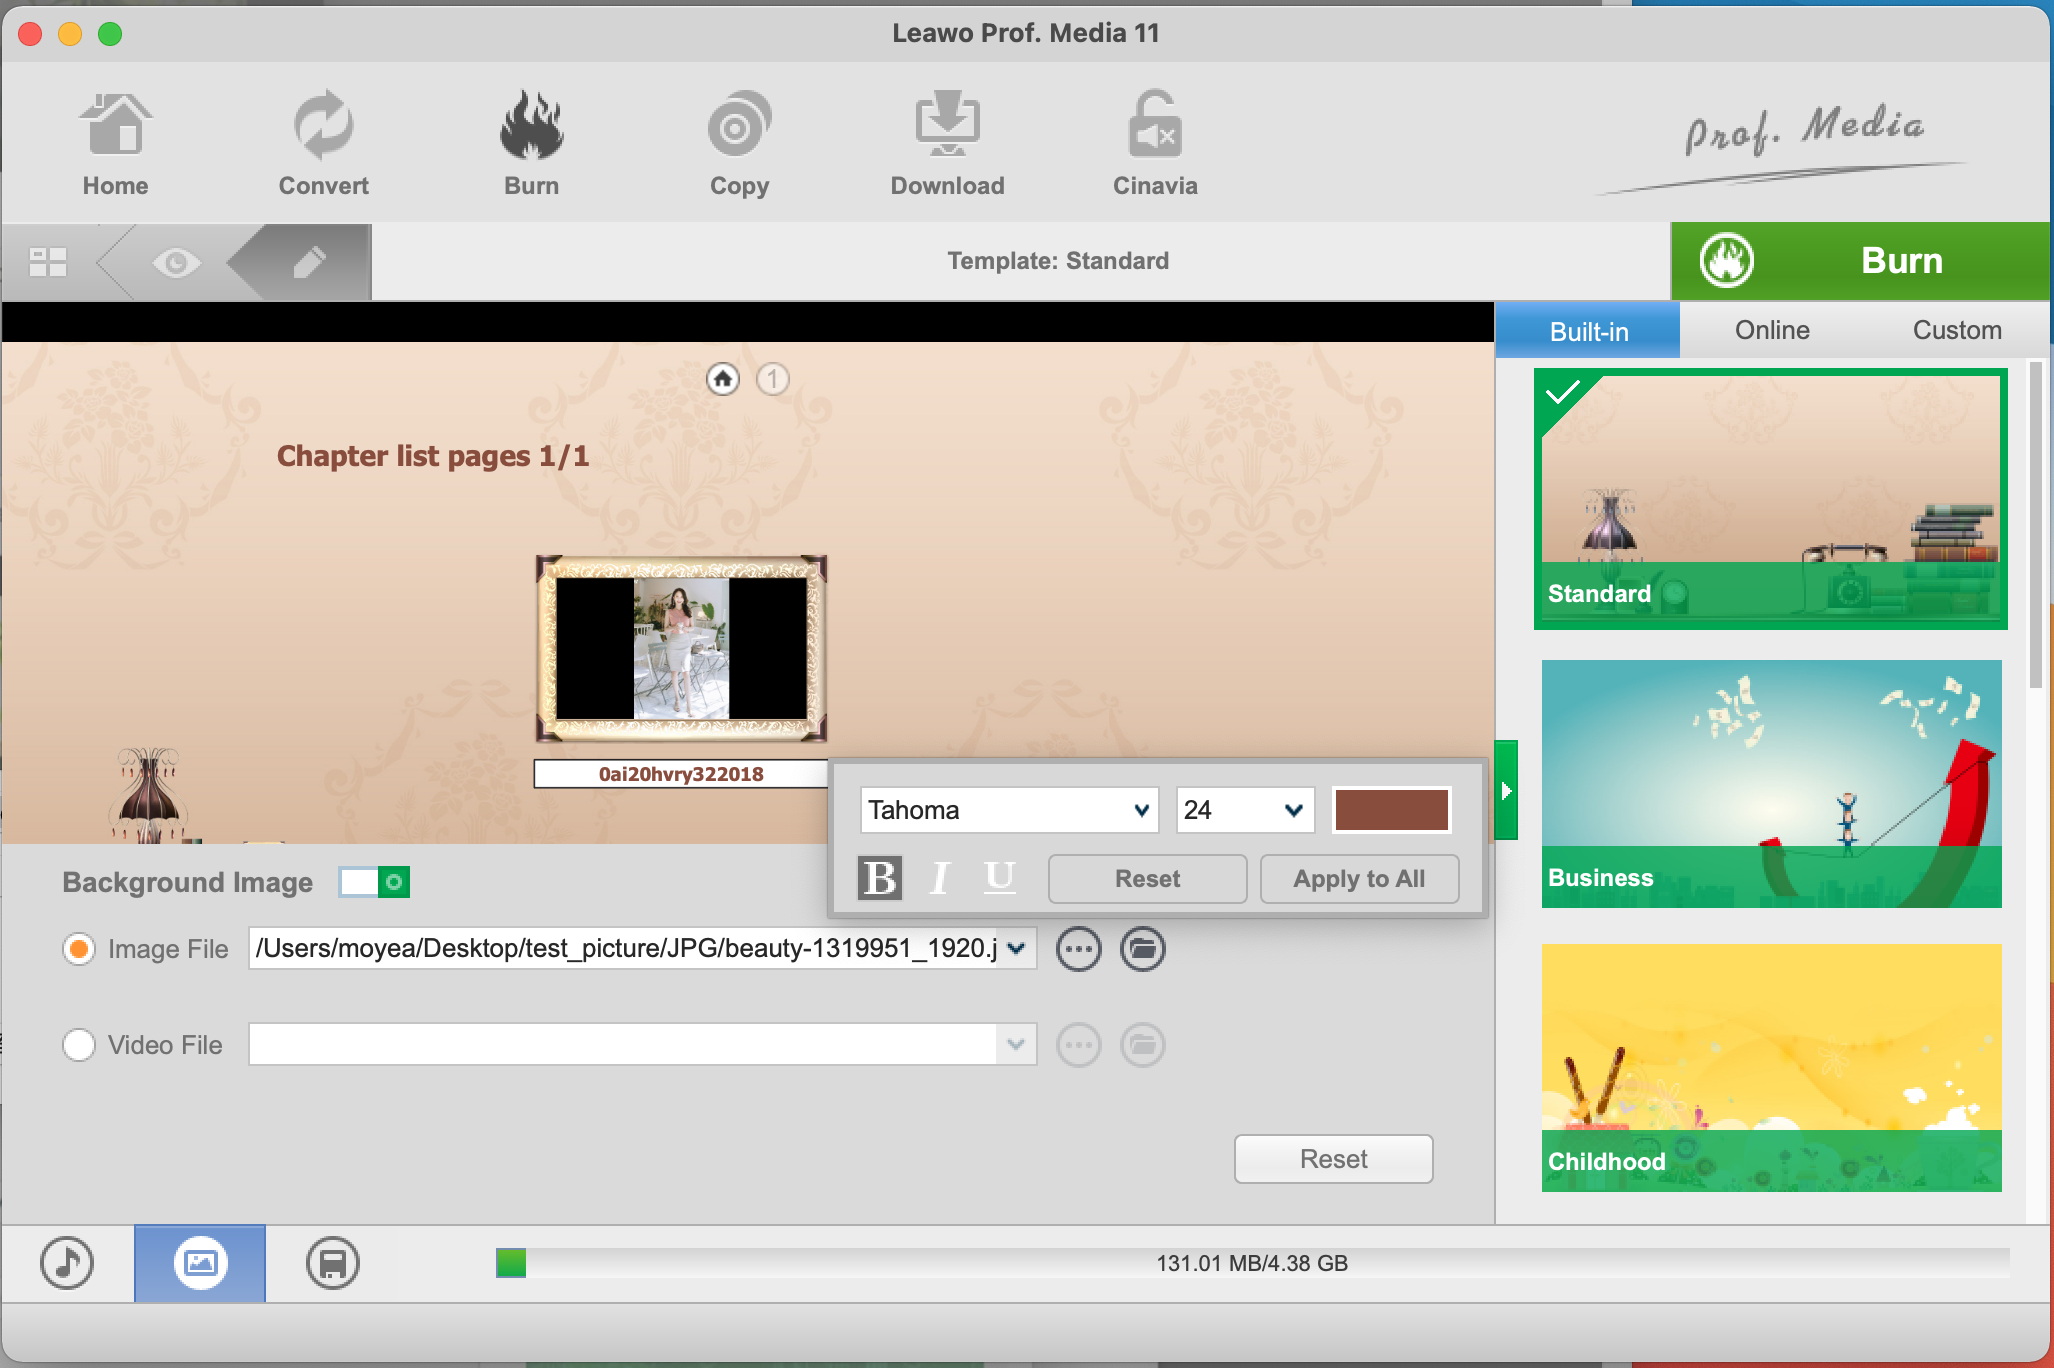
Note: You could tailor disc menu based on your personal preference. Click the pencil icon which means "edit" function to enter the disc menu designing window, where you could add background music/image/video, change title content and position, adjust text font, color, size, etc. After setting is complete, you can avoid the same setting again by clicking "Save" button to save it as custom template for future use.
Step 3 Burning settings
Click the big green "Burn" button to call out burning settings sidebar, on which you need to set Burn to, Disc Label and Save to. There are three options for you to burn to: DVD Folder, DVD ISO File and DVD disc. If you want to burn photo slideshow to DVD disc, you need to insert a blank and writable DVD disc into the disc drive beforehand and then select disc drive under "Burn to" option. After setting, click the bottom "Burn" button to start burning generated photo slideshow to DVD.

Edit Generated Photo Slideshow
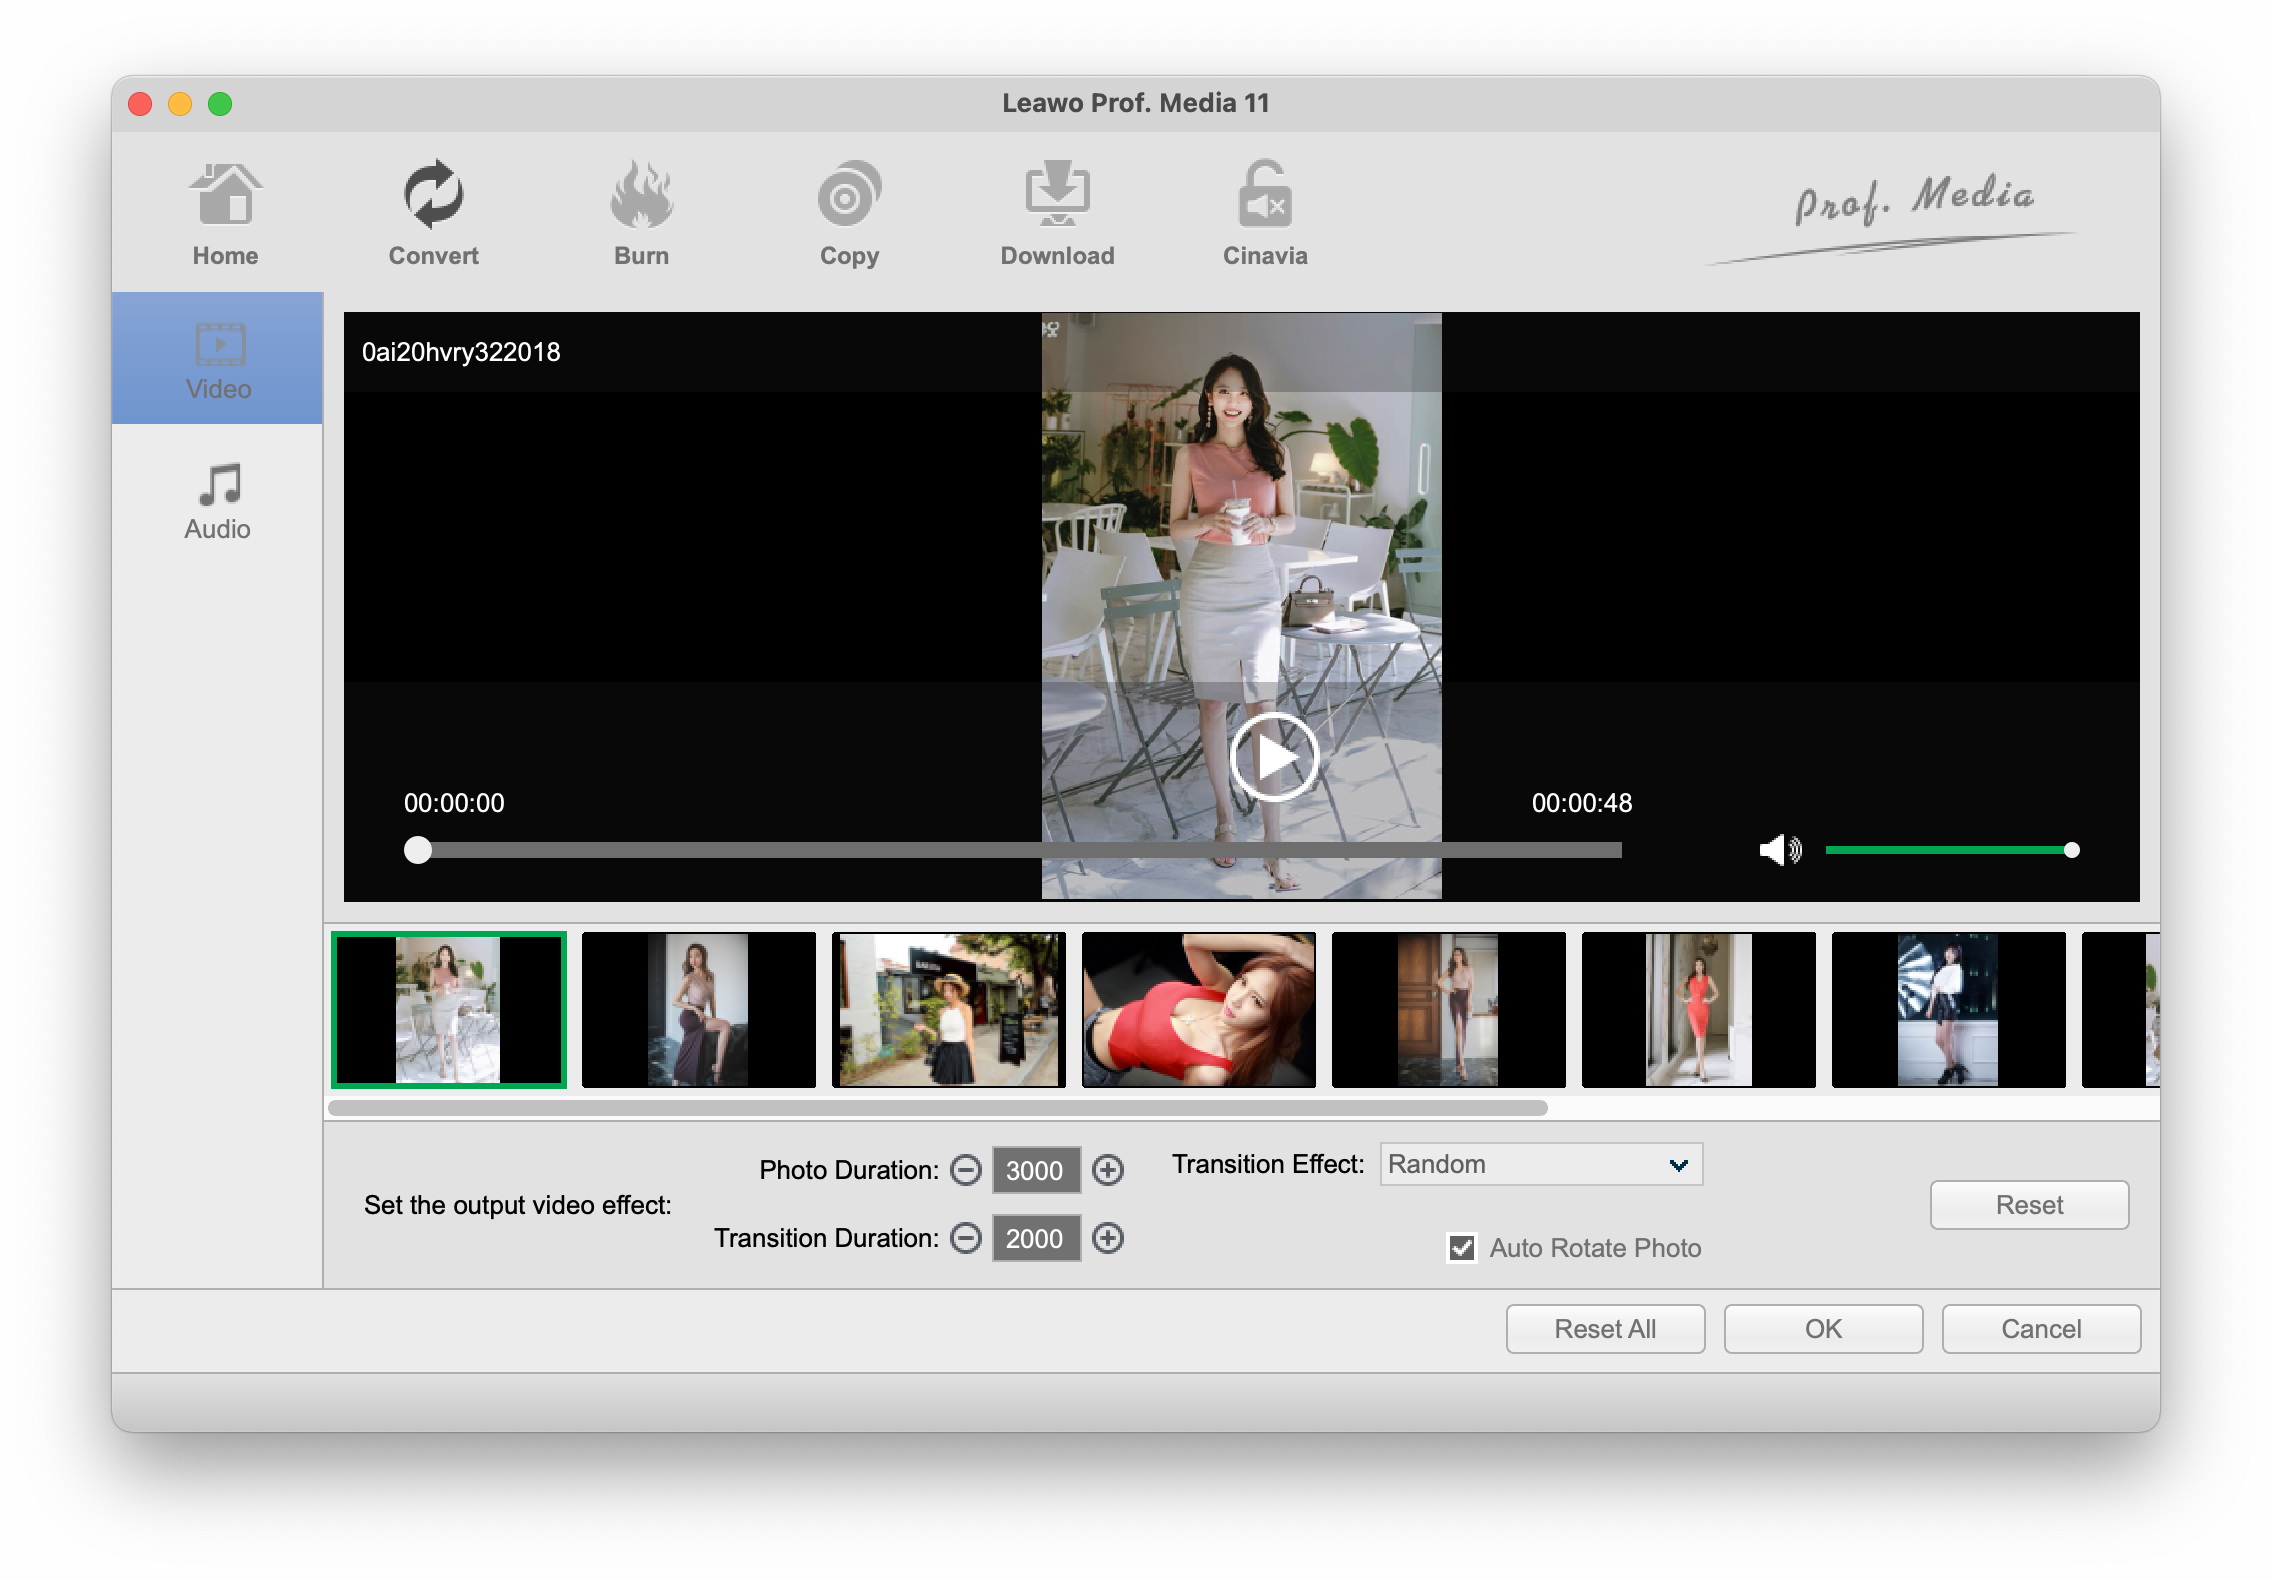
Source photos or photo folder would be turned into photo slideshow automatically the minute photos or photo folder is loaded. You could then click the "Edit" icon, or right click generated photo slideshow and then select "Edit" option to enter the photo slideshow editing panel.Step 1. Edit photo slideshow video
Under the "Video" tab on the photo slideshow editing panel, you could import extra photos, adjust photo position, rotate photo, remove unwanted photos, set output video effect(Photo Duration, Transition Effect and Transition Effect), etc. After setting is completed, press "OK" to confirm.
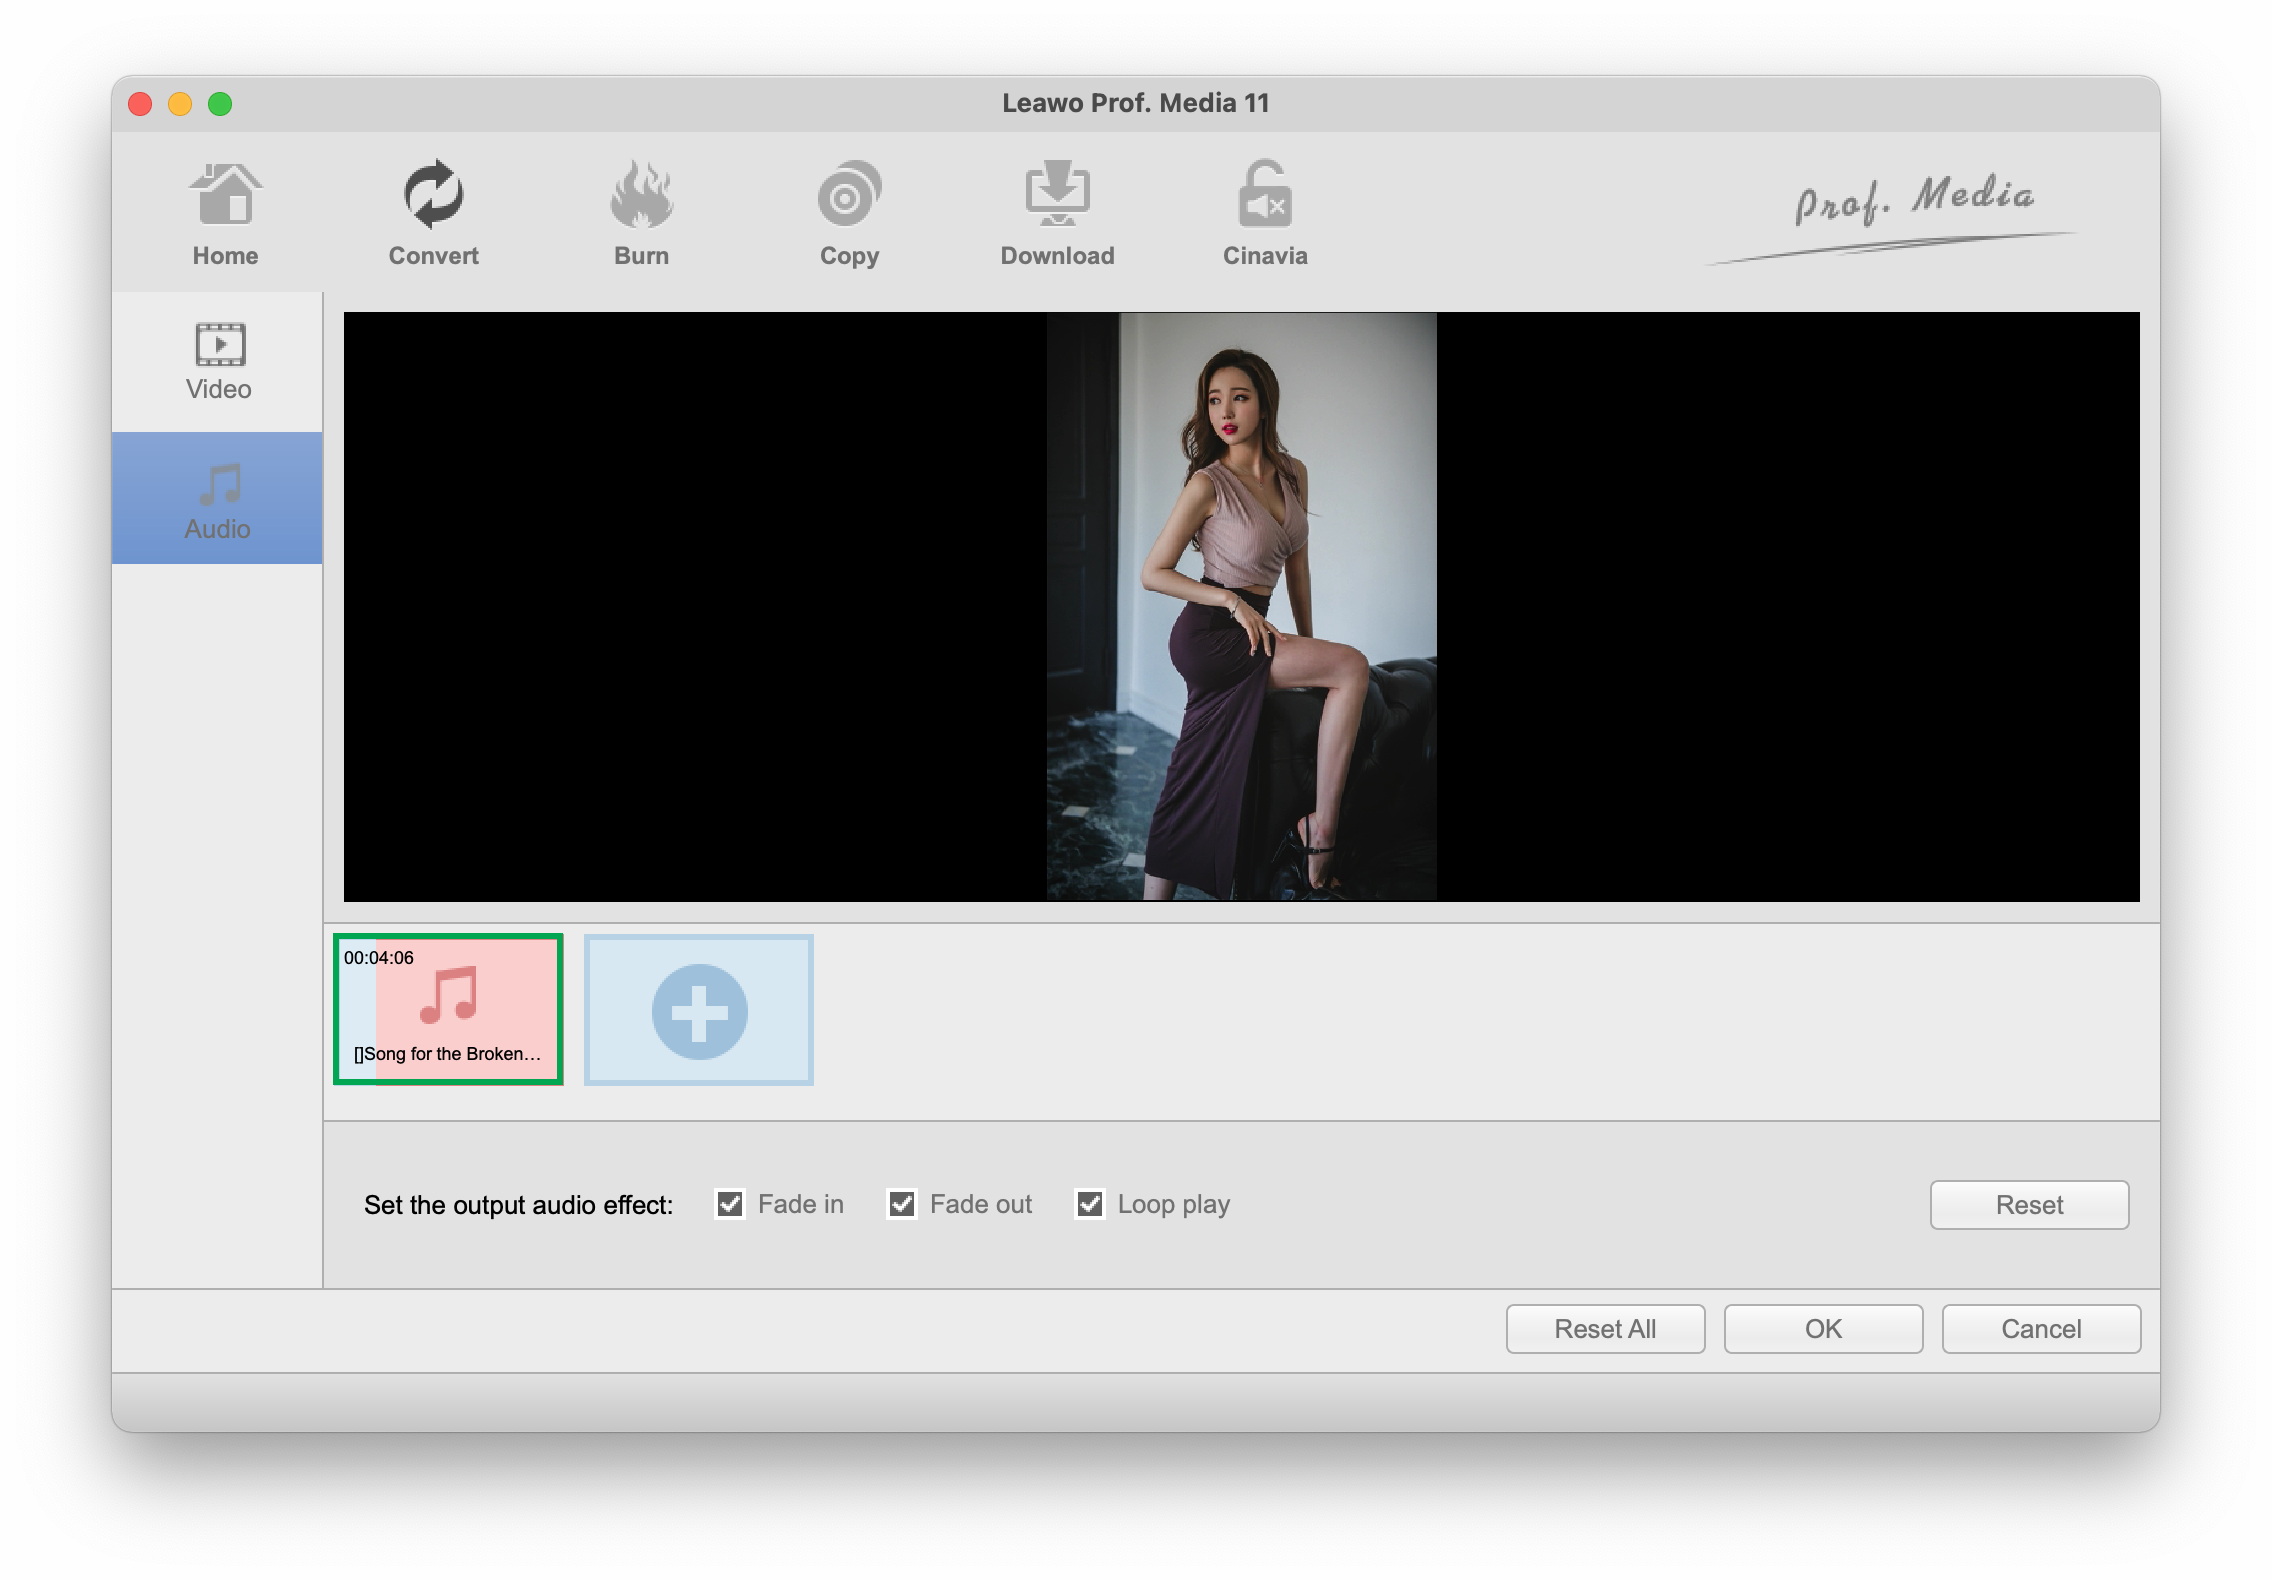
Step 2. Edit photo slideshow audio
Under "Audio" tab on the photo slideshow editing panel, you could add background music, set audio effect accordingly, and press "OK" to confirm the setting.
Edit Media Files
Under “Convert” and “Burn” modules, you could retouch media files via internal video editor. After loading source media files, select a loaded file, right click it and then select “Edit” option on the popup menu to enter the editing panel, or directly click the pencil icon at the end of the selected file for the appearance of the editing panel, on which there are five features accessible: Trim, Watermark, Crop, Effect, 3D, Remove Noise, and Create Chapter.
Trim
Click the “Trim” tab to trim video length. Set Start Time and End Time by manual inputting values, or directly drag the green triangle limiters on the playback to keep video clip you want to reserve and trim. You can view the "Clip Length" as well.

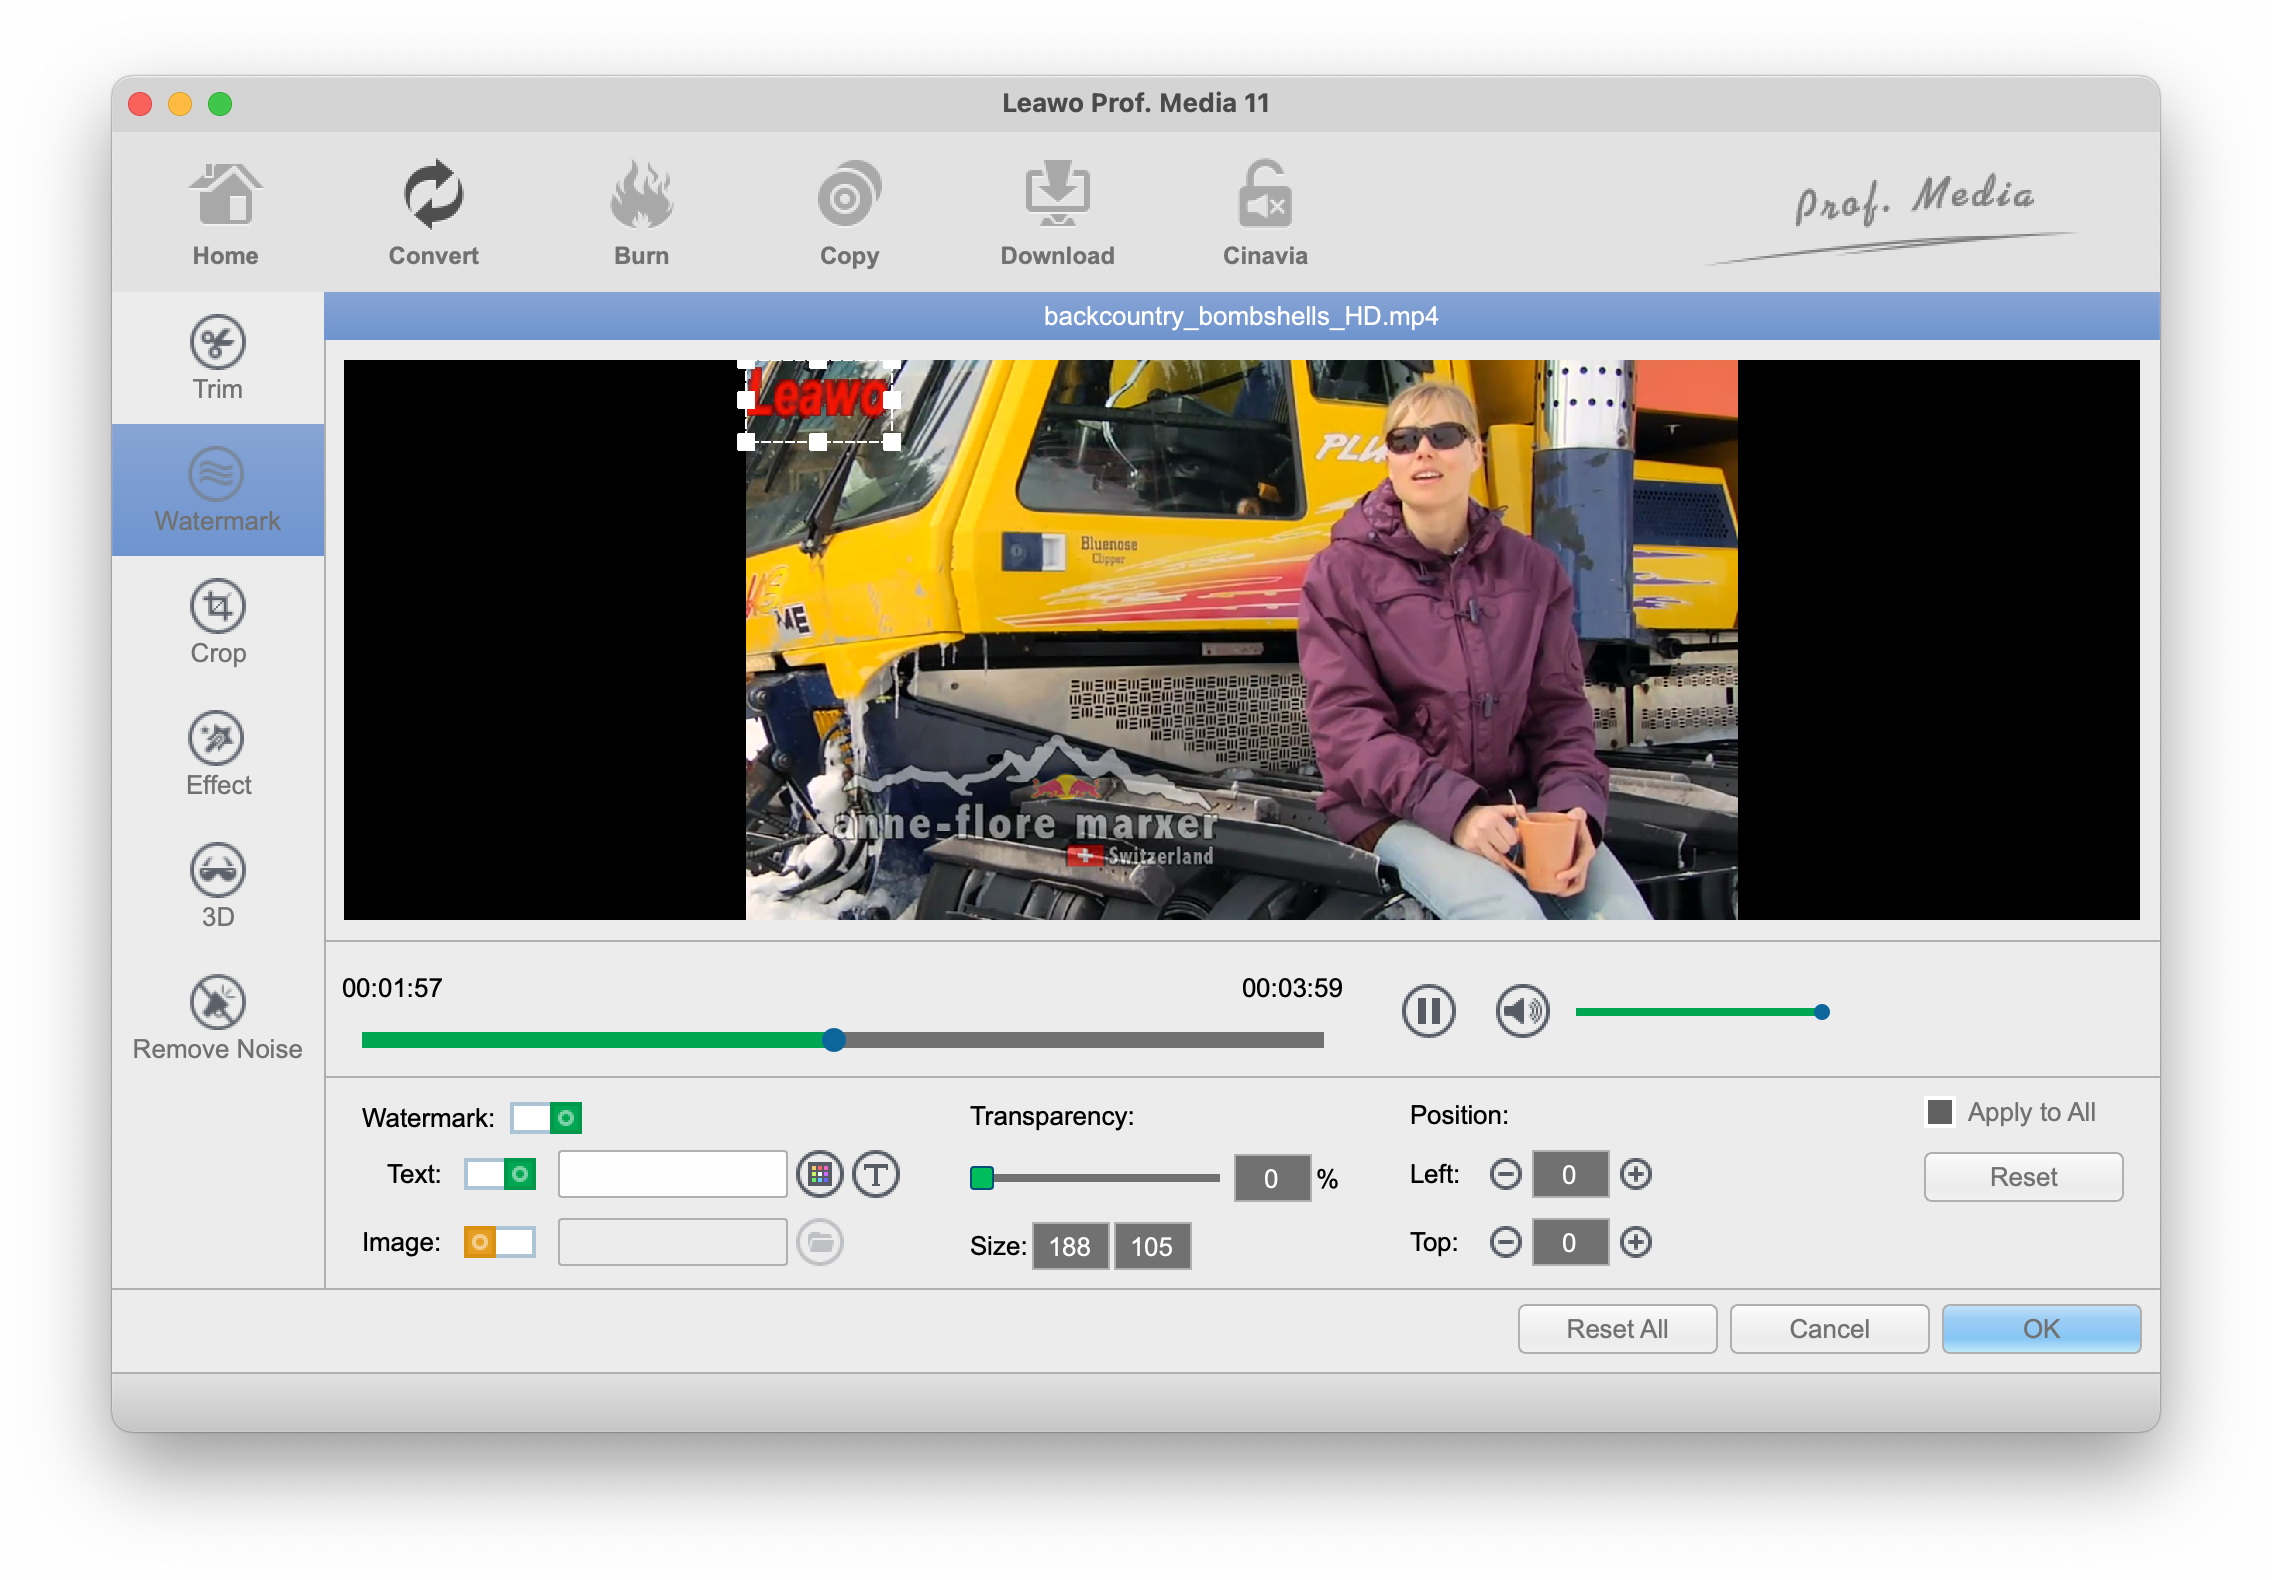
Watermark
Open “Watermark” tab and enable “Watermark” option to green. Then you could choose to add Text or Image watermark for final results. Once you decide to add text watermark, the function of image watermark is disable, and vise versa. That's to say, you are allowed to choose either text or image watermark. You could get custom watermark by changing parameters: transparency, size, and position. If you add text as watermark, you are able to select text color, font, font style, size, effects, etc. for better watermark application.
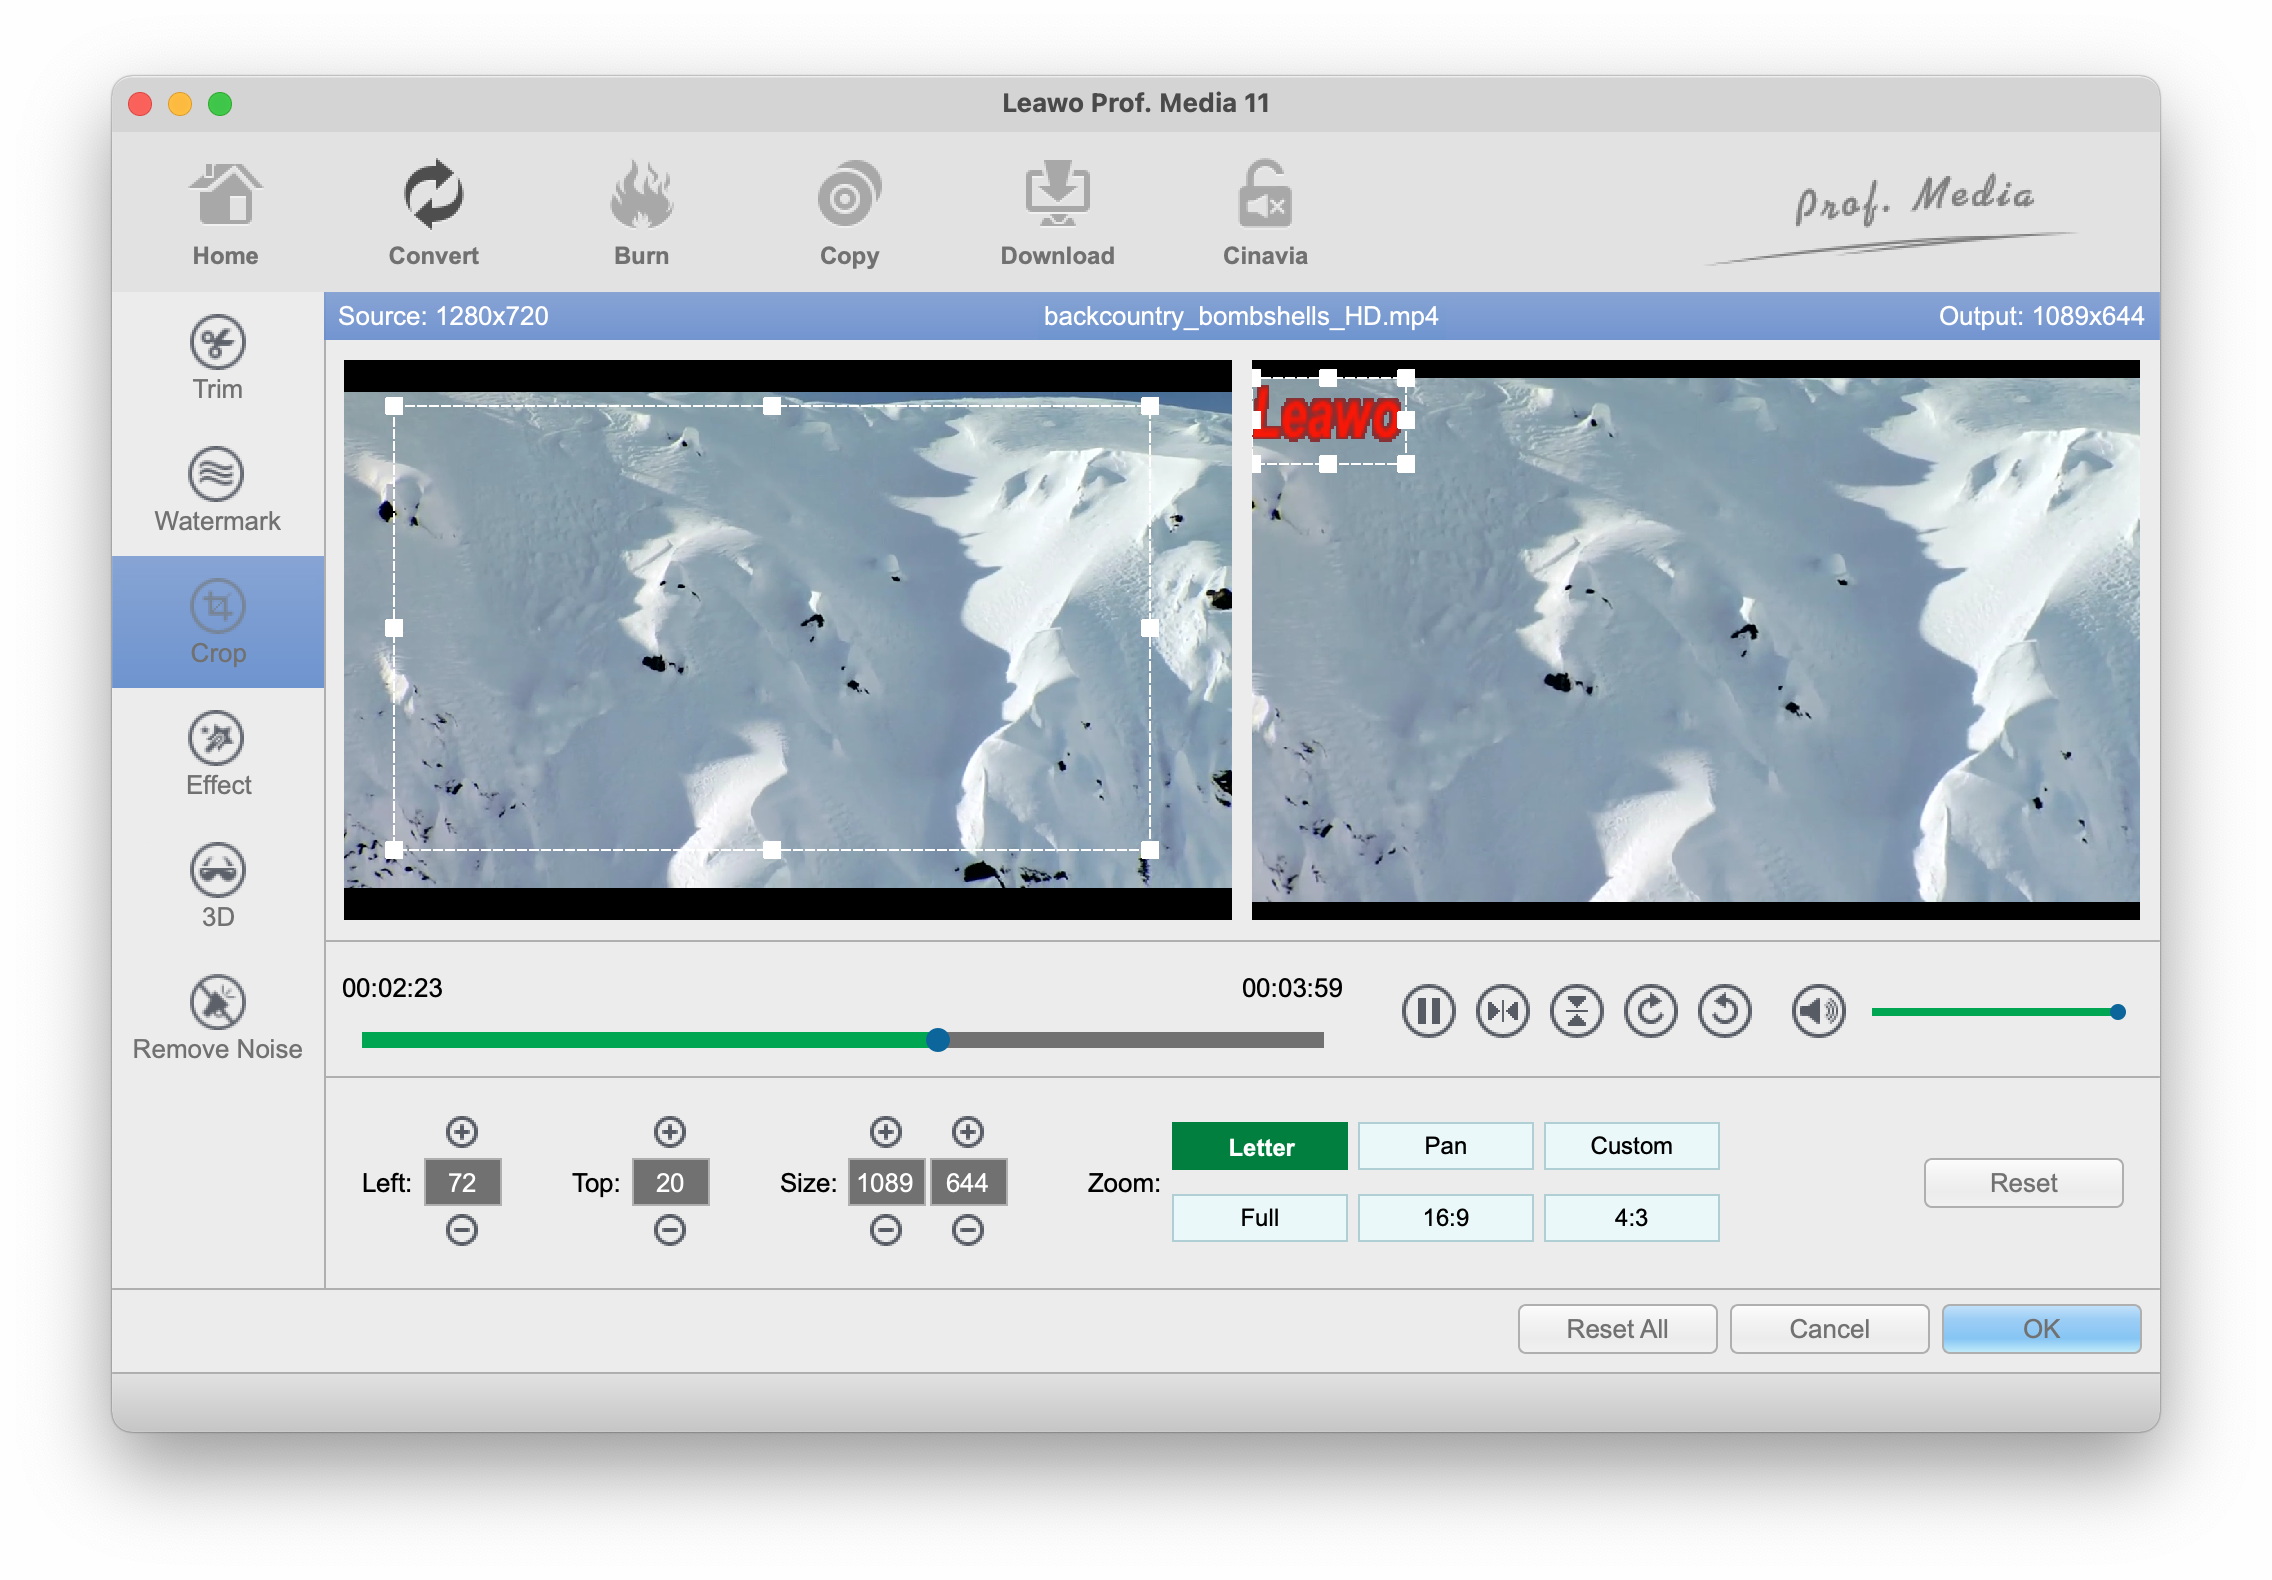
Crop
Under "Crop" section, select a "Zoom" style first, and adjust the Top and Left values to get a precise dimension, or to crop video size by directly dragging the dot frame on the left Original Preview window. While you are cropping, you can preview the outcome on the right side of Output Preview.
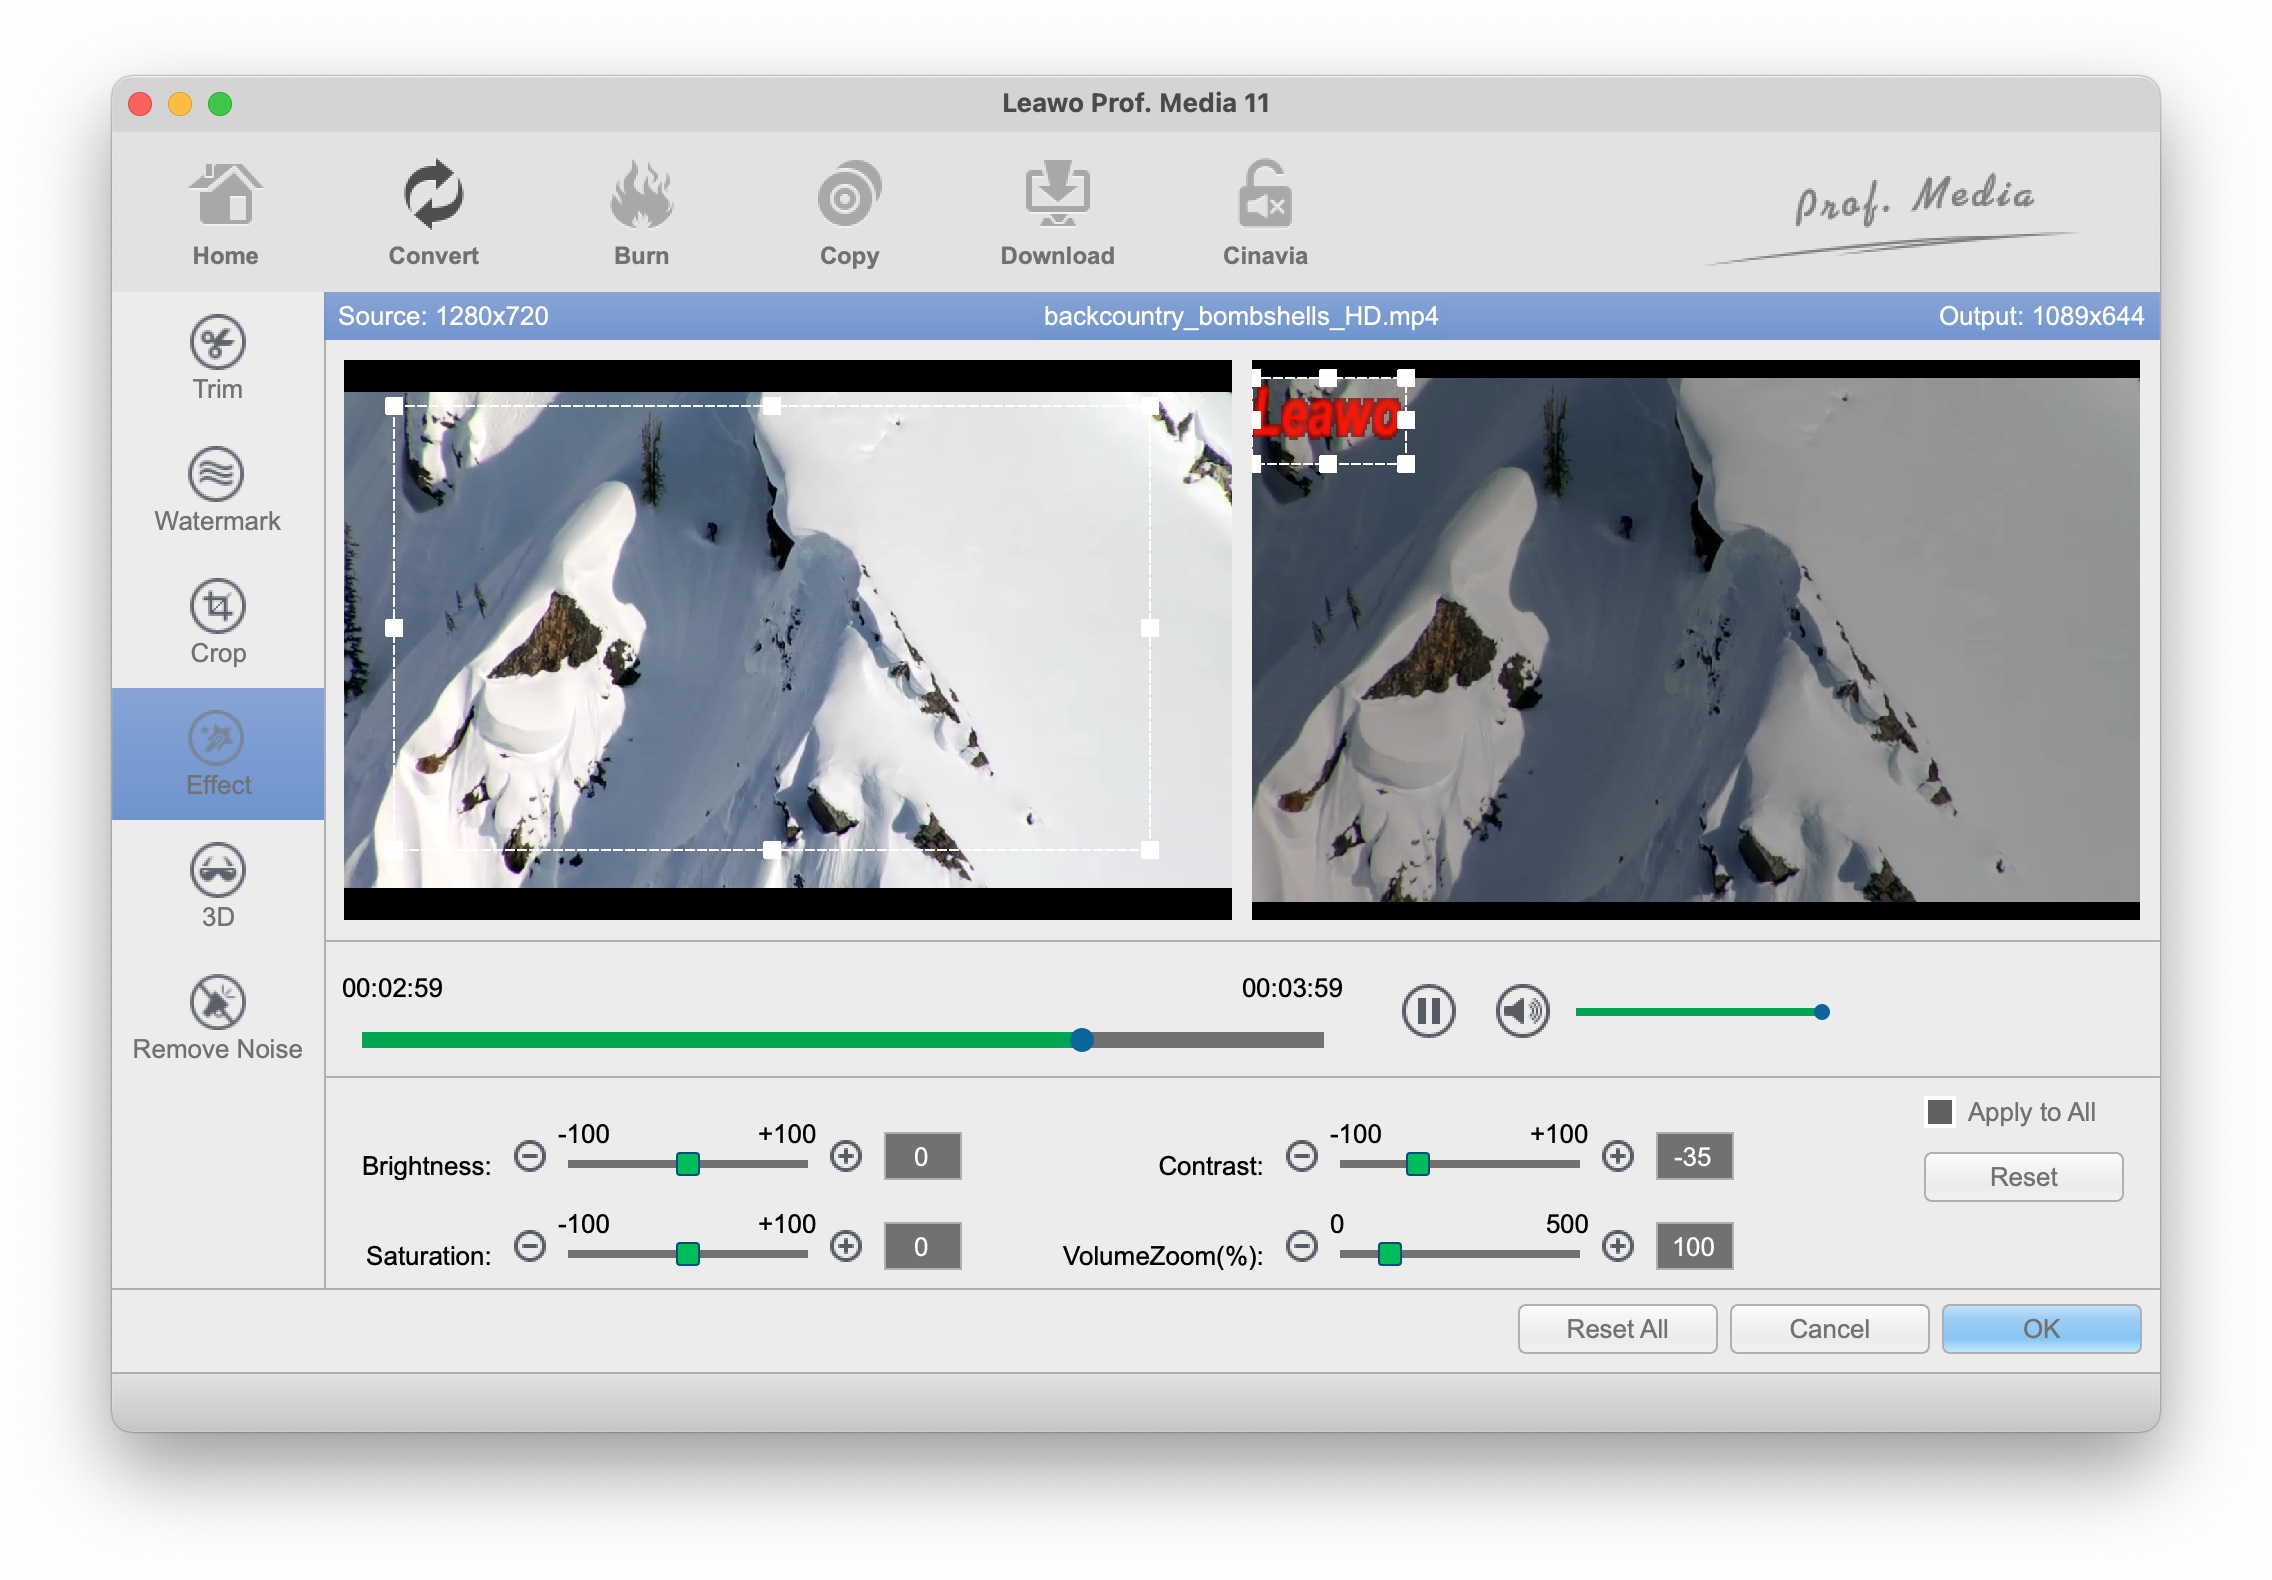
Effect
Click "Effect" tab for video effect adjusting, and then simply drag the slides of "Brightness", "Contrast", "Saturation" and "VolumeZoom" to adjust the output video effect. Press "OK" to confirm the setting.
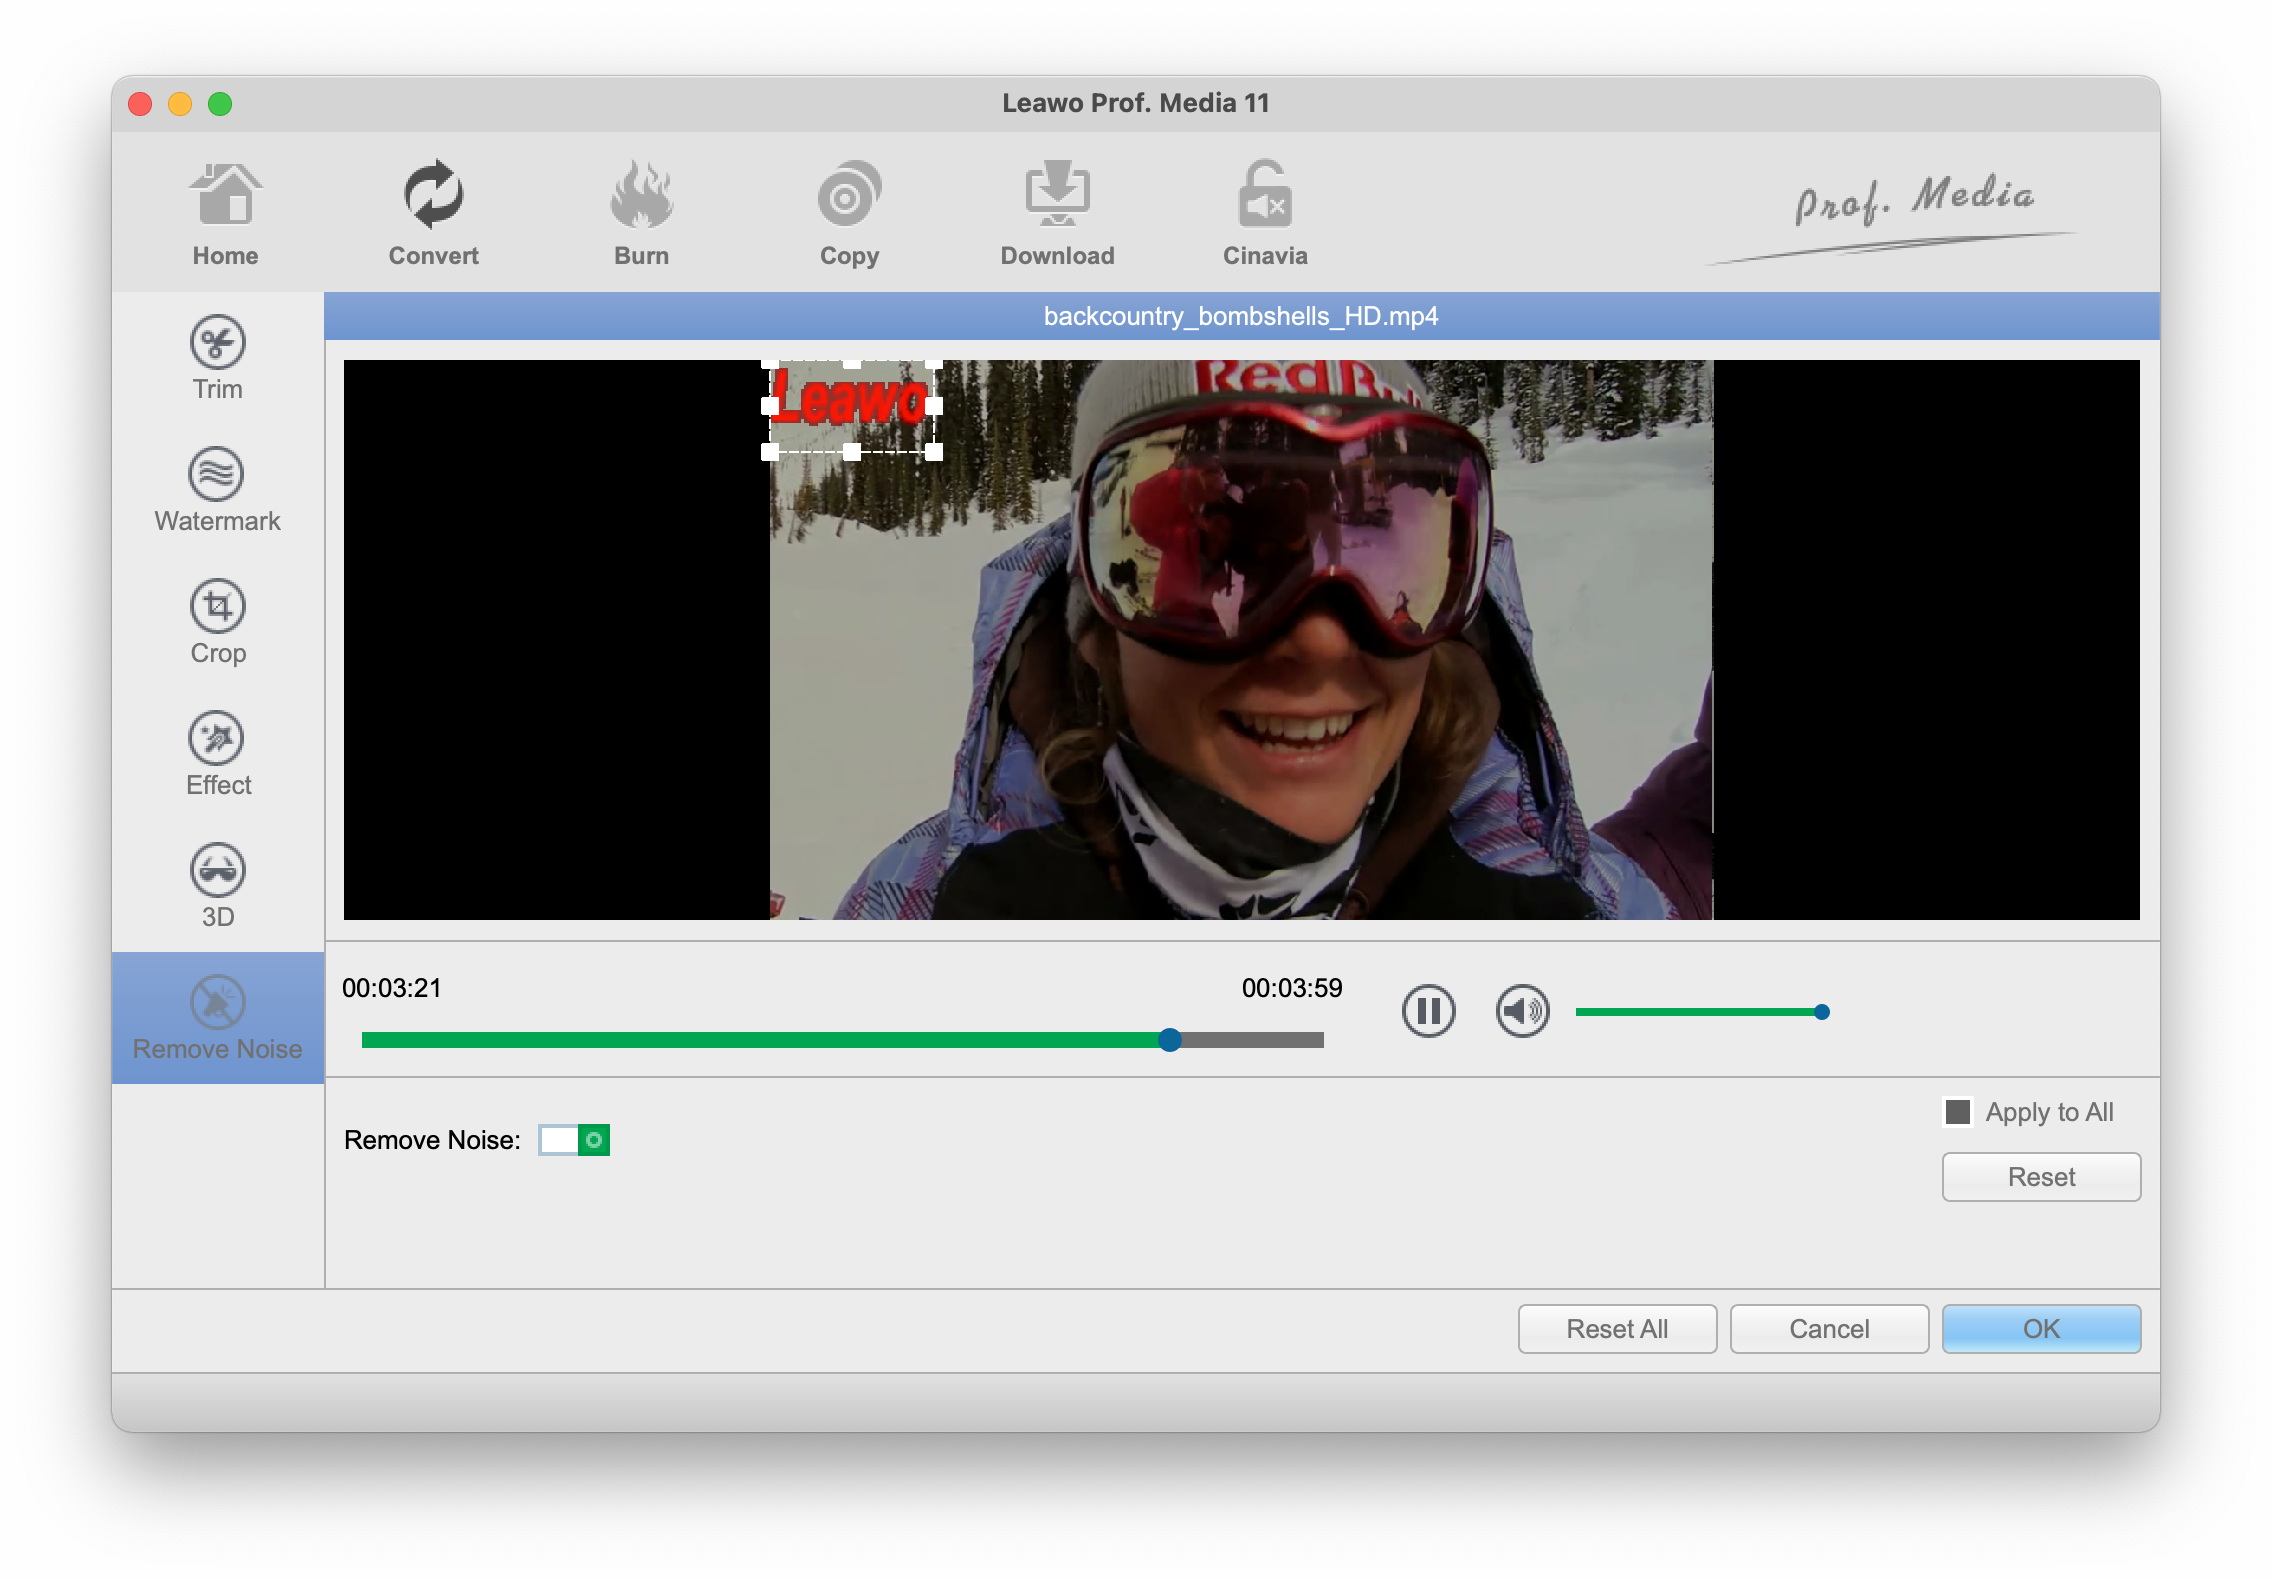
Remove Noise
Open “Remove Noise” tab, and then switch the "Remove Noise" button to green to let this program remove noise from source video/audio files.
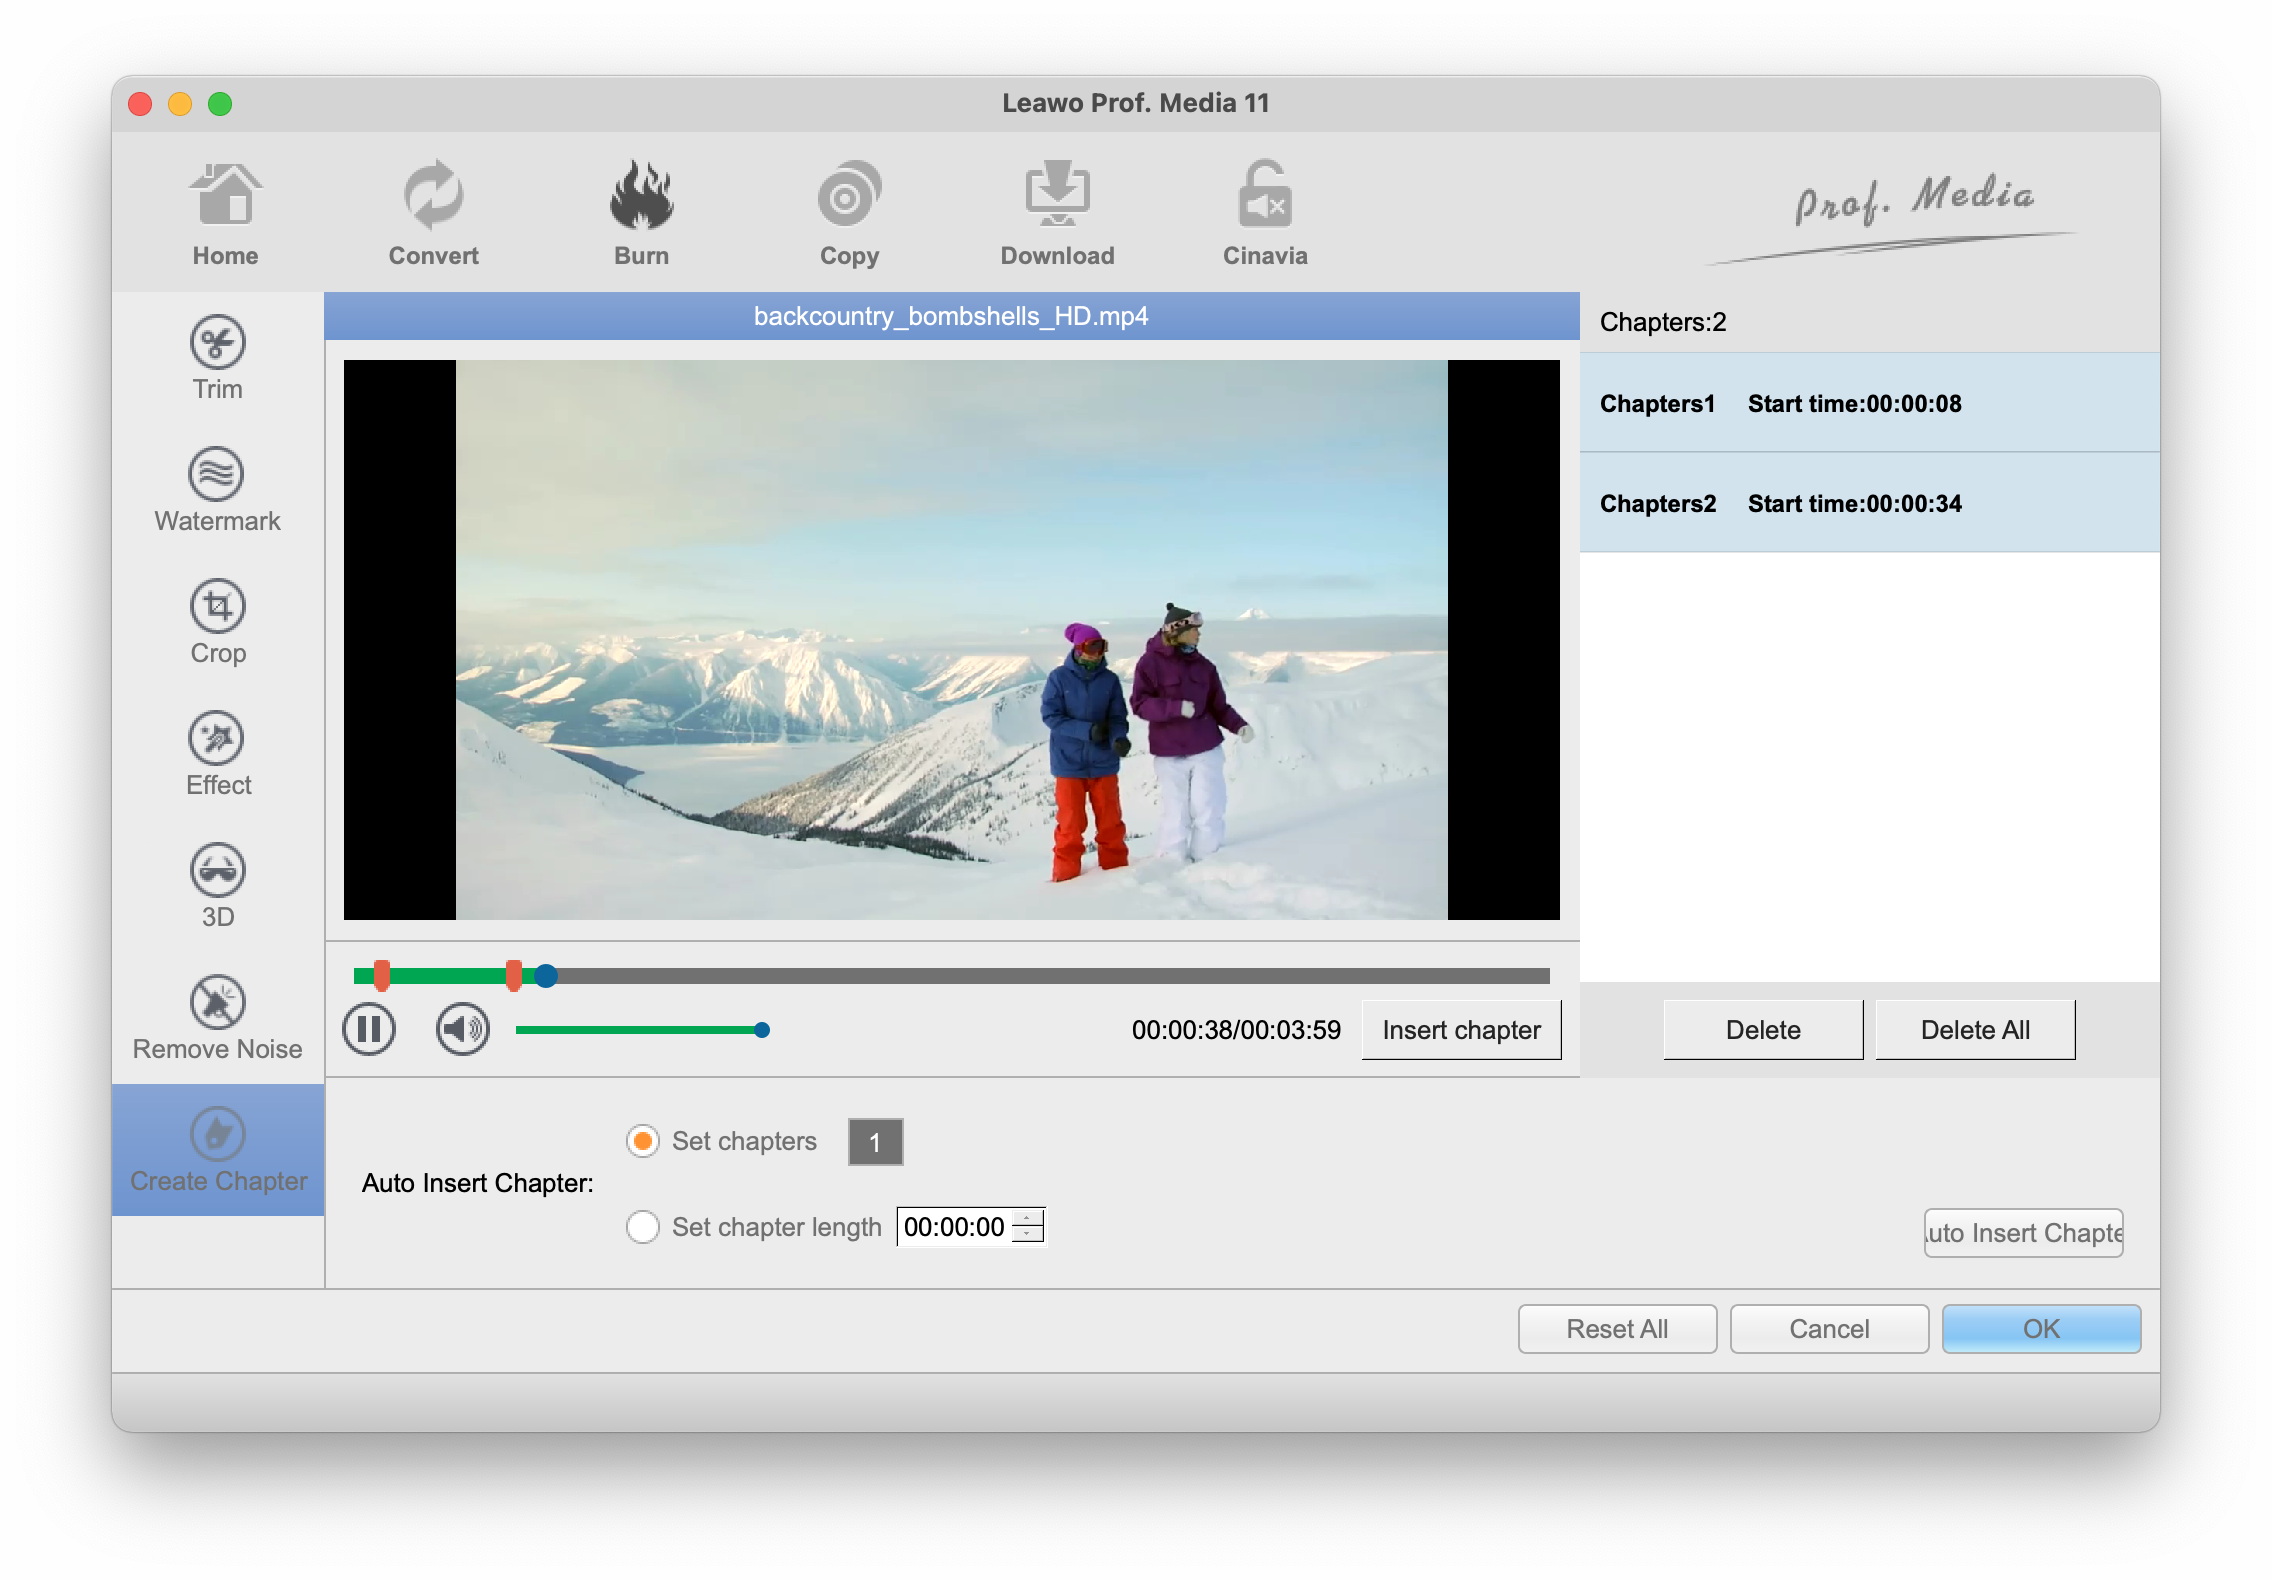
Create Chapters
Under the "Burn" module, in the editing panel, you could even create chapters for output DVD content. Open “Create Chapter” tab, adjust the Brightness, Contrast, Saturation and VolumeZoom.
How to Convert 2D into 3D
With a 2D to 3D converter integrated inside,Leawo Video Converter Ultimate for Mac empowers you to get output files with vivid 3D effects. After loading source media file in “Convert” or “Burn” module, right click loaded file and then select “Edit” option to pop up the video editing window, on which you shall click the “3D” tab to activate the internal 2D to 3D converter and slide “3D Mode” to green. Select a 3D effect from 6 different 3D effects provided: Red/Cyan, Red/Green, Red/Blue, Blue/Yellow, Interleaved, and Side by Side. For advanced purpose, 3D depth ranging from minus 50 to plus 50 is open for setting.

![]()
Users Say
As consumers, I love companies offering solid product guarantees. It proves the company has faith in its product, and is making a solid effort to gain your trust.
-From Donald through our support center
Social Network
Join Our Newsletter: