Leawo Prof. Media User Guide
As the most comprehensive media converter suite, Leawo Prof. Media helps you convert video, audio, 1080P video, 4K video, common and multi-angle Blu-rays/DVDs, 4K/3D Blu-ray to videos in 180+ formats like MP4, AVI, 3GP, FLV, MKV, WMV, MOV, etc.; burn video to DVD and Blu-ray disc, DVD/Blu-ray folder and/or ISO image file; copy and backup 4K Blu-ray/Blu-ray/DVD movies to computer or blank disc; backup ISO image file to DVD/Blu-ray disc; create photo slideshows and burn photos to Blu-ray/DVD; download online videos to computer or devices from YouTube, Facebook, Veoh, etc. for multiple players, etc. Meanwhile, this total media file converter also provides you with 2D to 3D converter to help you create 3D movies in 6 different 3D movie effects, edit disc menu for personalized Blu-ray/DVD files, edit 4K Blu-ray/Blu-ray/DVD/video/photo slideshow before converting, adjust video and audio parameters of output profile, etc.

Convert

Burn

Copy

Download

Photo

Edit

3D
Convert video/DVD/Blu-ray
As professional total media converter combo, Leawo Prof. Media could easily convert video, DVD, 4K Blu-ray, and Blu-ray to video and extract audio off 4K Blu-ray/Blu-ray/DVD/video to save in 180+ formats.
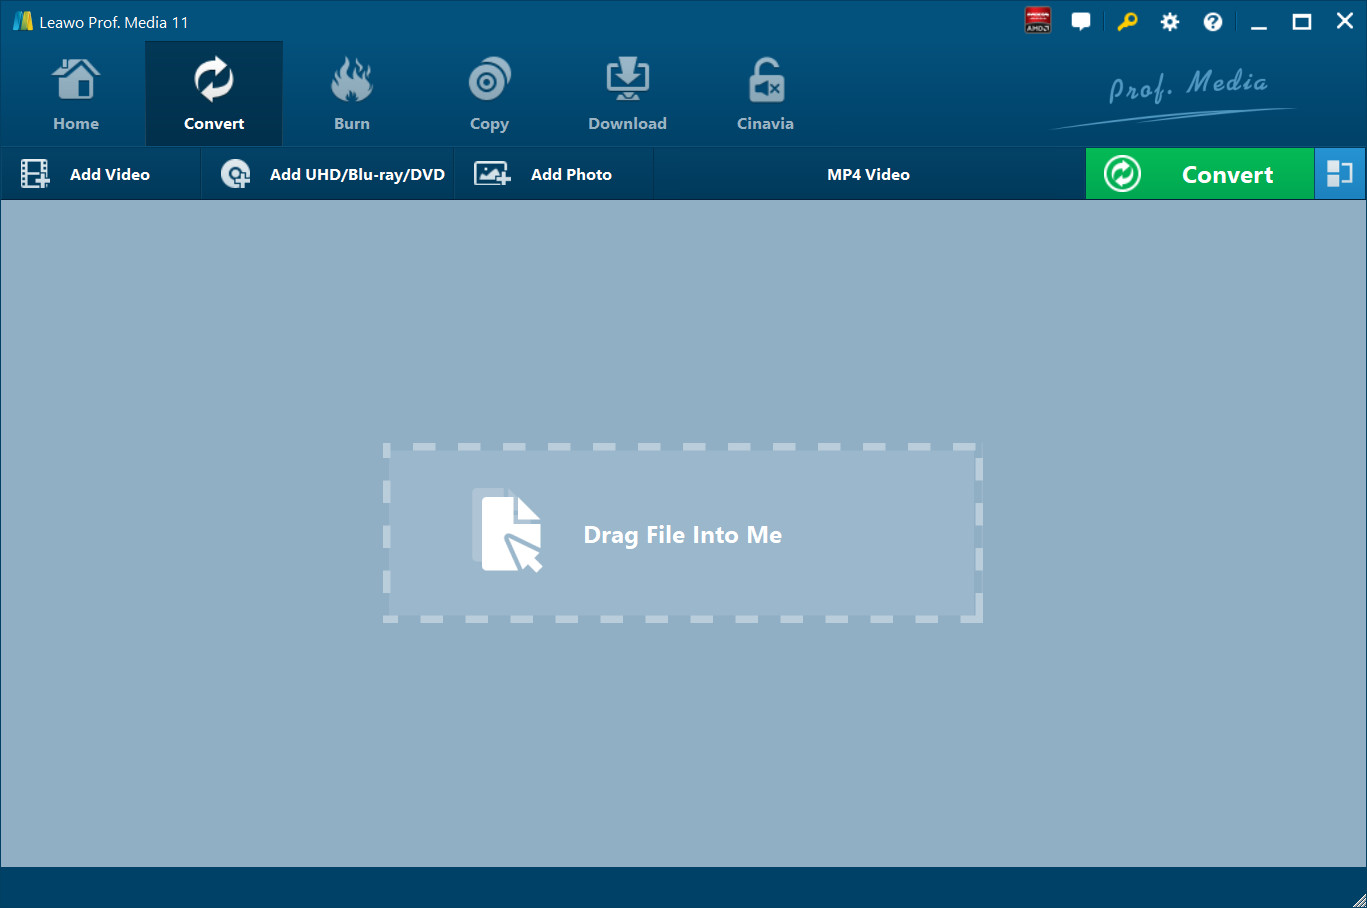
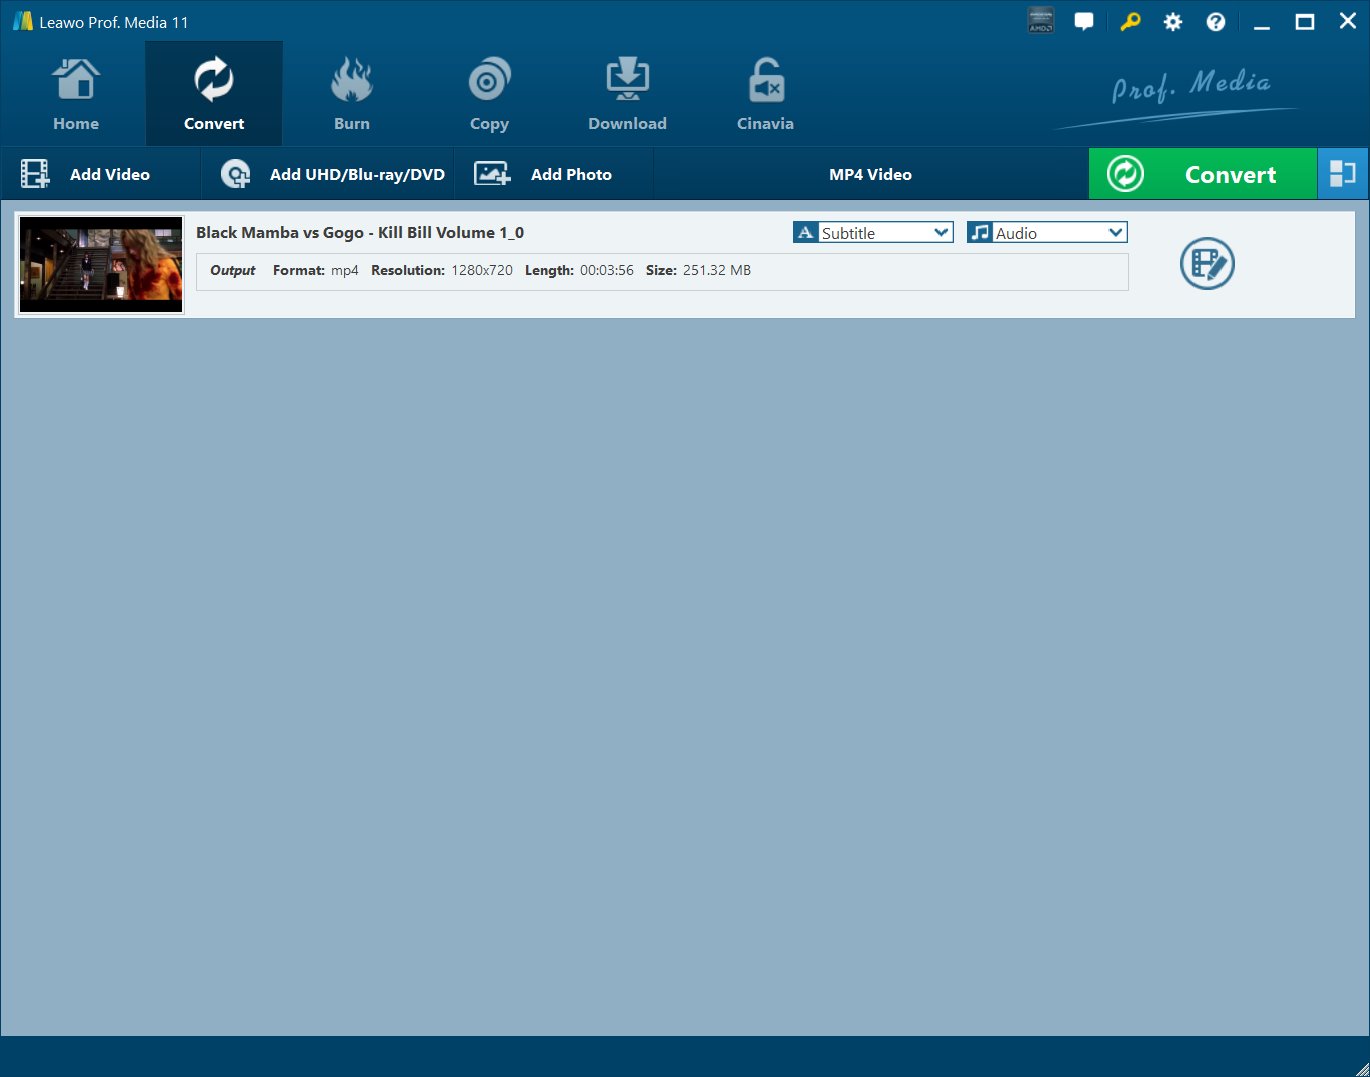
Step 1 Add source media files
Open the Convert tab, click "Add Video" or "Add UHD/Blu-ray/DVD" buttons to add source media files respectively. You could also load source media files via direct drag-and-drop. Both single media file and folder could be added for batch conversion. After loading, you could choose subtitles, audio tracks, and angle (only for multi-angle Blu-ray/DVD) from source media files, play back imported media files, move down or up to adjust the converting order, rename the files, check details of imported media files, etc.
Tips:
1) Leawo Prof. Media allows you to merge all videos into one file. Click the blue "Merge all files into one" button.
2) If you’re going to convert video files, you can import external subtitles.
3) While adding 4K Blu-ray/Blu-ray/DVD movies, there're 3 different loading modes: Full Movie, Main Movie and Custom Mode. Full Movie mode loads entire source DVD movies, Main Movie loads the longest title of source media file (generally the main movie), while Custom Mode allows you to select titles for loading.
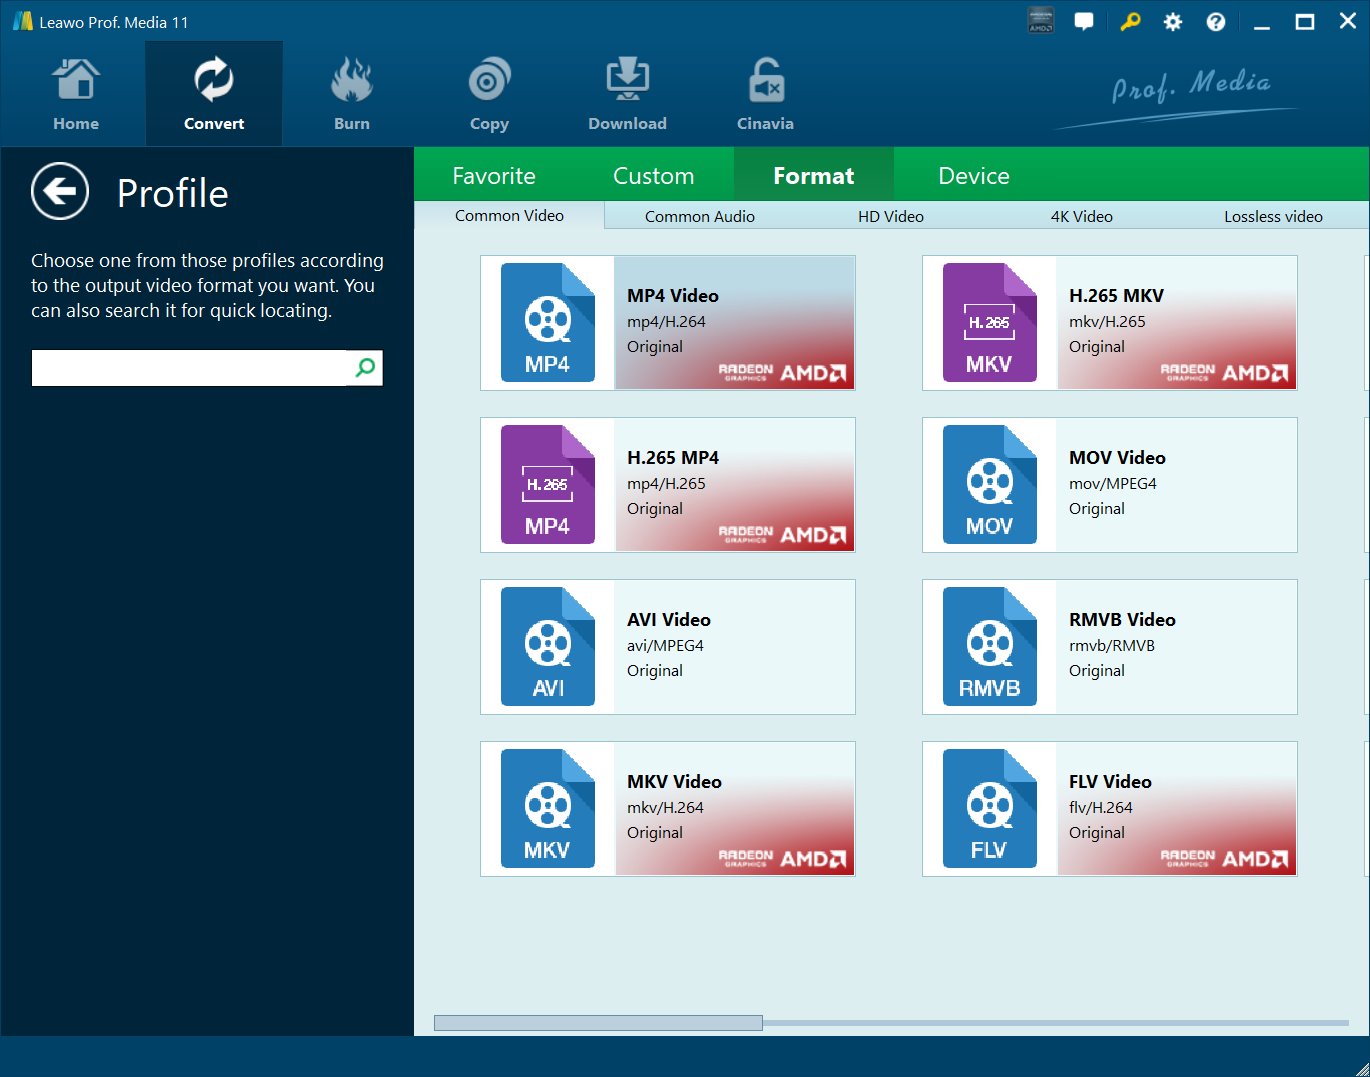
Step 2 Choose output format
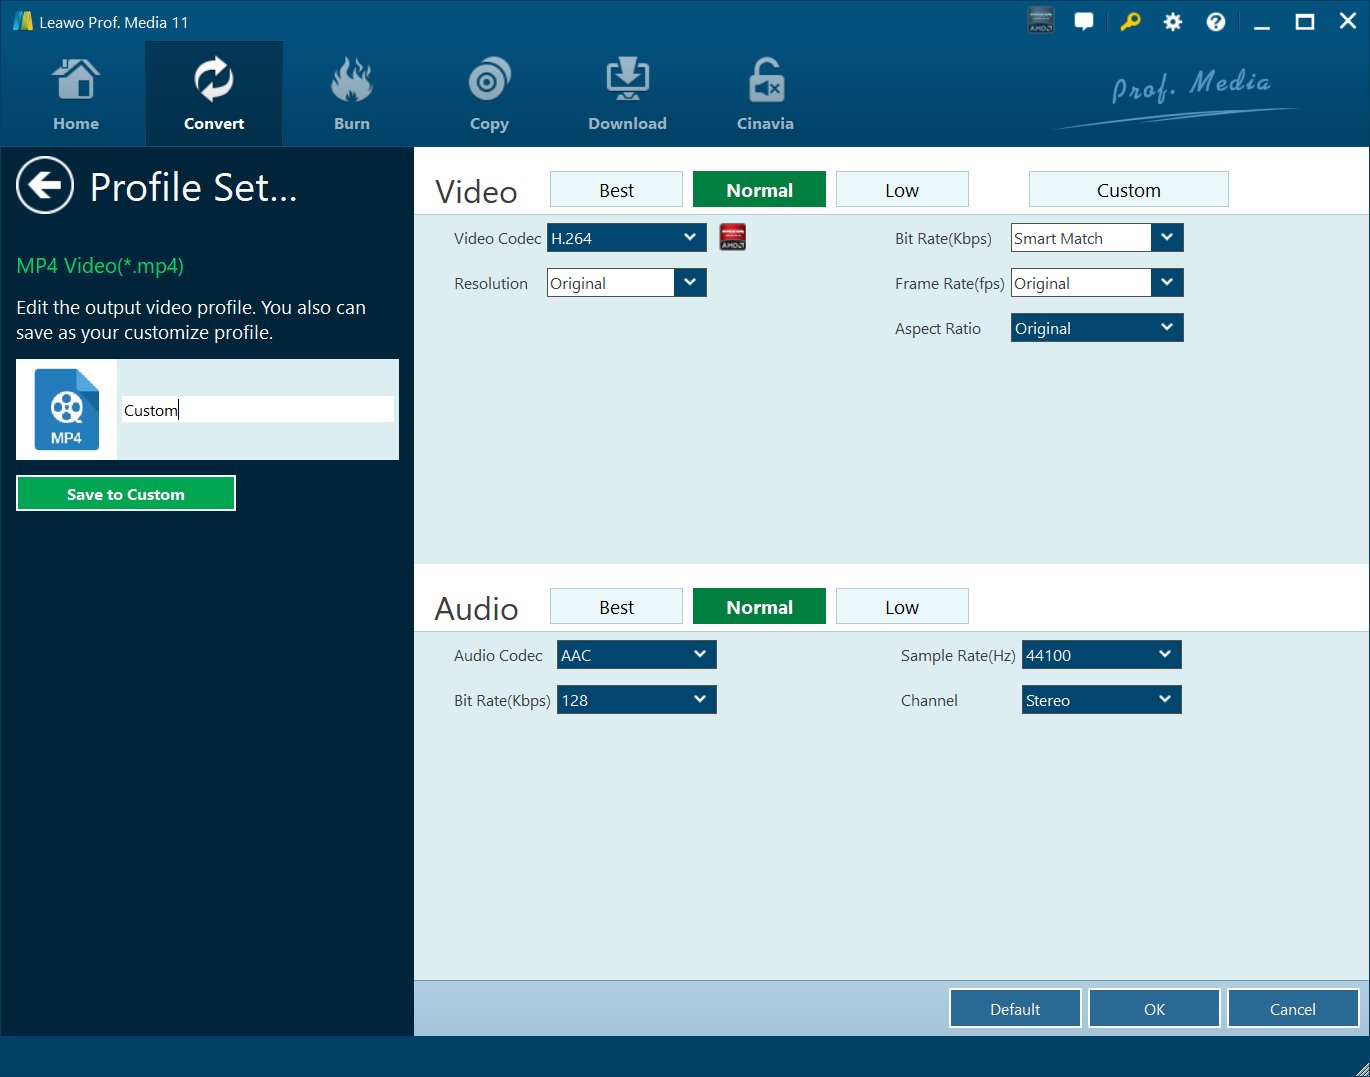
Next to the "Add Photo" button, you will see a clickable box (displayed in MP4 Video by default, as showed in Step 1). Click it and then on the drop-down box select "Change" option to enter the Profile panel, where you could select desired profile as output format from "Format" and "Device" categories.

Optionally, you can add formats to "Favorite" group or edit profiles to add into "Custom" group. Leawo Prof. Media allows you to adjust basic the output file properties such as audio and video codec, quality, bit rate, video frame rate, video resolution, audio sample rate, etc. Click the "Edit" option on the drop-down panel to enter the Profile panel to carry out these settings.
Step 3 Set output directory
After setting output format, return to the main interface and then click the big green "Convert" button. There will pop up a sidebar, on which you need to set an output directory in "Save to" box. Required hard disk space is displayed for your referrence.

Step 4 Start the converting
Then, click the "Convert" button at the bottom. Leawo Prof. Media would start to convert video, Blu-ray, DVD and audio files immediately.

Burn video to DVD/Blu-ray
After setting the output format, go back and then click the big green "Convert" button on the sub-menu bar to call out the output directory setting panel. Set an output directory in "Save to" box and then click the "Convert" button at the bottom to start converting. Working as DVD burner and Blu-ray burner, Leawo Prof. Media allows you to easily burn video to DVD/Blu-ray in both 2D and 3D effect. You can easily create DVD-5, DVD-9, BD-50 and BD-25 content in disc, folder or ISO Image Files. This media file converter combo provides abundant disc menu and templates for you to choose from. You can also DIY disc menu and templates if you like.
Step 1 Import source videos
Open the "Burn" panel, click the "Add Video" icon to import source videos, or directly drag and drop source videos into this Blu-ray/DVD burner. After loading, you could play back source video files, select subtitles and audio tracks, add external subtitles, view details, rename media files, etc. Also, for video to Blu-ray/DVD burning, you need to set the target disc type, aspect ratio, quality at the bottom.
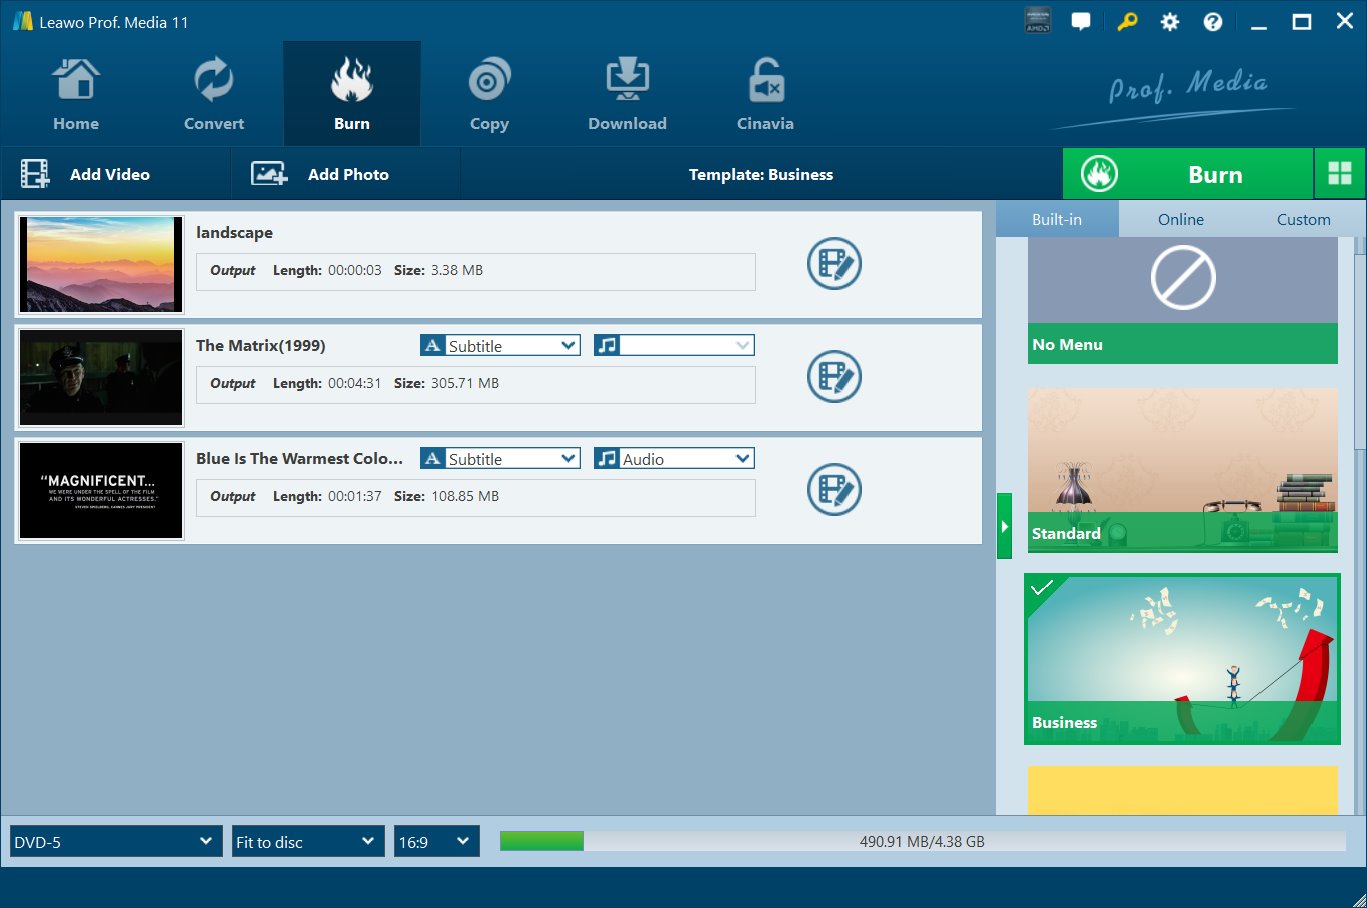
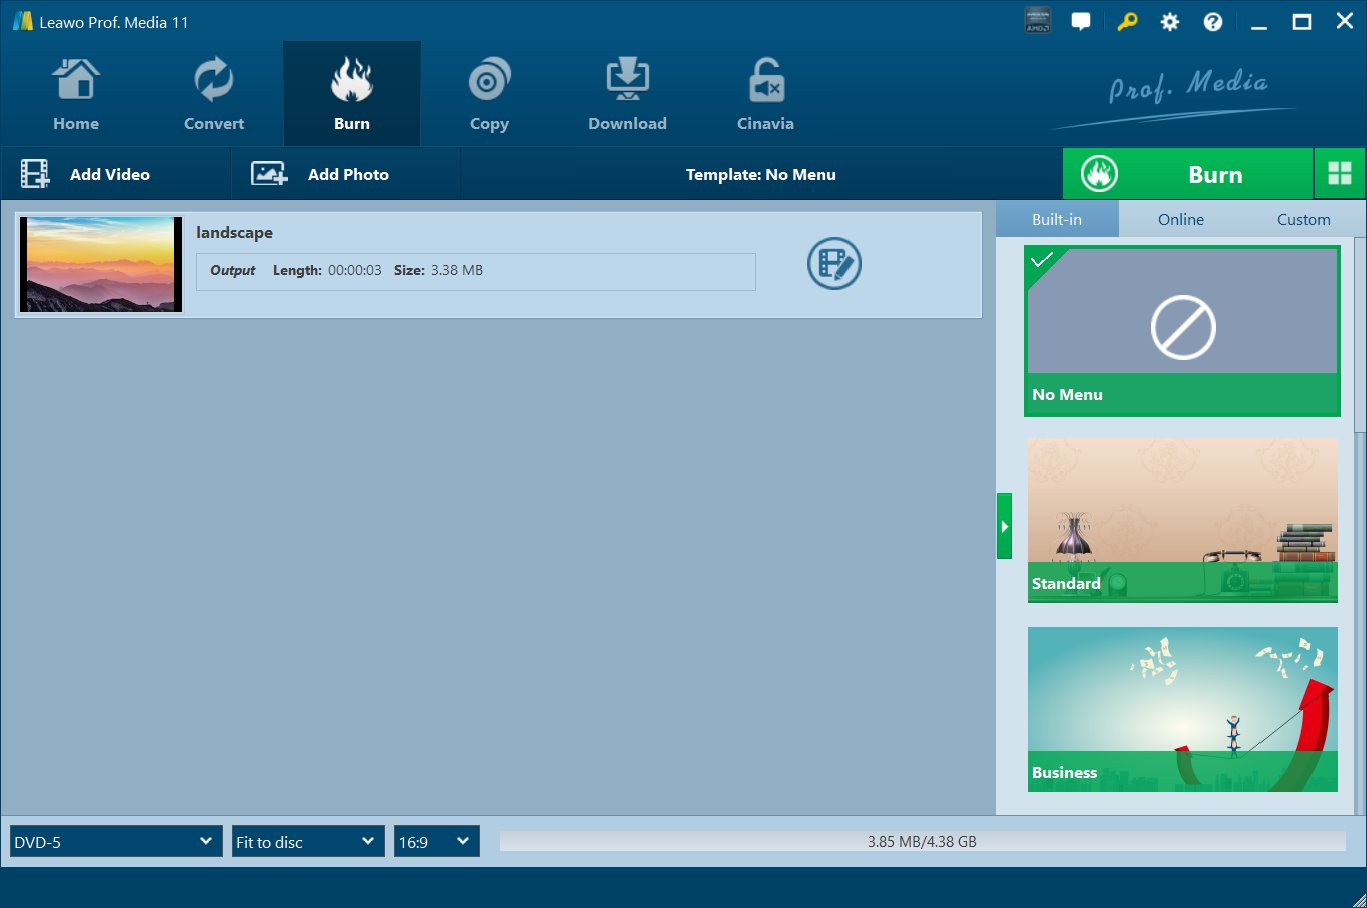
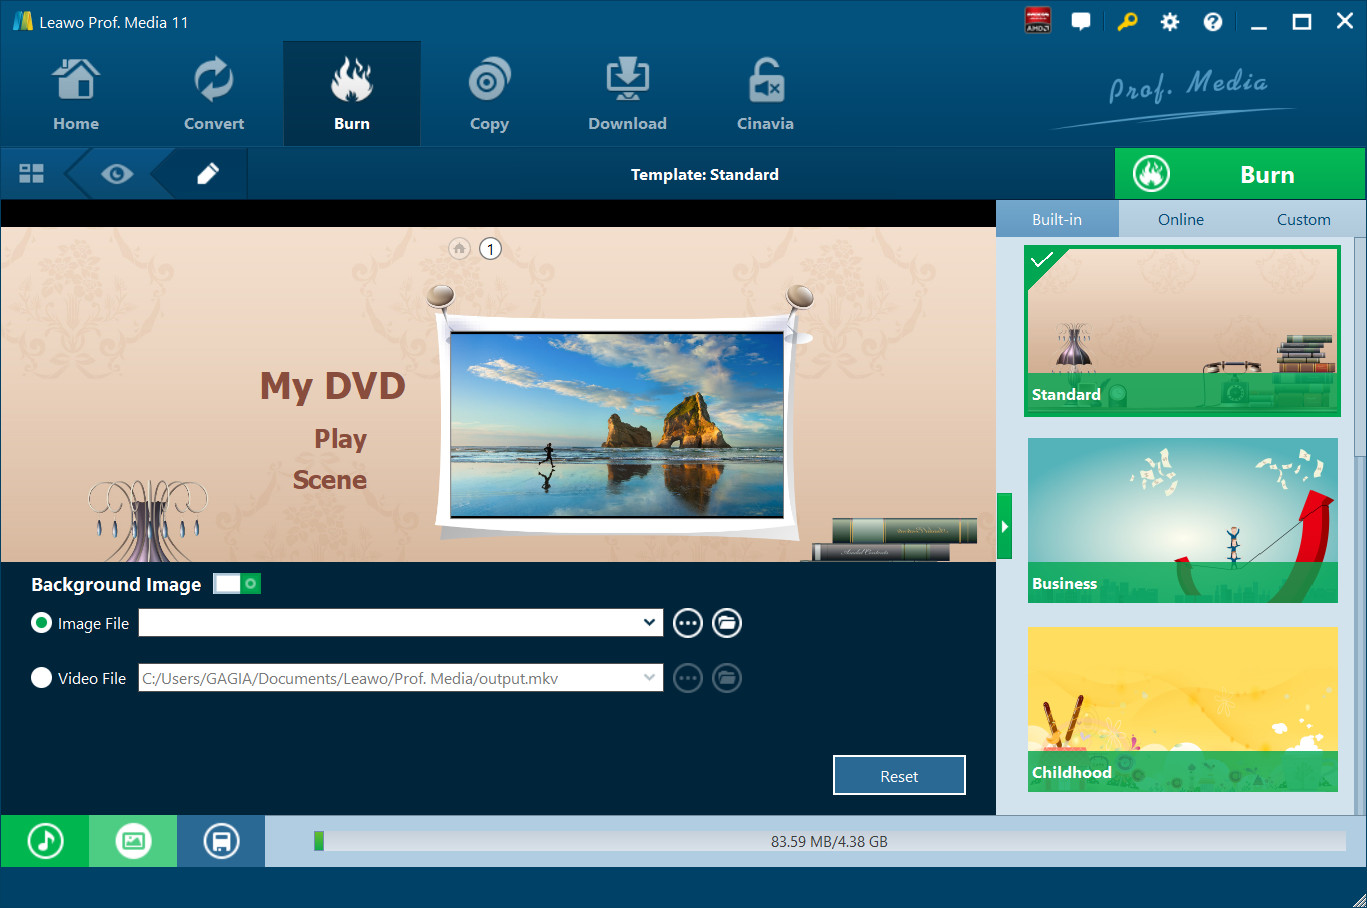
Step 2 Set disc menu
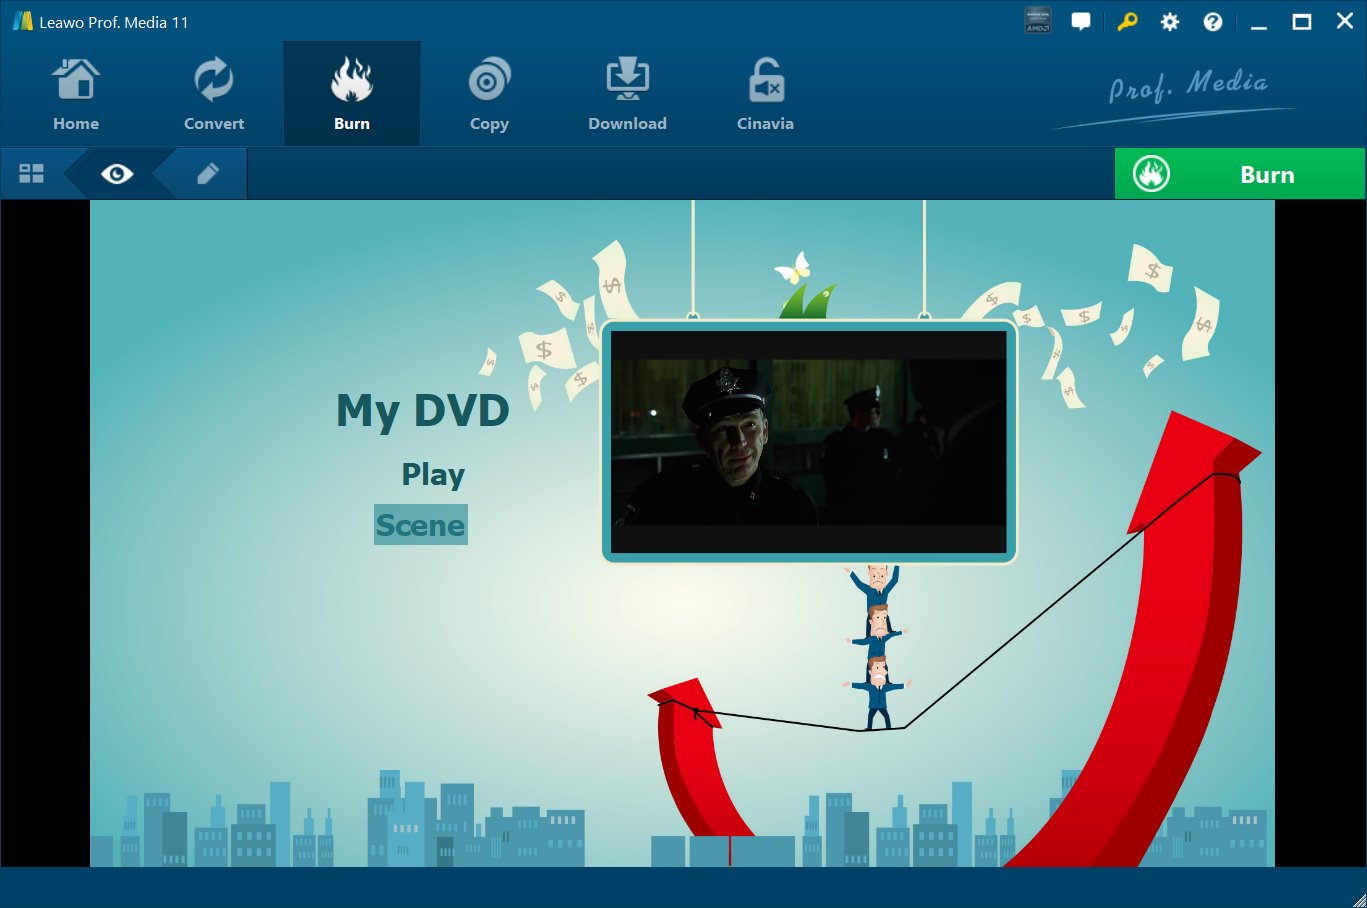
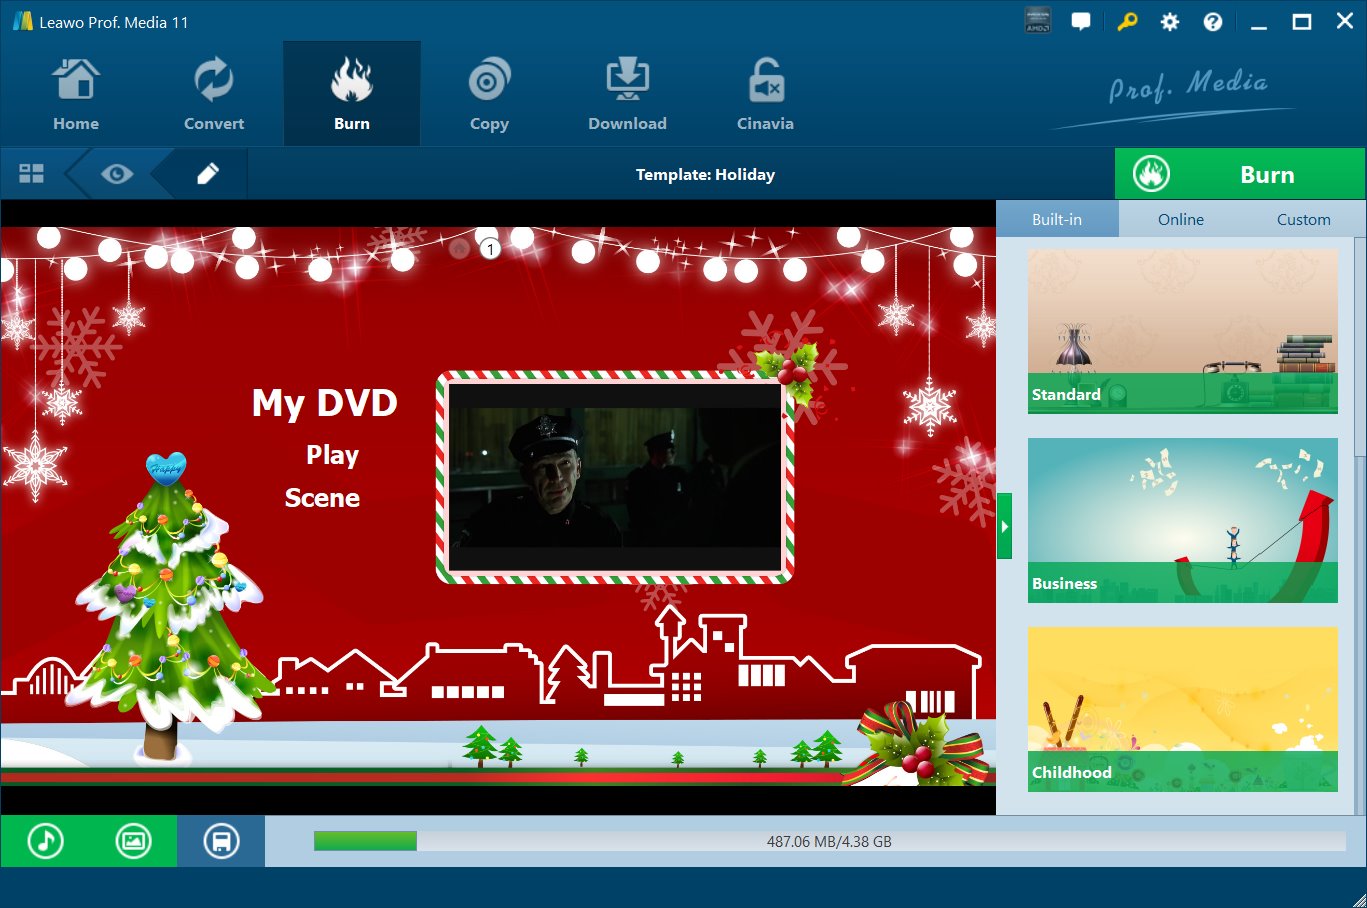
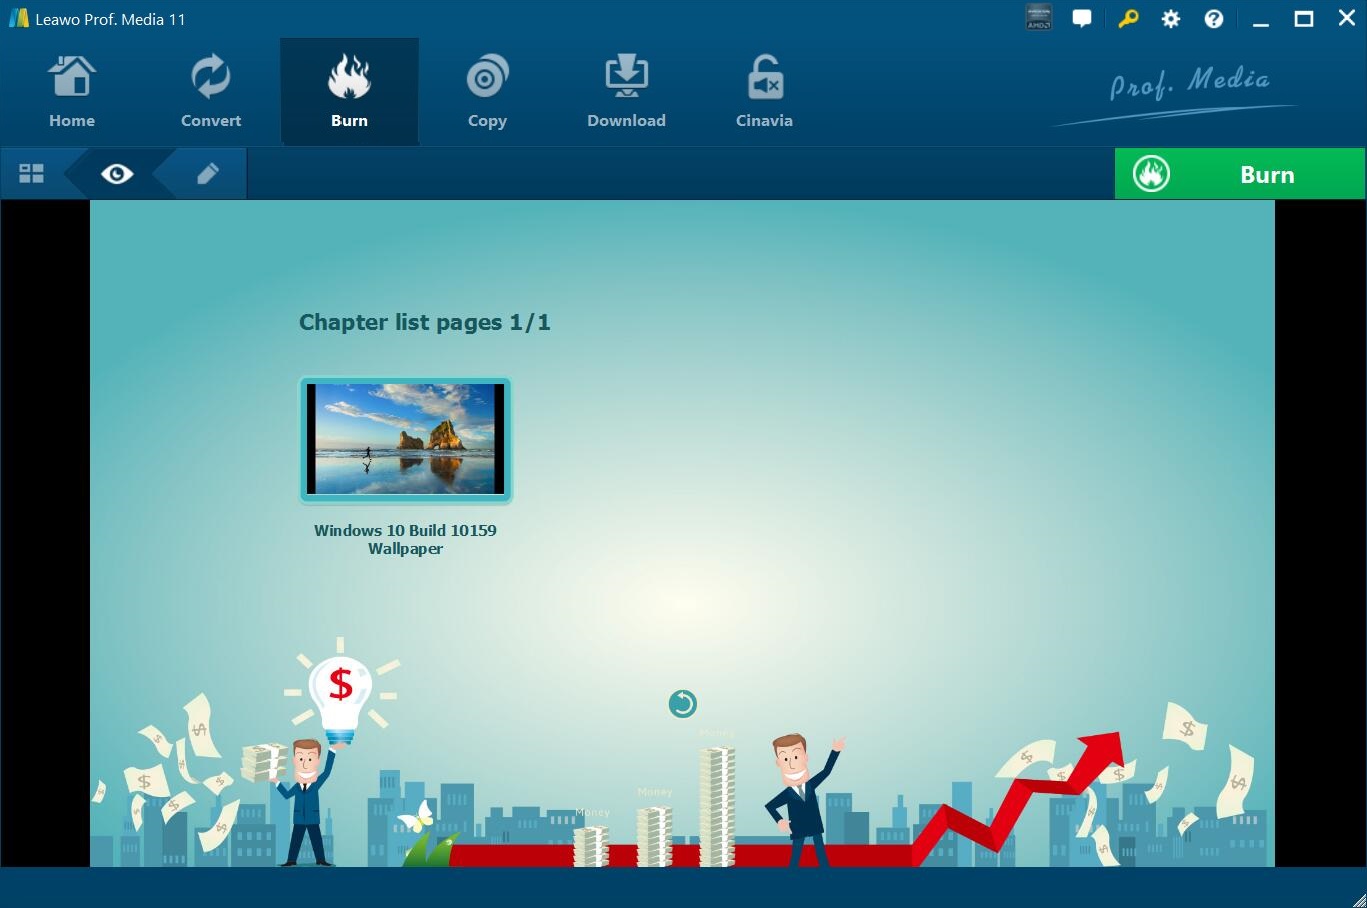
If you need disc menu, choose one from the disc menu gallery on the right side bar. There are preset disc menu templates in different themes, including: Standard, Business, Childhood, Education, Holiday, Nature, Sports and Wedding. You could click the middle eye-shape icon to get instant preview of selected disc menu. If you don't need a disc menu, just click the "No Menu" option on the top of the right sidebar.
With a disc menu designer inside, Leawo Prof. Media allows you to edit disc menu to add personal elements like background songs and images. On the disc menu preview panel, click the pencil icon to enter the disc menu custom panel, where you could add background music/image/video, change titles, modify the text font, adjust the icon locations, etc. After editing, click the blue "Save" button to add edited disc menu to "Custom" group.
Step 3 Start burning
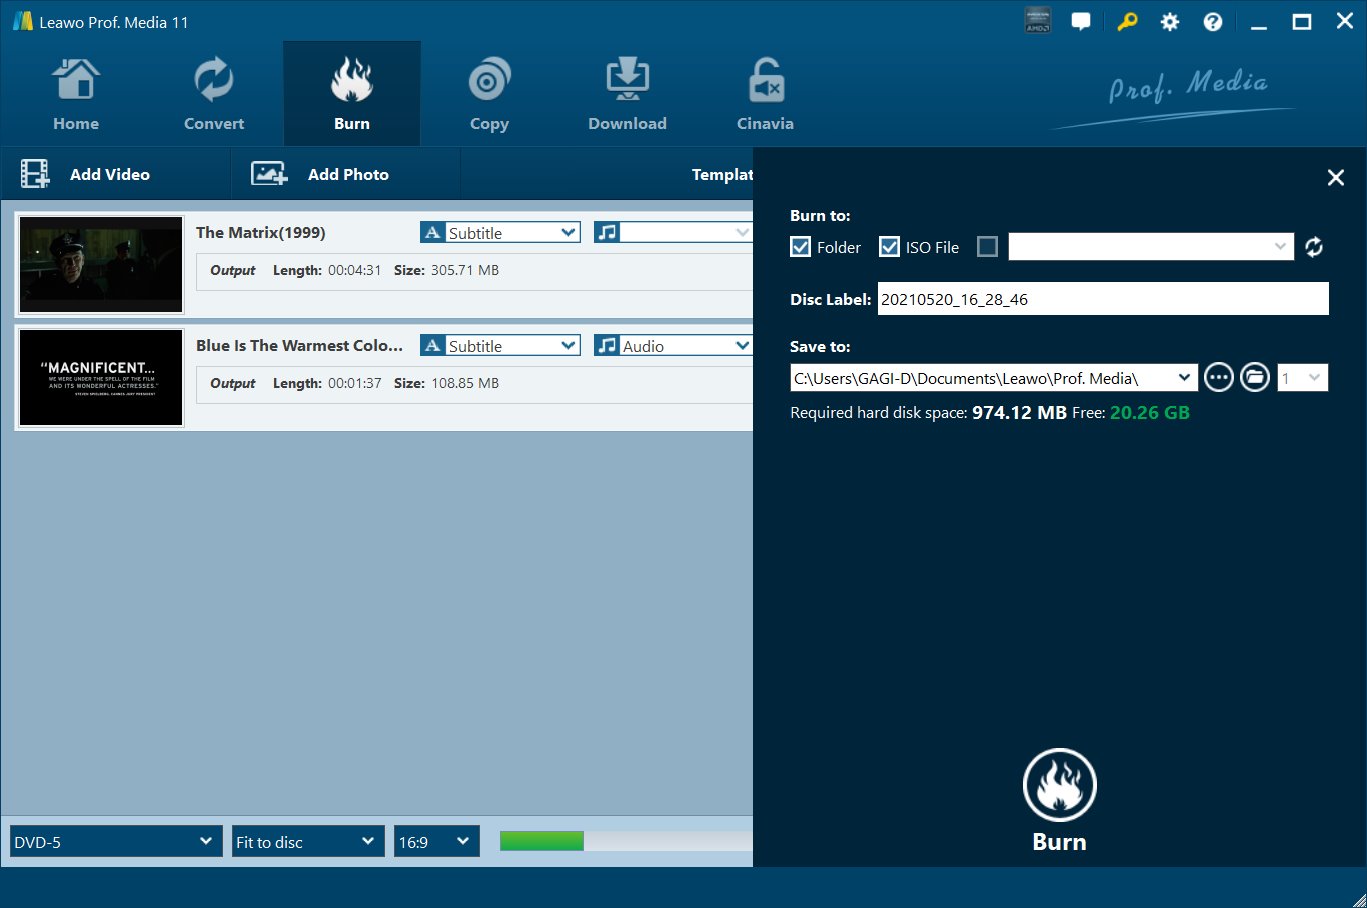
Then, return to the main interface and then click the big green "Burn" button. On the popup sidebar, set the "Burn to", "Disc Label", "Save to" options and then click the bottom "Burn" button to start burning video to Blu-ray/DVD movies.
Burn ISO to DVD/Blu-ray Disc
With an ISO image burner, you could not only create ISO image file from video/Blu-ray/DVD movies, but also burn ISO image file to DVD/Blu-ray disc in one click.
Step 1 Add source ISO file
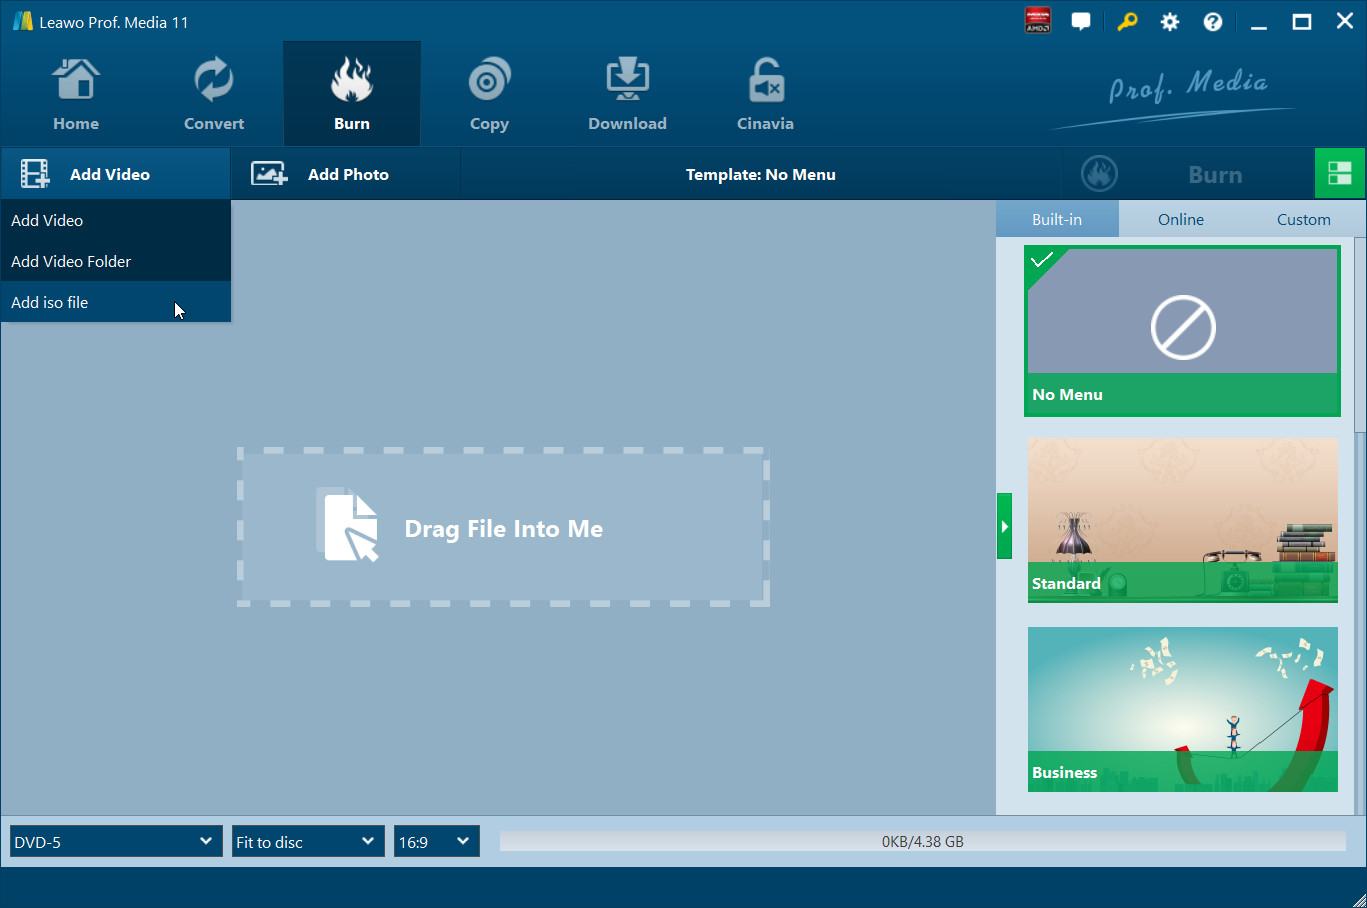
Under the "Burn" panel, click the inverted triangle icon next to the "Add Video" button and then select "Add iso file" option. You are then to browse and load source ISO file. Or, directly add source ISO image file by drag-and-drop.
Step 2 Do burning settings
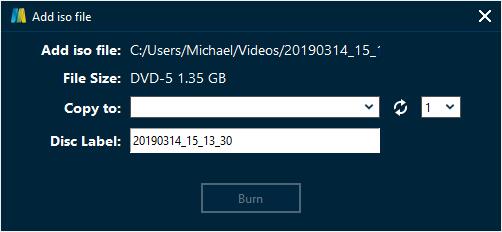
On the popup "Add iso file" window, set "Copy to" and "Disc Label". Only when you have inserted a blank and writable Blu-ray or DVD disc into the disc drive, could you select disc drive as Copy to target. After setting, click the "Burn" button to start burning ISO file to disc.
Copy and Backup DVD
Including a practical Blu-ray Copy function module that could be used as both Blu-ray copy and DVD copy software, Leawo Prof. Media enables you to copy Blu-ray and backup DVD movies to computer or blank discs, and backup ISO image file to DVD/Blu-ray disc in one click.
Step 1 Load source DVD movie
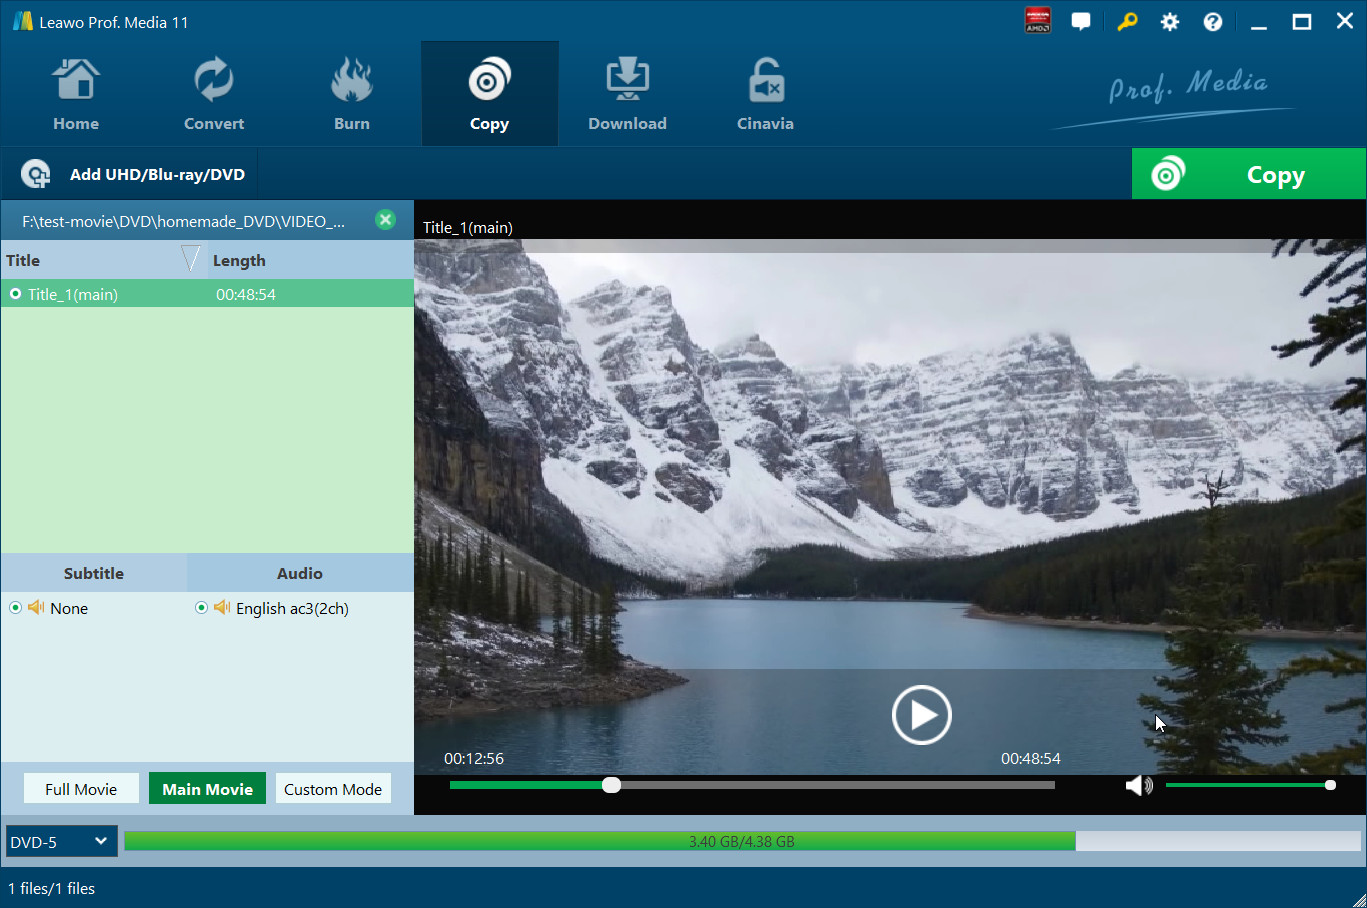
Under the “Copy” tab, click the “Add UHD/Blu-ray/DVD” button to load source 4K Blu-ray/Blu-ray/DVD movies. Also, you could directly drag and drop source 4K Blu-ray/Blu-ray/DVD movies. After loading source 4K Blu-ray/Blu-ray/DVD movies, select a copy mode from Full Movie, Main Movie and Custom Mode, set target disc type. You could play back loaded 4K Blu-ray/Blu-ray/DVD movies.
Step 2 Start DVD backup
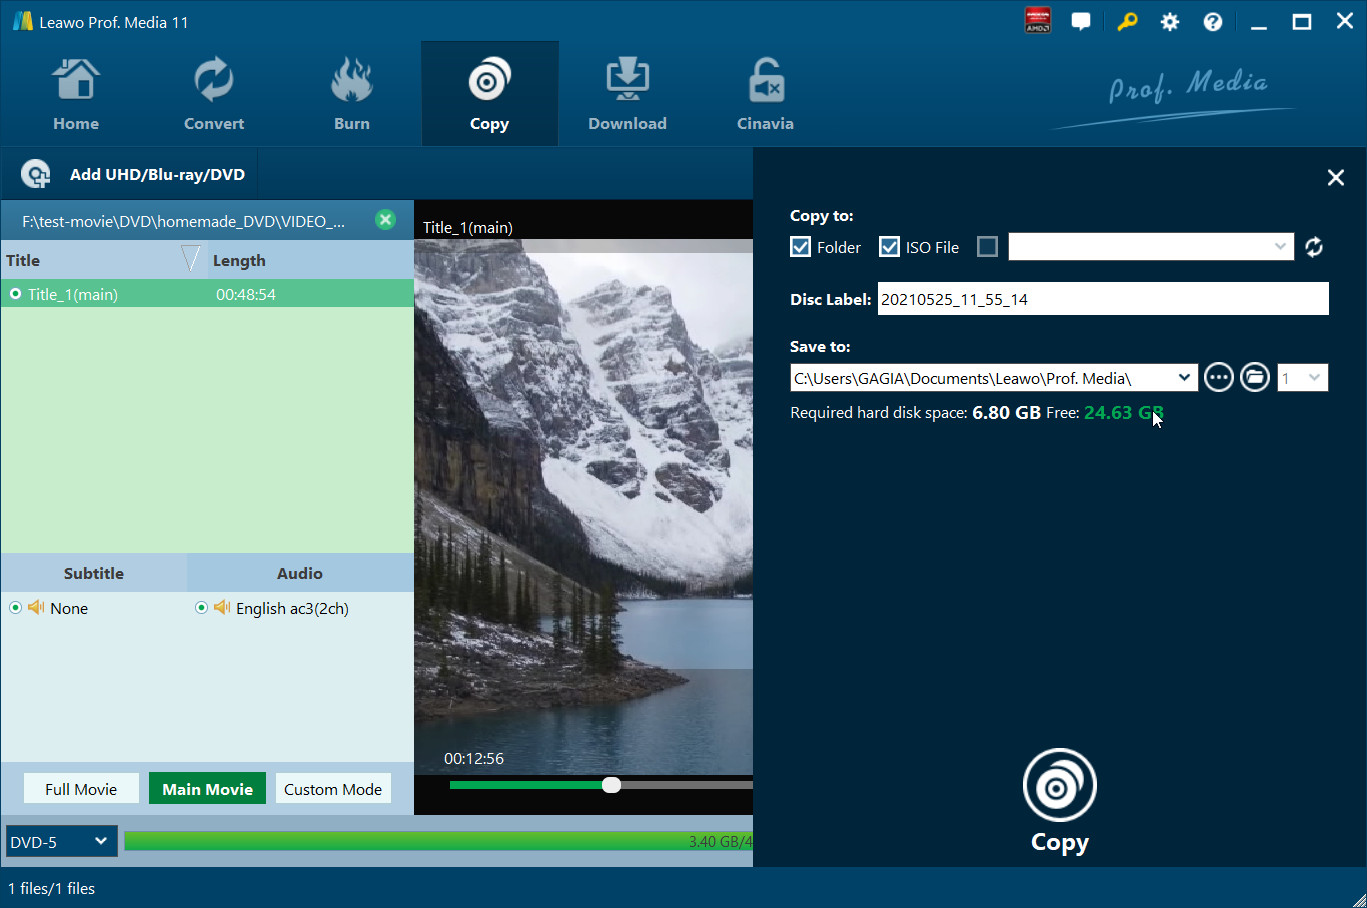
Click the big green "Copy" button. On the popup sidebar, set "Copy to", "Disc Label" and "Save to" options. After that, click the Copy button at the bottom to start 4K Blu-ray/Blu-ray/DVD backup immediately.
Note: Insert blank and writable disc into disc drive and then select it as target under "Copy to" box if you want to copy and backup 4K Blu-ray/Blu-ray/DVD disc.
Copy ISO to Disc
With Leawo Prof. Media, you could even directly copy and back up ISO file onto blank writable disc. Insert a blank and writable disc into disc drive and then follow the below steps to learn how to copy and back up ISO file onto disc directly.
Step 1 Load source ISO file
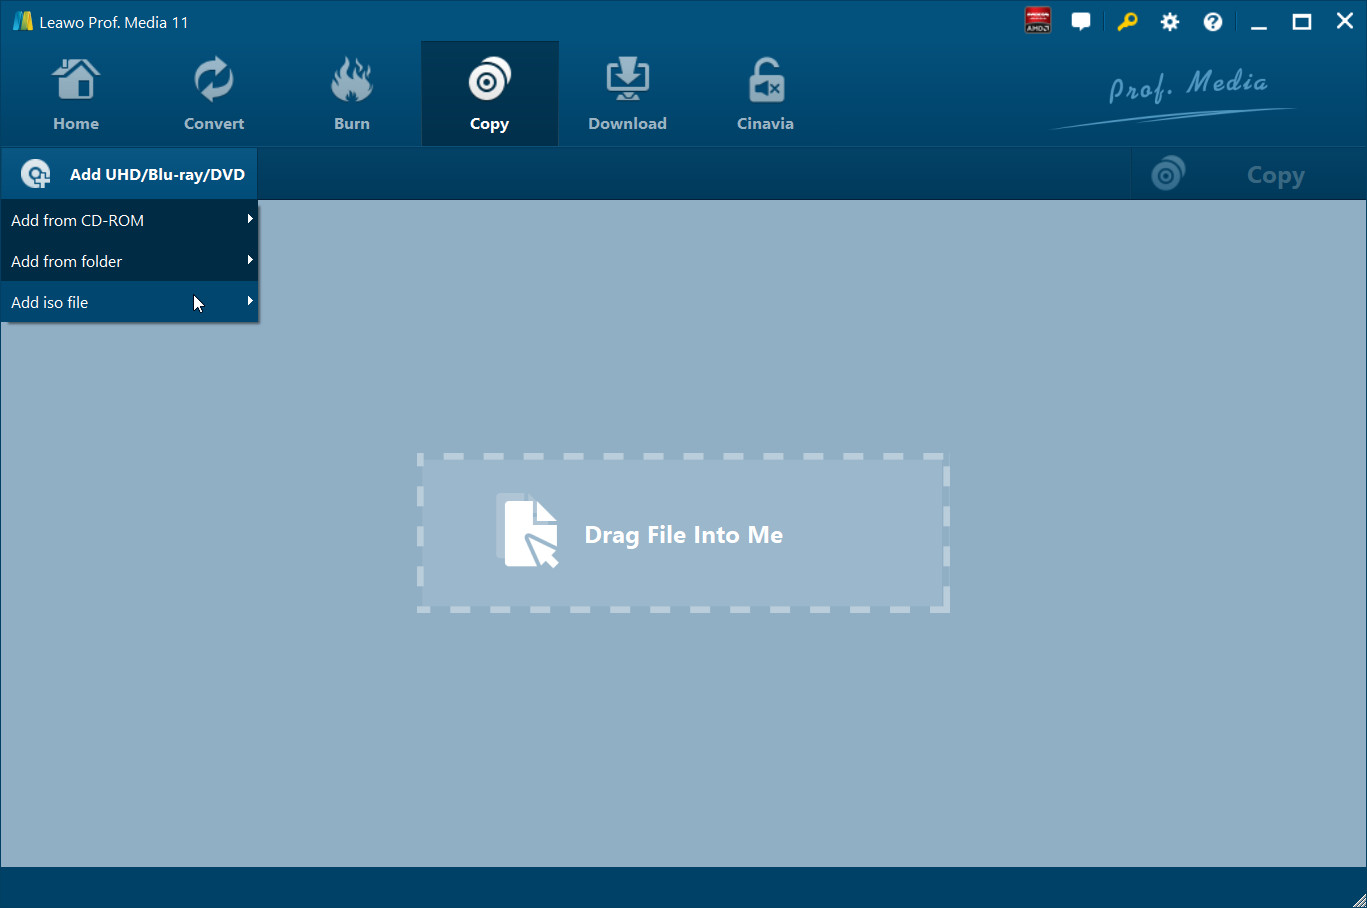
Under the "Copy" tab, click the inverted triangle button next to the "Add UHD/Blu-ray/DVD" button and then select "Add iso file" option. This app would lead you to load source ISO file on your computer for backup.
Step 2 Backup Settings
After loading source ISO file, on the popup "Add iso file" window, finish more settings including "Copy to" and "Disc Label" options. Generally speaking, after inserting blank writable disc into disc drive, Copy to option would automatically adopt disc drive. You could click the refresh button to refresh the program for scanning your disc drive. Finally, click the "Burn" button to start ISO file to disc backup.

Download Online Videos
Featuring online video downloader, Leawo Prof. Media could let you download online videos from YouTube, dailymotion.com, metacafe.com, blip.tv, veoh.com, liveleak.com, videobash.com, funnyordie.com, aol.com, break.com, vevo.com, etc., and download live streams from various live streaming sites.
Step 1 Add video URL
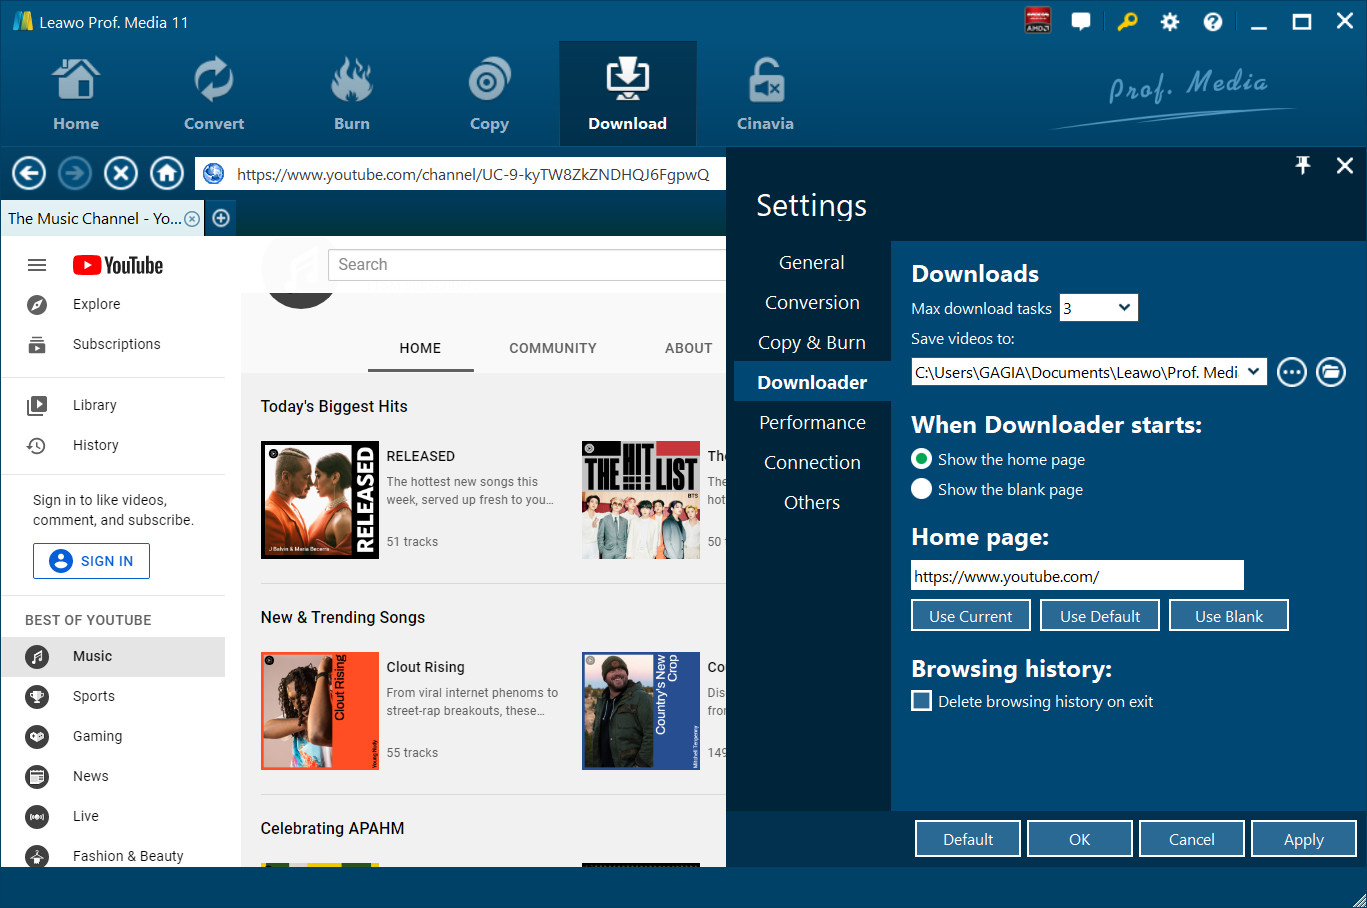
Click the wheel icon on the top-right corner and then open "Download" tab. Set download directory in the "Save videos to" box.
Step 2 Add video URL
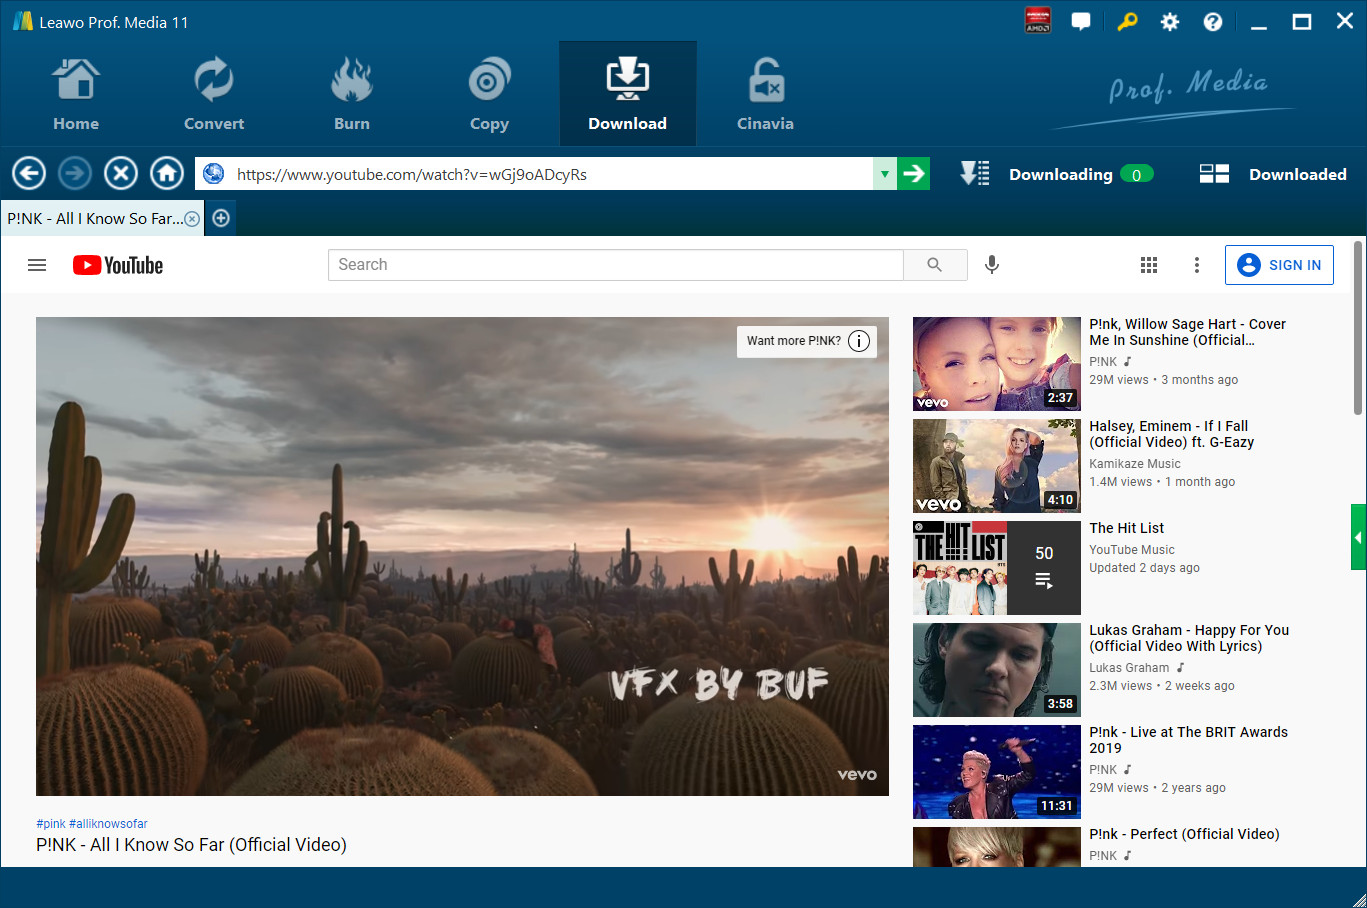
Open the “Download” tab. Copy and paste the URL of video you want to download into the browser address bar. Or, you could make use of the internal browser to browse the video you want to download.
Step 3 Get target videos
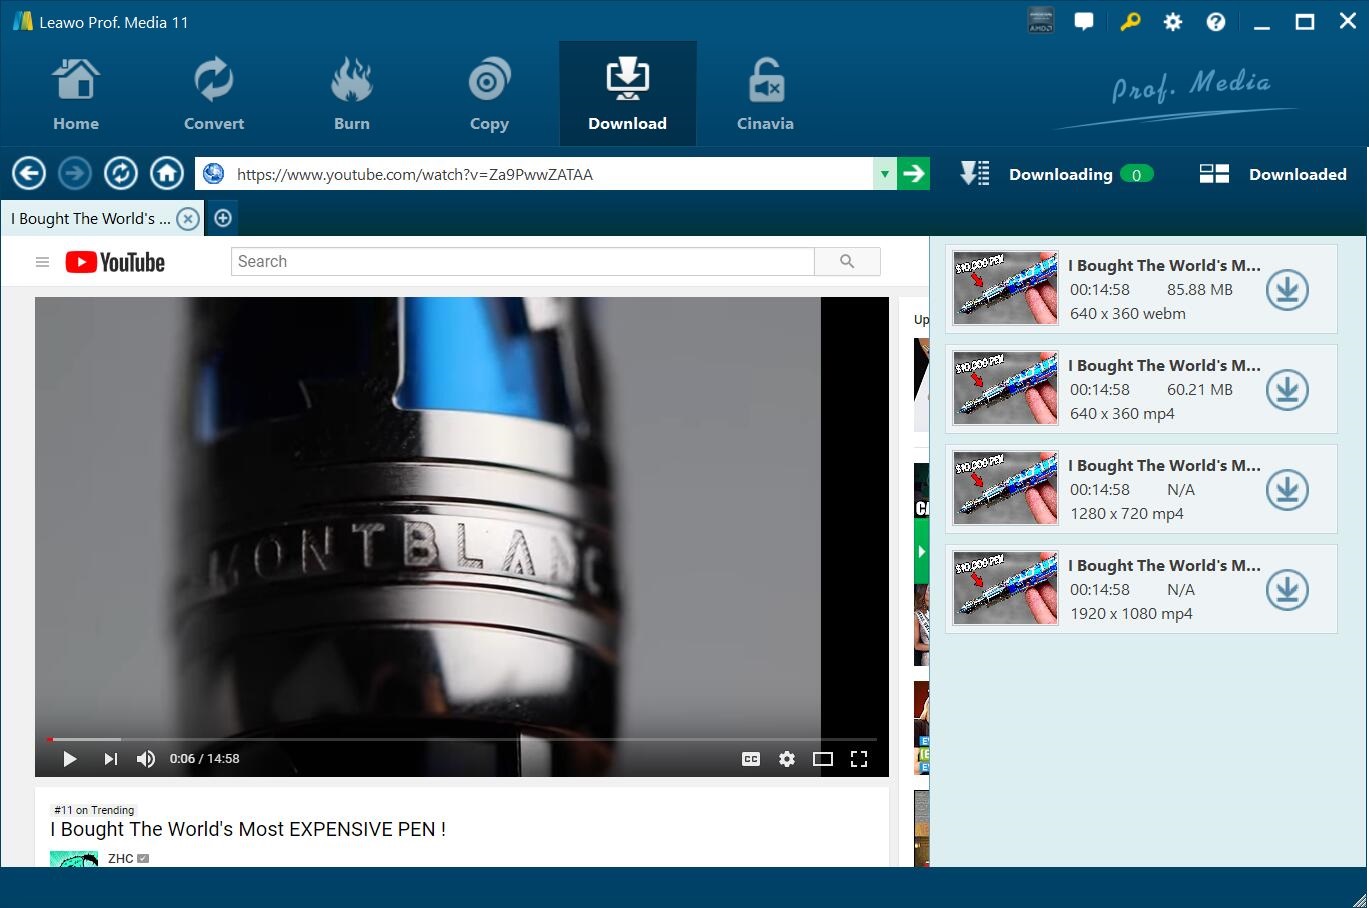
The internal online video downloader would find target videos and allow you to play videos back. On the right side bar, select one to download by clicking the download icon. This video downloader would display all available videos in different formats and quality.
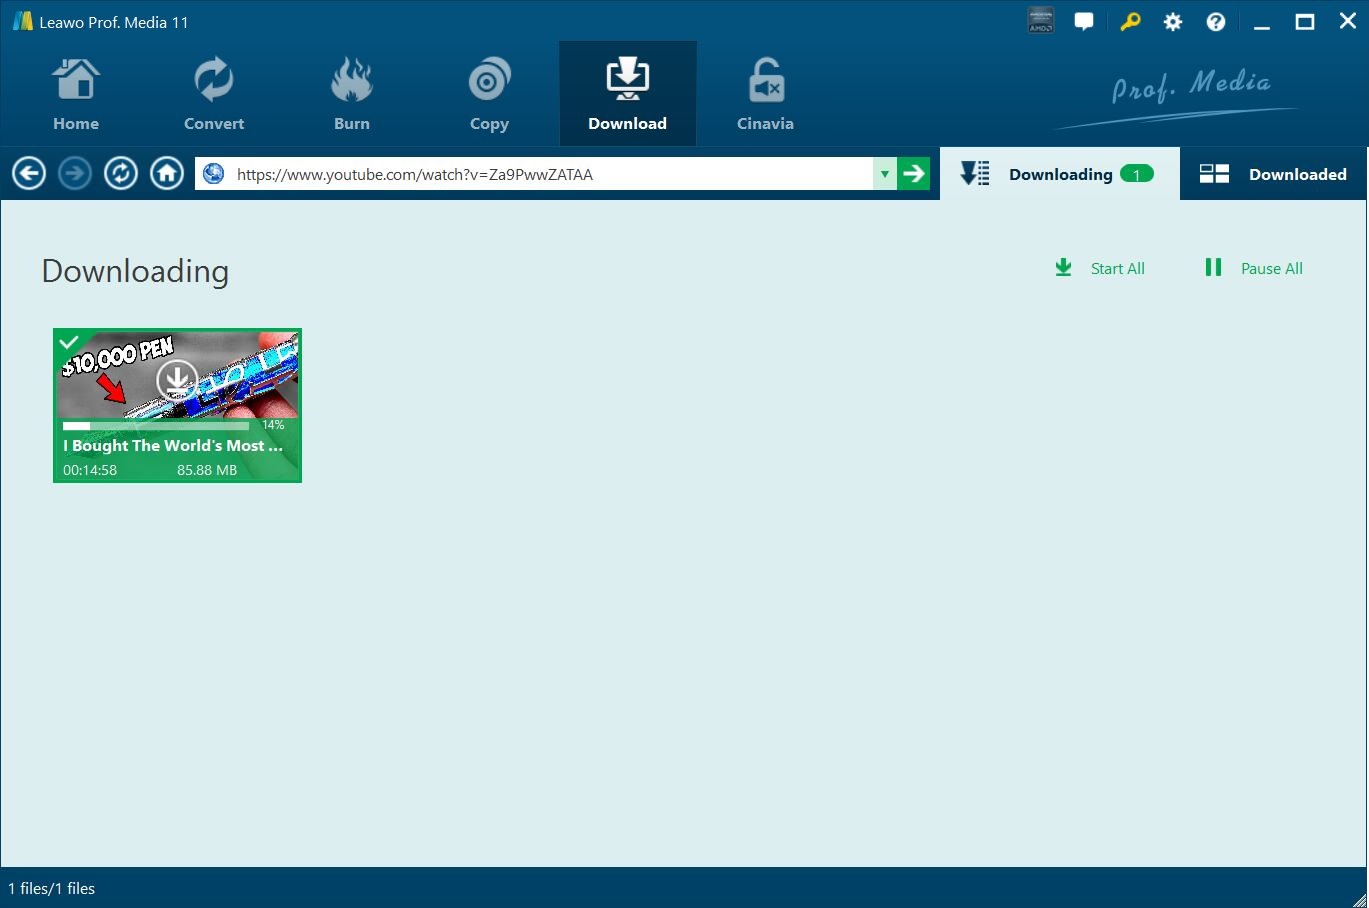
Step 4 Start downloading
Selected videos would be downloaded immediately after you click the download icon within this online video downloader. You could see all the downloading tasks in the Downloading sub-tab.
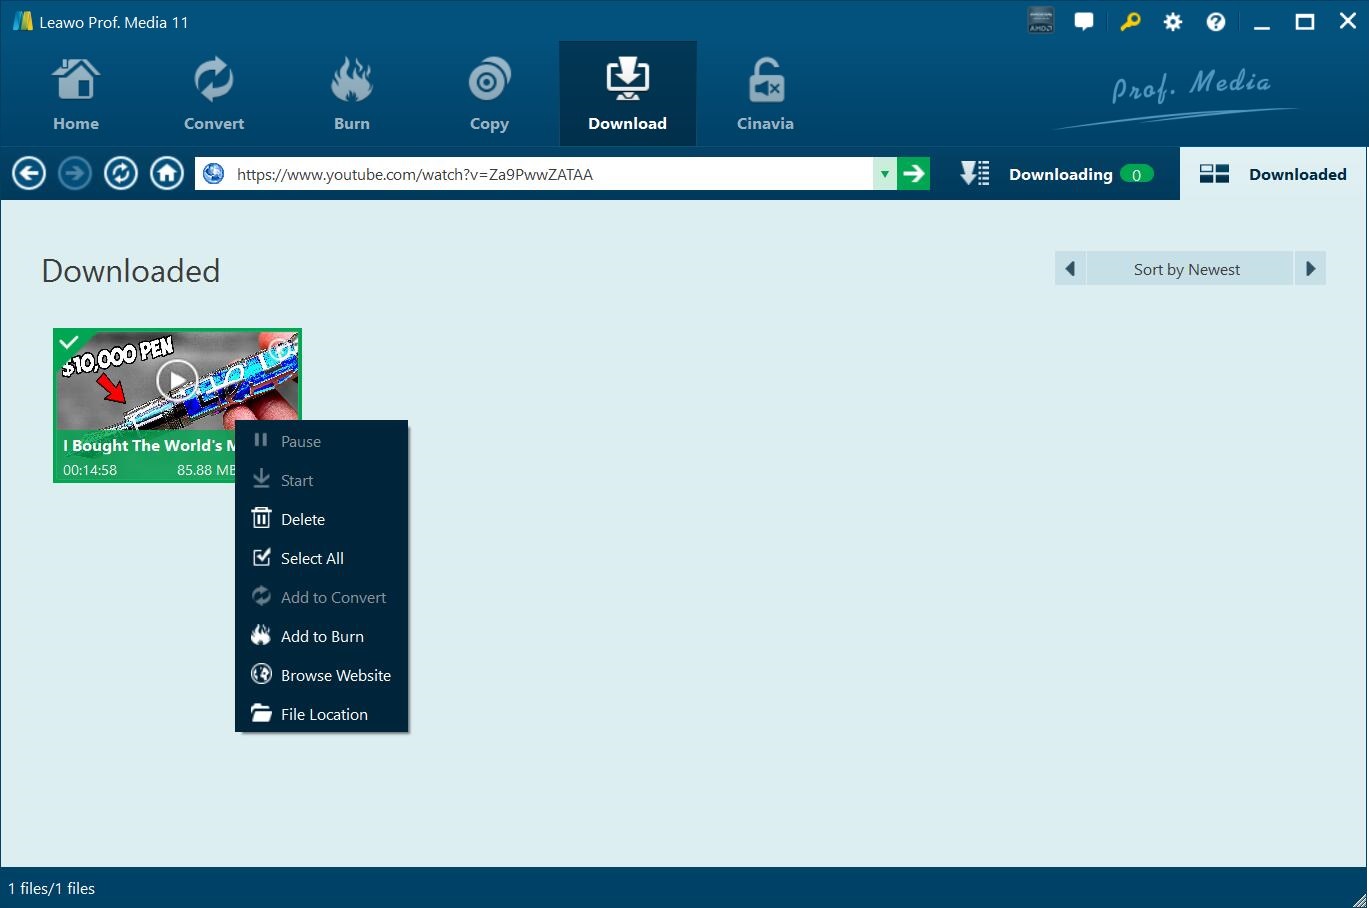
Step 5Convert or burn downloaded videos
All downloaded videos would be displayed under the Downloaded sub-tab. You could play these downloaded videos back, right click to choose "Add to Convert" for converting to other formats or "Add to Burn" option for burning to DVD/Blu-ray.
Create Photo Slideshow Video
Featuring a photo slideshow maker, Leawo Prof. Media could create photo slideshows in one-click. It could turn photos into photo slideshow as long as your photos are saved in JPEG, JPG, PNG and BMP formats.
Step 1 Load source photos
Go to the "Convert" tab and then click the "Add Photo" button to browse and add source photos. You could also directly drag and drop photos into this photo slideshow maker. You're able to load photo files and photo folder as you like. The loaded photos would be automatically generated into photo slideshow. You could play back the generated photo slideshow, click the "Edit" icon to edit photo slideshow video and audio, etc.
Step 2 Set output format
On the main interface, click the drop-down box right before the big green "Convert" button and then click "Change" option to enter the "Profile" panel to select a profile as output format from "Format" or "Device" group upon your needs. Also, you could add profiles into "Favorite" group and customize profiles for saving into "Custom" group for future using.

Step 3 Set output directory
After setting output profile, return to the main interface. Click the big green "Convert" button to set output directory in "Save to" box for saving created photo slideshow.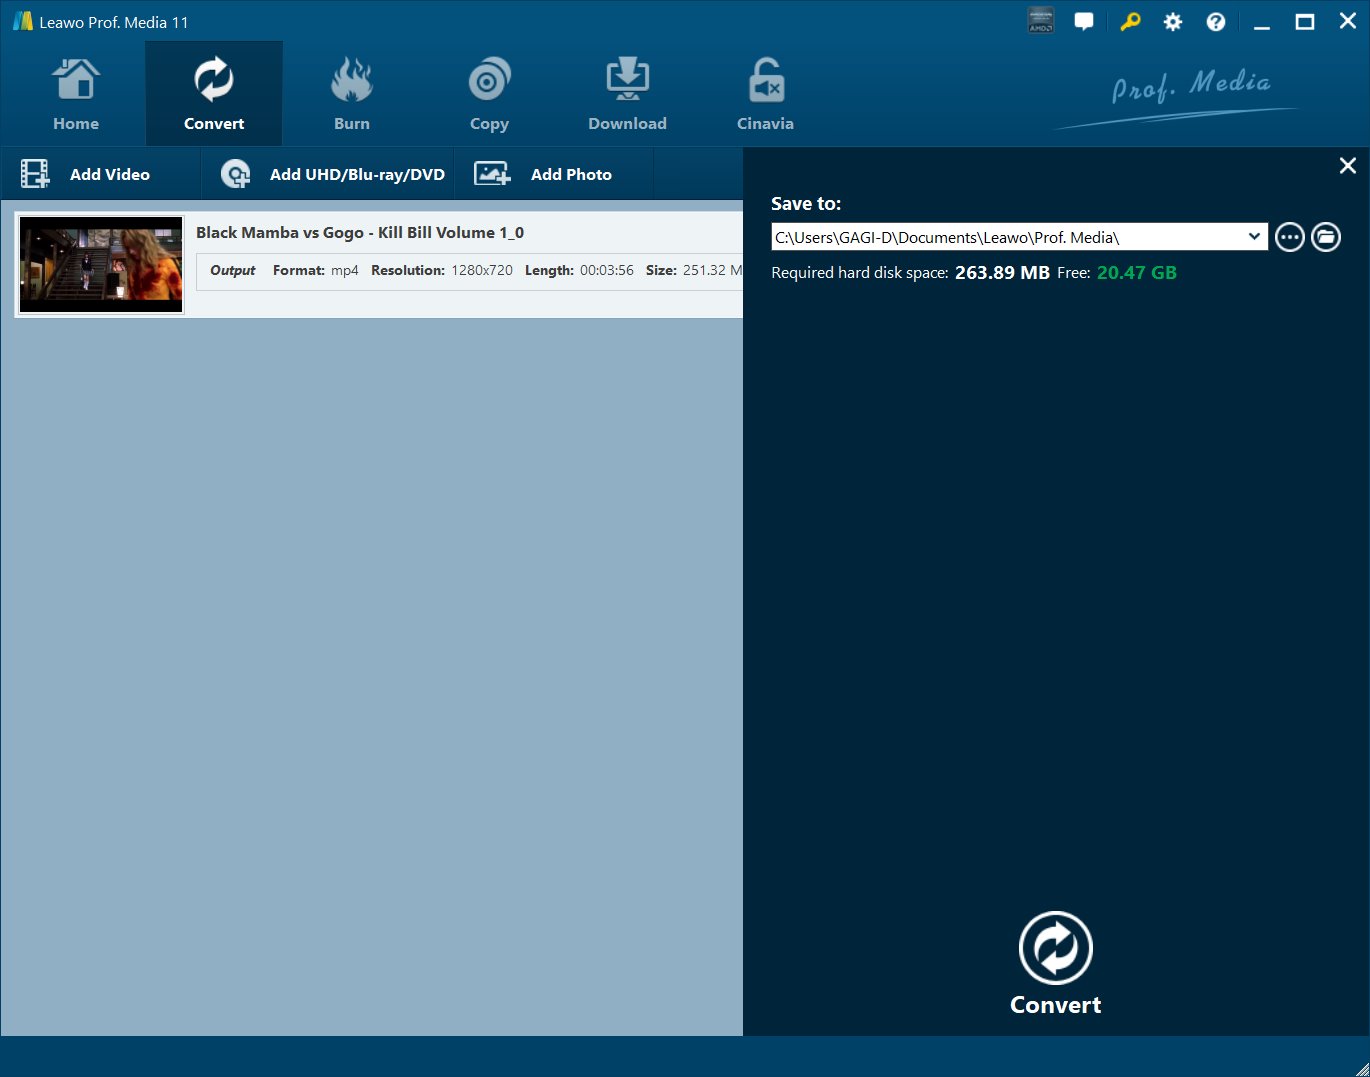
Step 4 Output photo slideshow
Finally, click the bottom "Convert" button to convert generated photo slideshow to video slideshow in your desired format.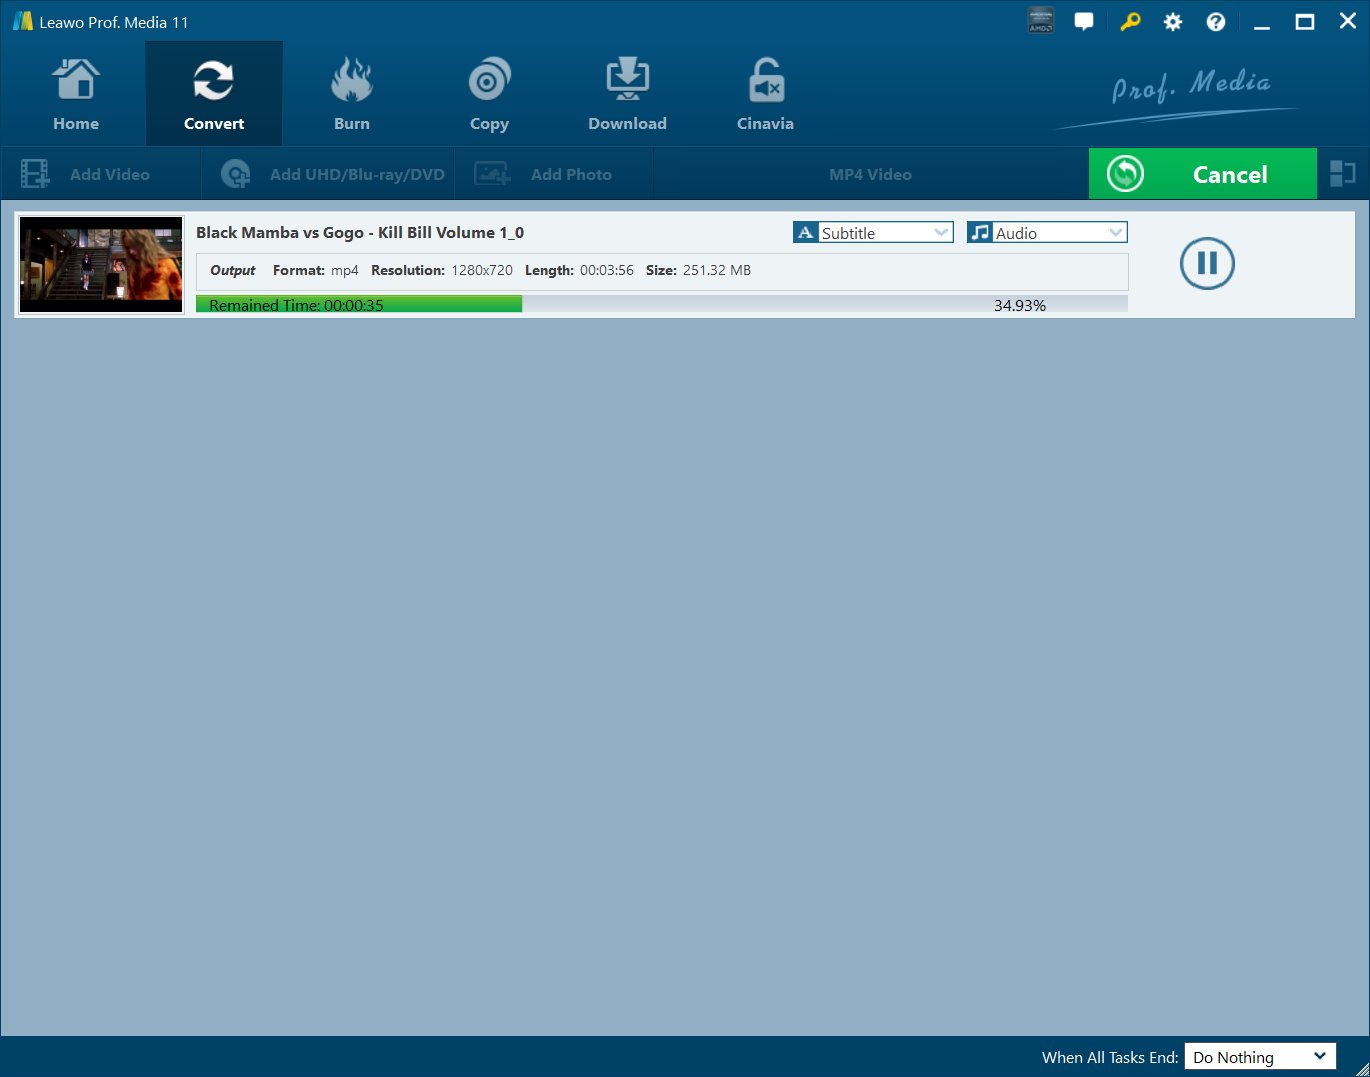
Burn photo slideshow to Blu-ray/DVD
Also, with a photo slideshow burner that could burn photos into Blu-ray/DVD photo slideshow, Leawo Prof. Media could generate photo slideshow and then burn to Blu-ray/DVD format, allowing you to edit photo slideshows and add disc menu as you like.
Step 1 Load source photos
Go to the "Burn" tab and then click the "Add Photo" button or directly drag and dop to import source photos. The internal photo slideshow burner would automatically generate photos into photo slideshow upon loading. After adding source photos, set disc type, quality and aspect ratio at the bottom. Play back generated photo slideshow if you like.
Step 2 Set disc menu
You could add a disc menu to output Blu-ray/DVD photo slideshow by selecting preset disc menu from the right sidebar or designing a disc menu by yourself within the internal menu designer. There are different themes of disc menu for you to choose. Click the middle of selected disc menu to get instant preview. Click "No Menu" option if you don't want a disc menu.
Step 3 Burn settings
Click the big green "Burn" button on the main interface. On the popup sidebar, finish photo slideshow to Blu-ray/DVD burning settings: Burn to, Disc Label and Save to. You could even click the wheel icon on the top-right corner of Leawo Prof. Media and then enter the "Copy & Burn" option for more settings: Burning Engine, Video Mode, Region Code, etc.

Note: To burn photos to Blu-ray/DVD disc, you need to insert a blank writable Blu-ray/DVD disc into the disc recorder drive and then choose it as target under the "Burn to" option.
Step 4 Burn photo slideshow
Finally, click the bottom "Burn" button to start burning photo slideshow to Blu-ray/DVD format..
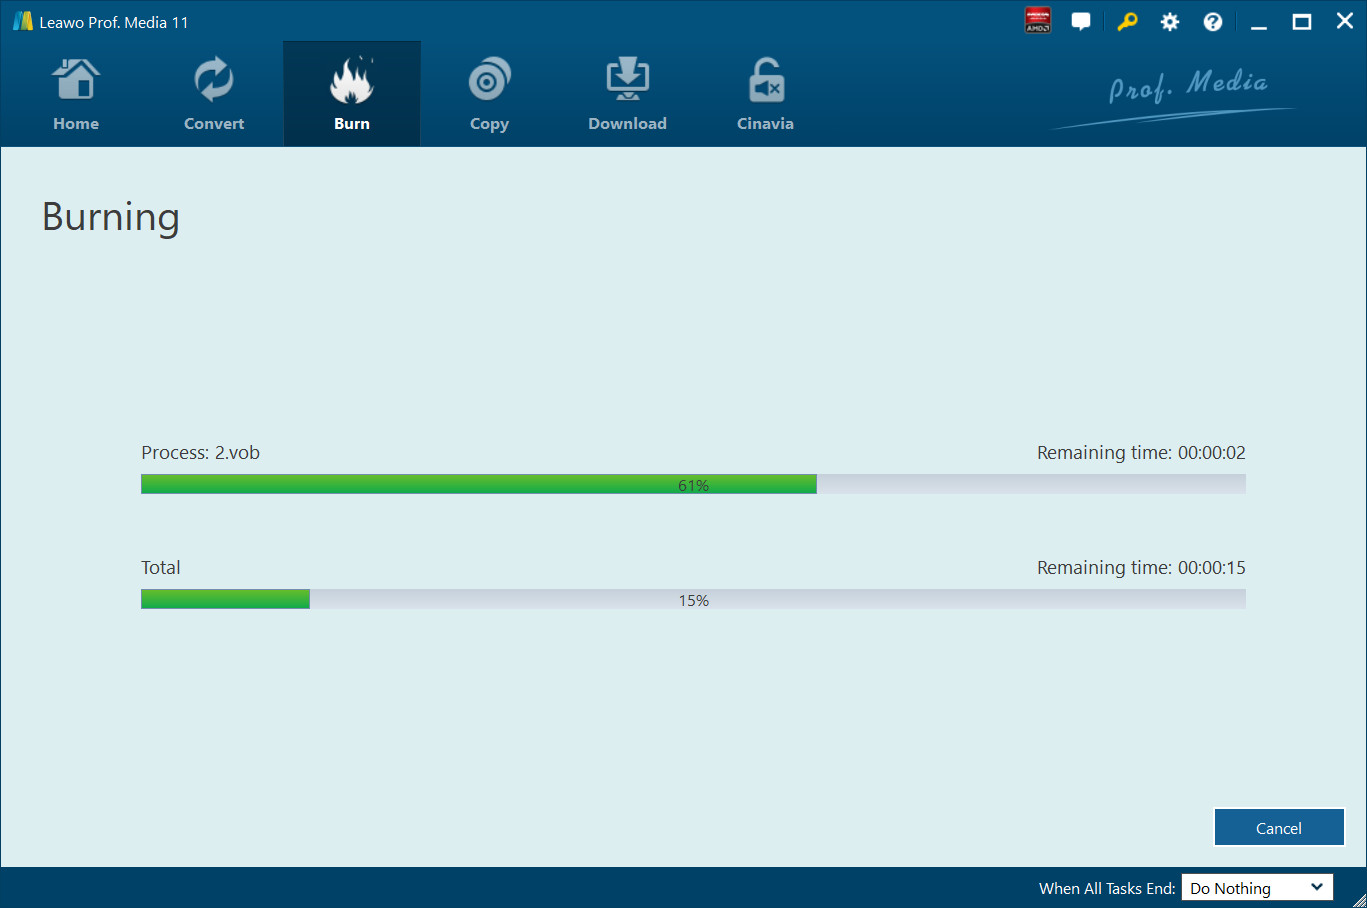
Photo Slideshow Editing
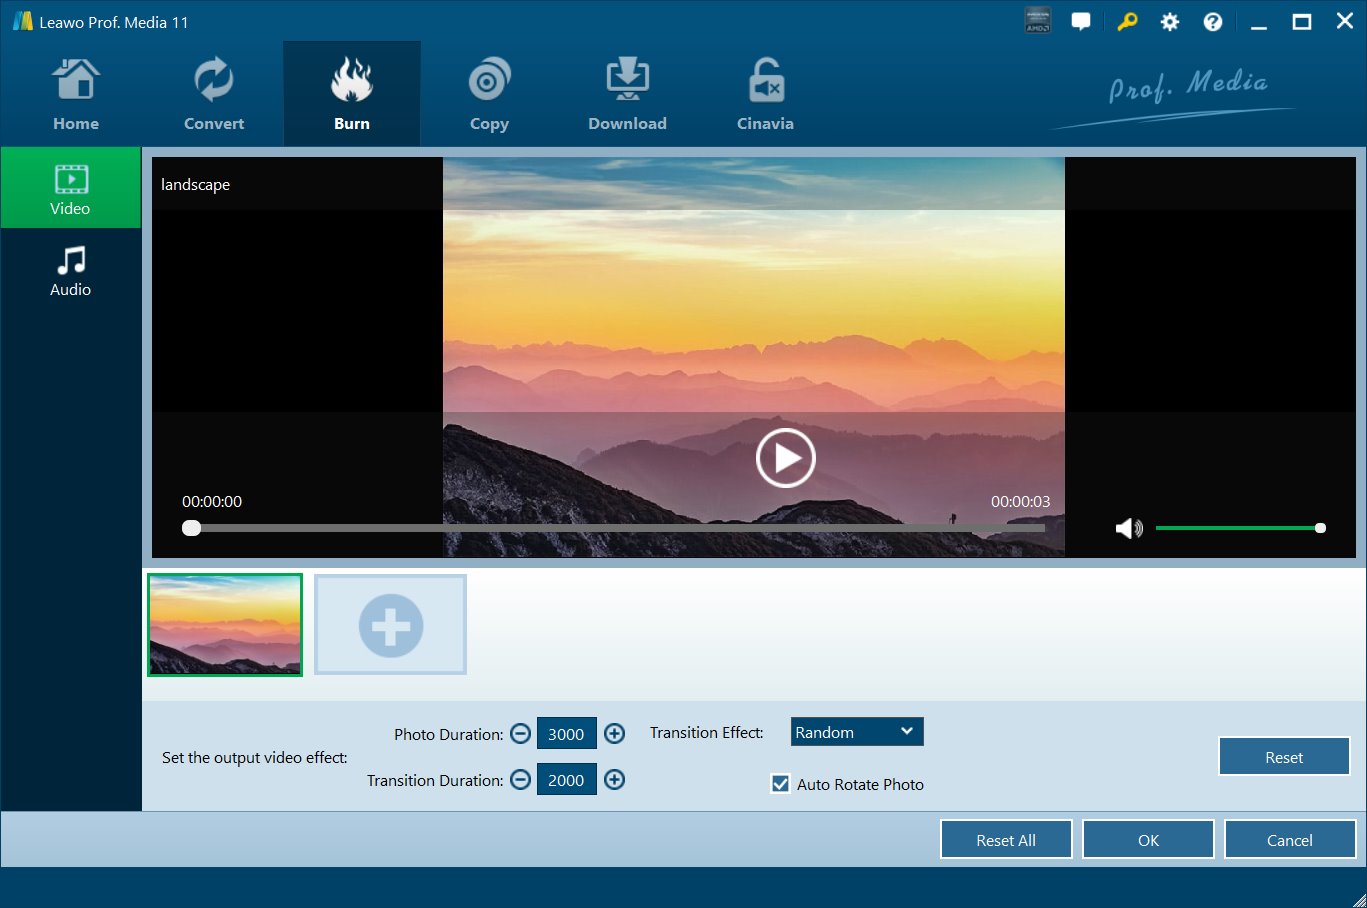
With the internal photo slideshow maker and photo slideshow burner, you could freely create photo slideshow and then burn photo slideshow to DVD/Blu-ray format. Also, with a photo slideshow editor, you are enabled to edit generated photo slideshow. After loading source photos, click the "Edit" icon in generated photo slideshow title to enter the photo slideshow editing panel.Step 1 Edit photo slideshow video
Under "Video" tab, you could adjust photo order, import extra photos, remove/rotate photo, set the output video effect, etc.
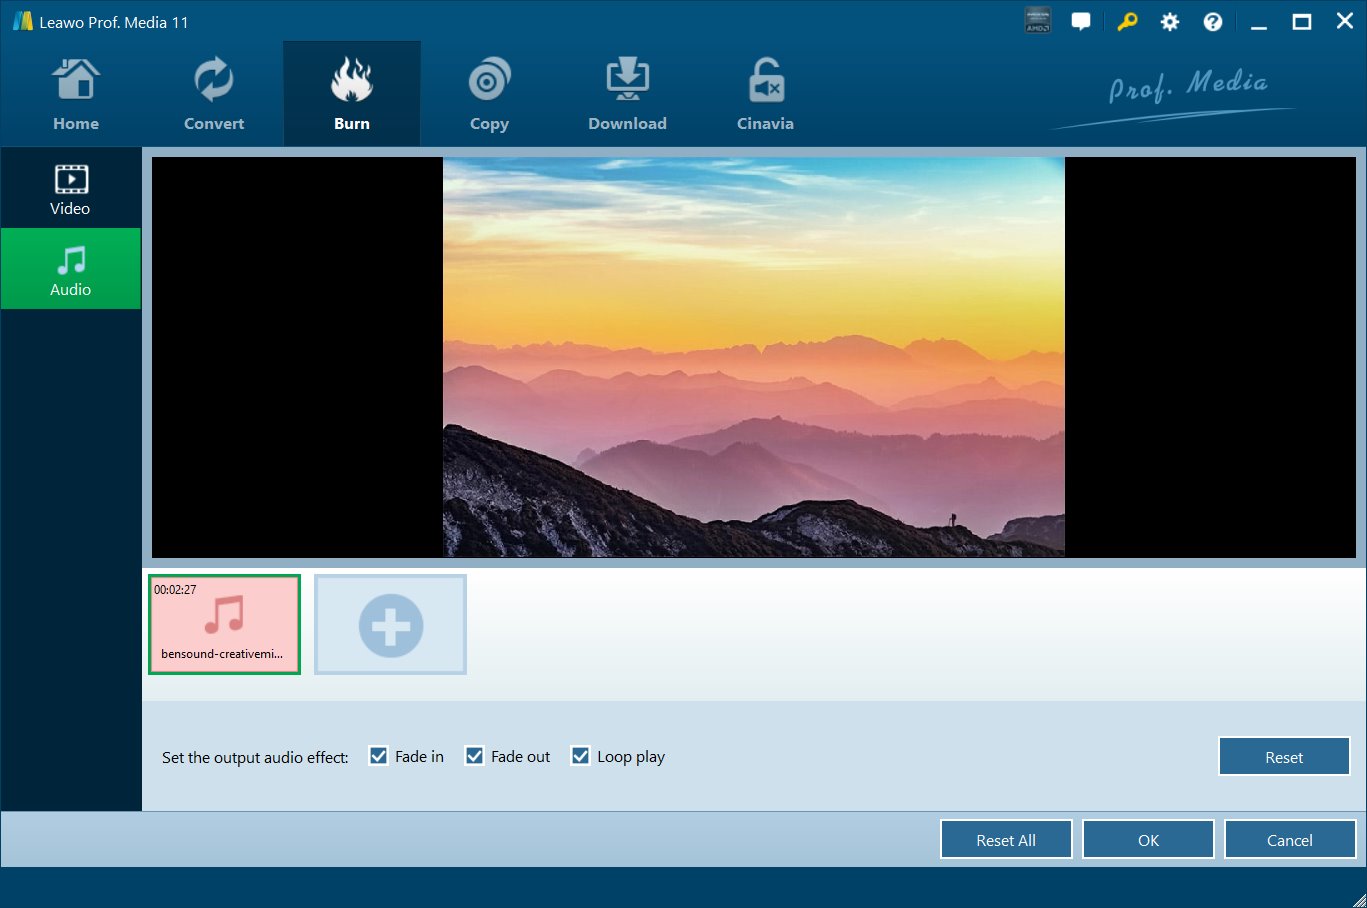
Step 2Edit photo slideshow audio
Under "Audio" tab, you could add music as background and set the output audio effect.
Video editing
Leawo Prof. Media comes with a practical mini video editor that could help you trim video length, crop video size, adjust video effect, add watermark, remove video noise, create chapter, etc. After loading source media files into the Convert or Burn tab, you could check a loaded media file and then click the "Edit" icon, or right click selected media file and then choose Edit option, to enter the "Video Edit" panel.
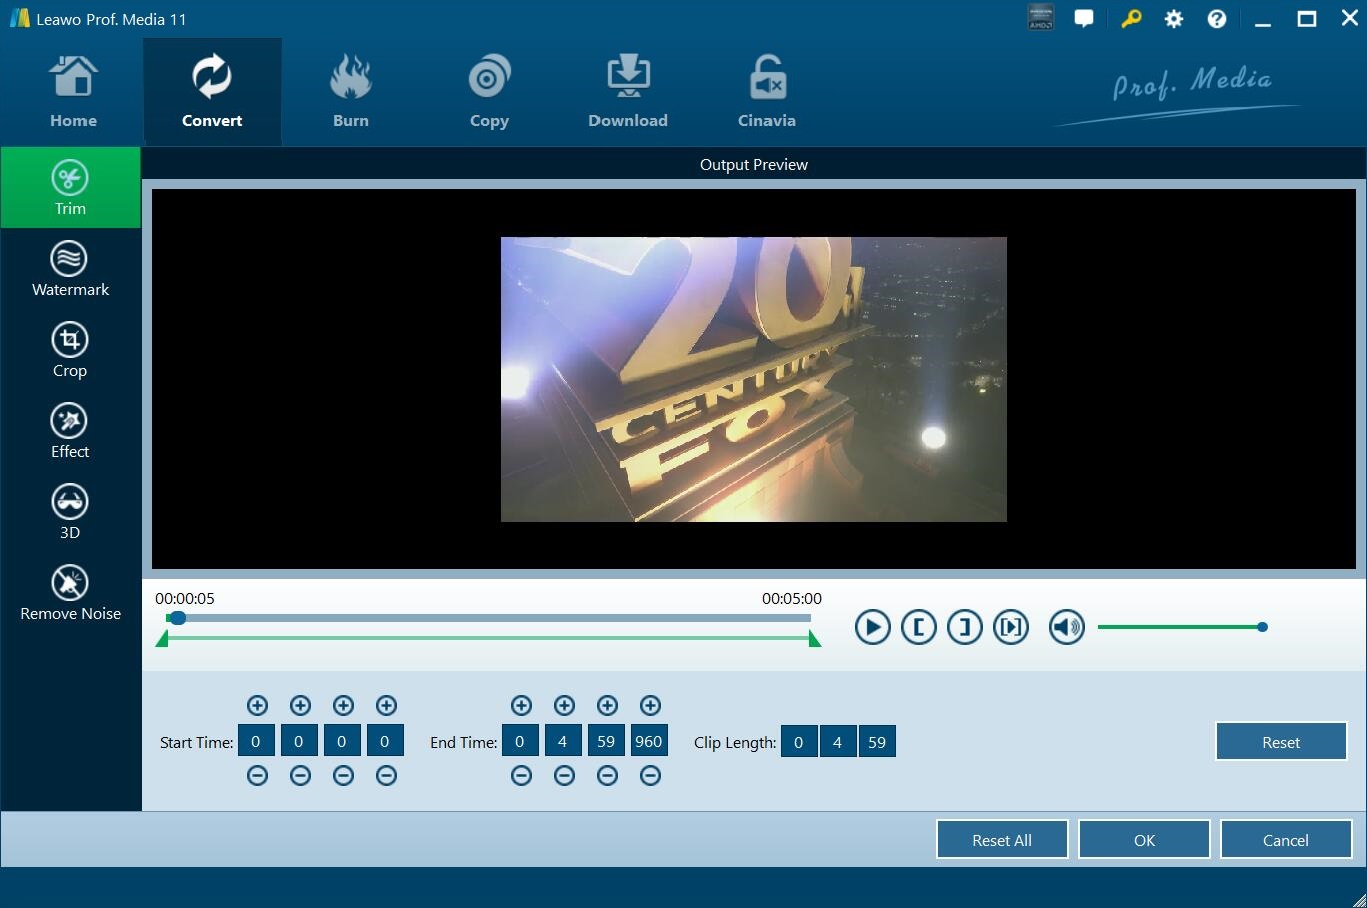
Trim video length
Under the "Trim" tab, set the "Start Time" and "End Time" or move the horizontal triangles on the play bar to get the video clips you want.
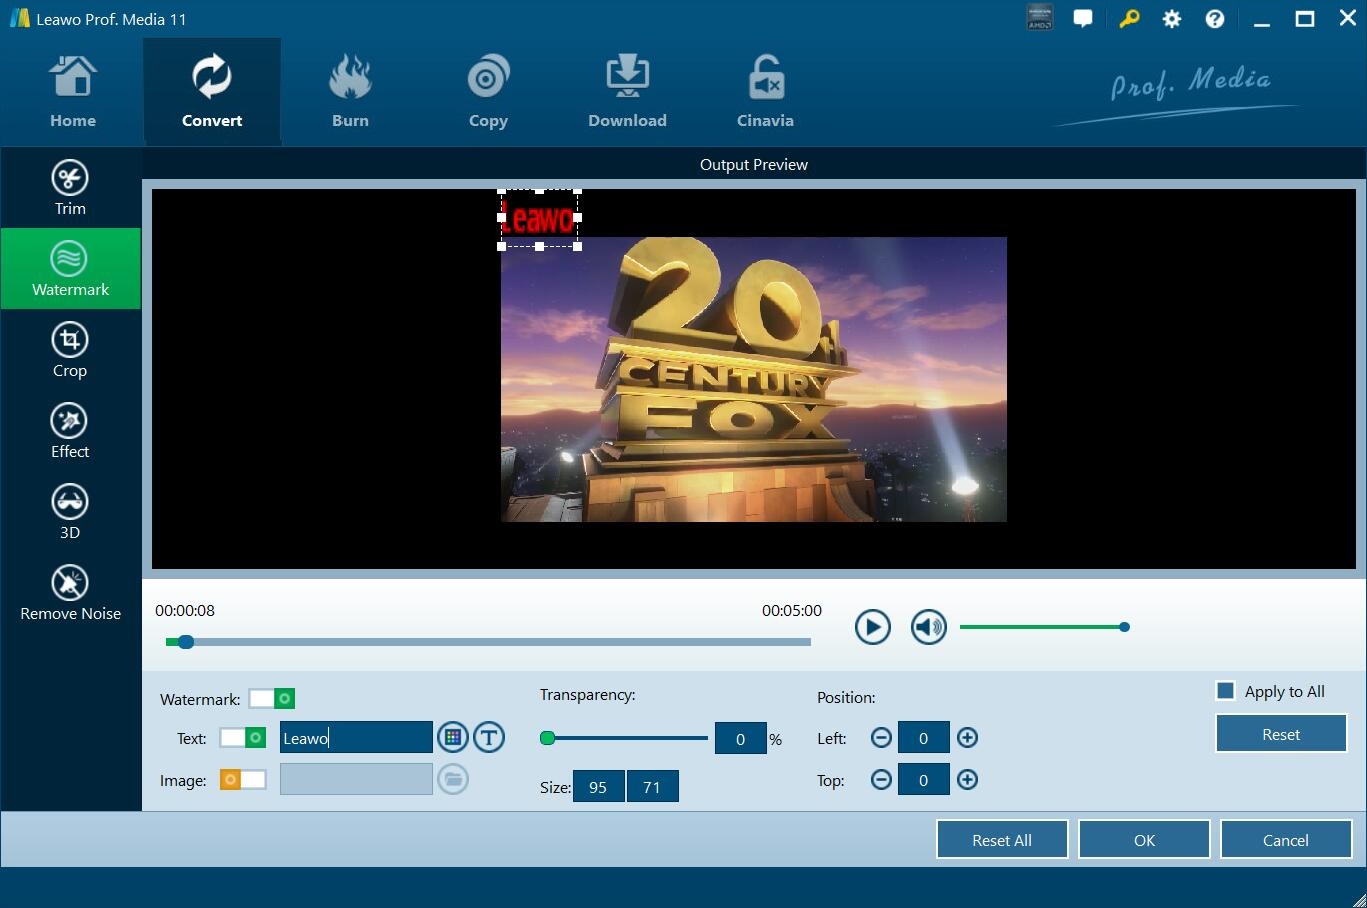
Add image or text watermark
In Watermark section, slide Watermark to green and then choose to add text or image as watermark. The watermark could be edited, like image transparence, position and size, text font, color, transparence and position.
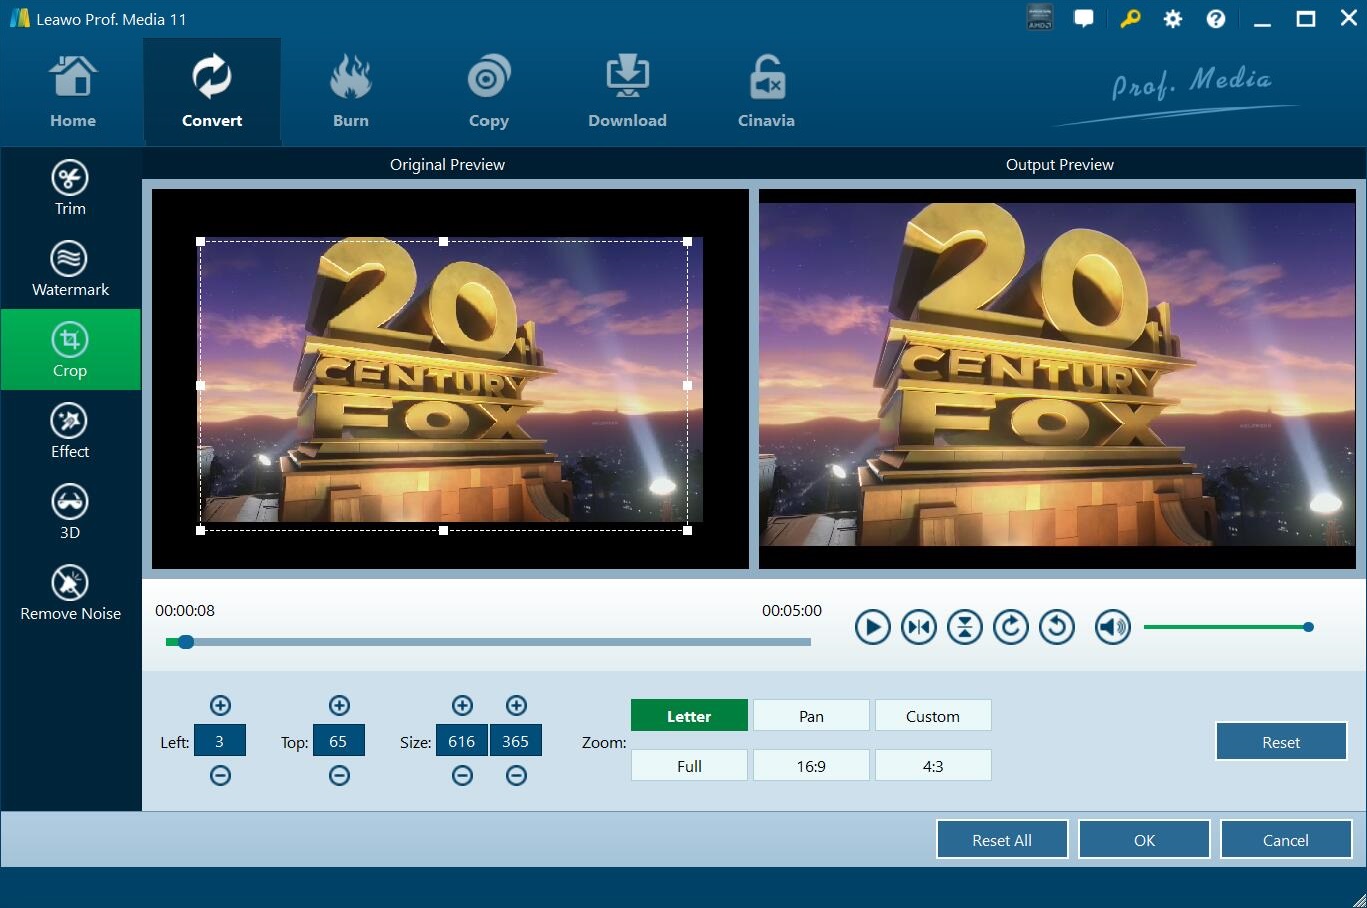
Crop video size
Click Crop tab, choose "Letter Box" from "Zoom" and crop the video in "Cropped size", or directly drag the dot frame for it. Click "OK" to confirm the settings. On the Crop tab, you could also try to rotate video for a special angle of view.
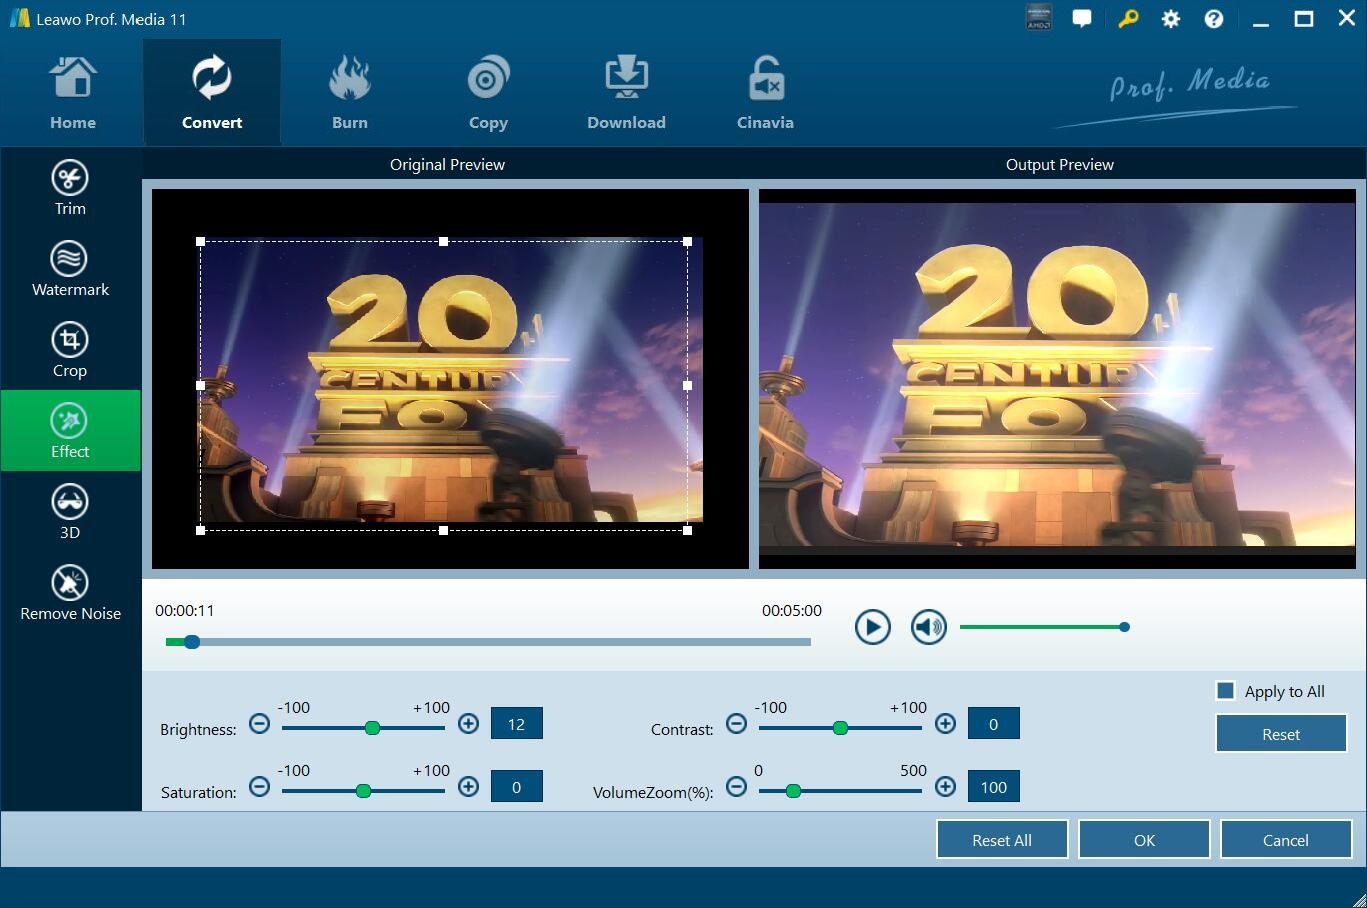
Adjust video effect
Click Effect tab to adjust video effects, including Brightness, Saturation, Contrast, Volume Zoom.
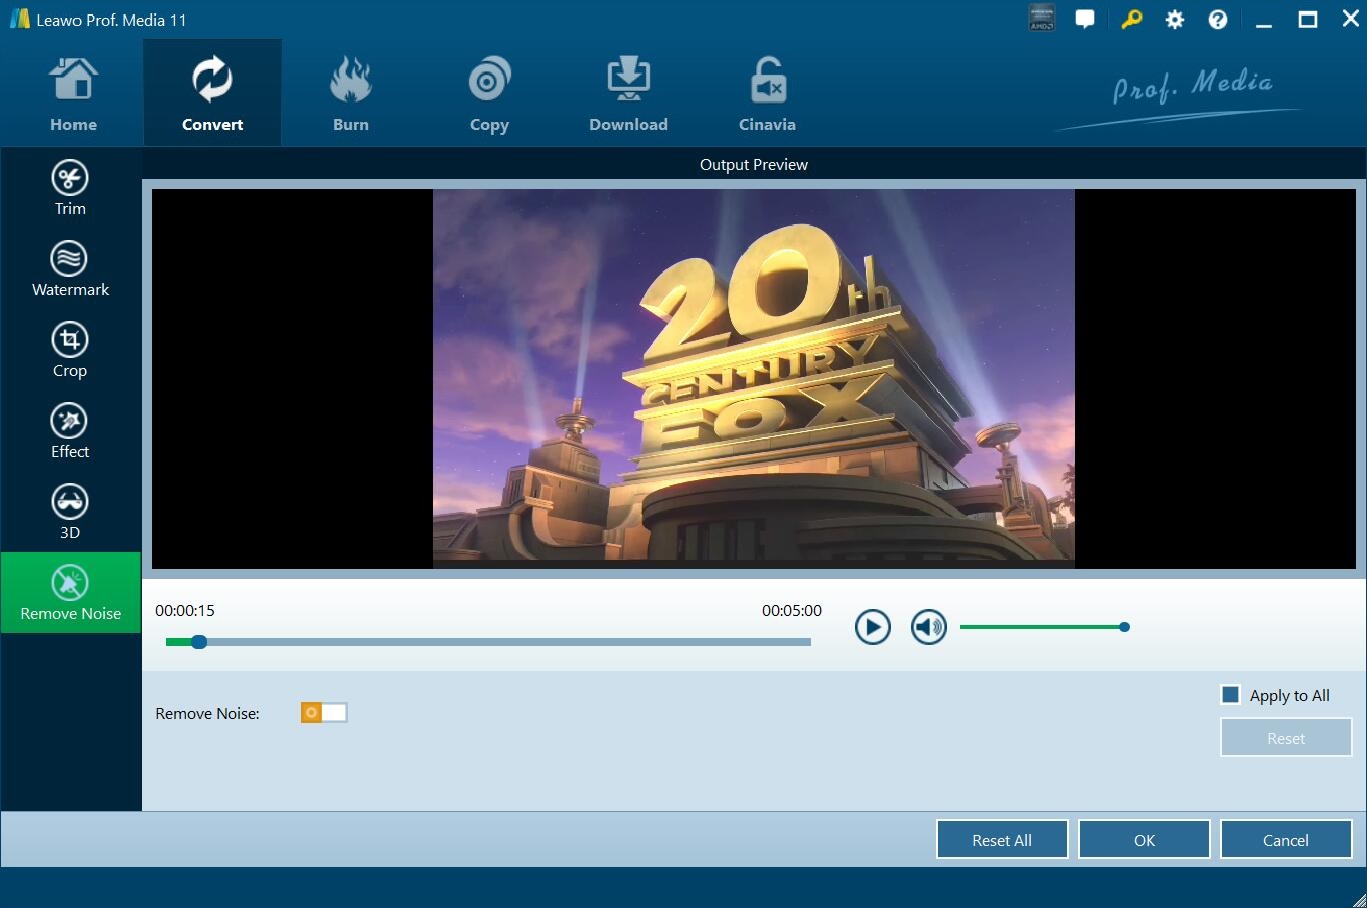
Remove noise
When converting video, you can see Remove Noise tab. Under the tab, you can switch on Remove Noise option to remove noise in the video and get better audio quality.
Create Chapter
Especially, when burning video to Blu-ray disc, there will show an extra tab “Create Chapter”. It allows you to create and insert chapters to video automatically by setting chapters’ number or chapter length. Certainly, you can insert chapter one by one manually.

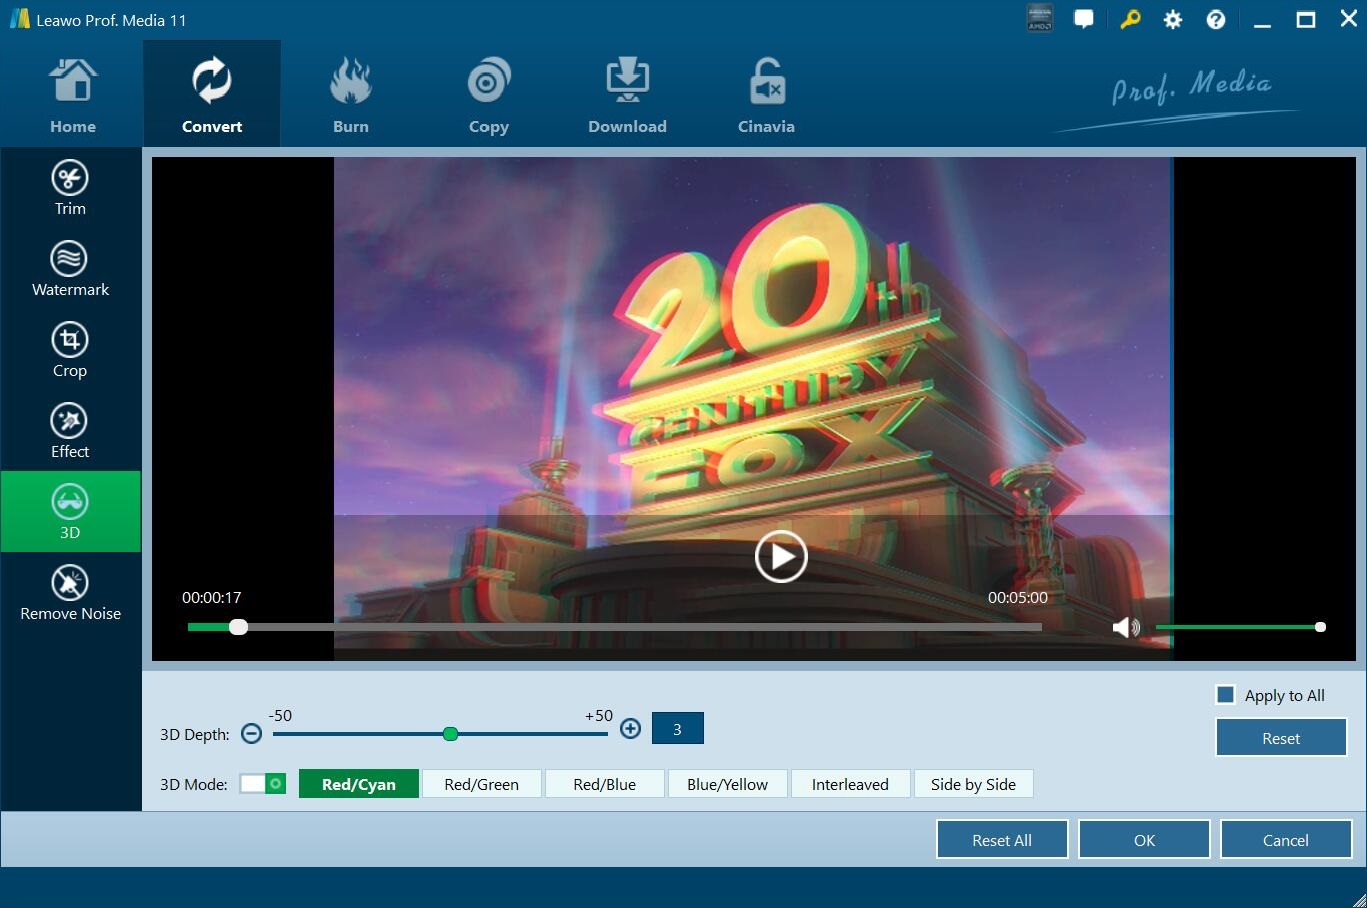
Convert 2D to 3D
When acting as 2D to 3D converter, Leawo Prof. Media helps create 3D movies, DVD and Blu-ray from 2D sources easily. After loading source media files, enter the video editing panel. In 3D tab, slide 3D Mode to green and then select a 3D movie effect for output files. 6 different 3D effects are provided: Red/Cyan, Red/Green, Red/Blue, Blue/Yellow, Interleaved and Side by Side. You coul also adjust 3D Depth from -50 to +50 for more vivid 3D movie effect. The internal media player offers instant preview of any change of 3D effect.
![]()
Users Say
As consumers, I love companies offering solid product guarantees. It proves the company has faith in its product, and is making a solid effort to gain your trust.
-From Donald through our support center
Social Network
Join Our Newsletter: